
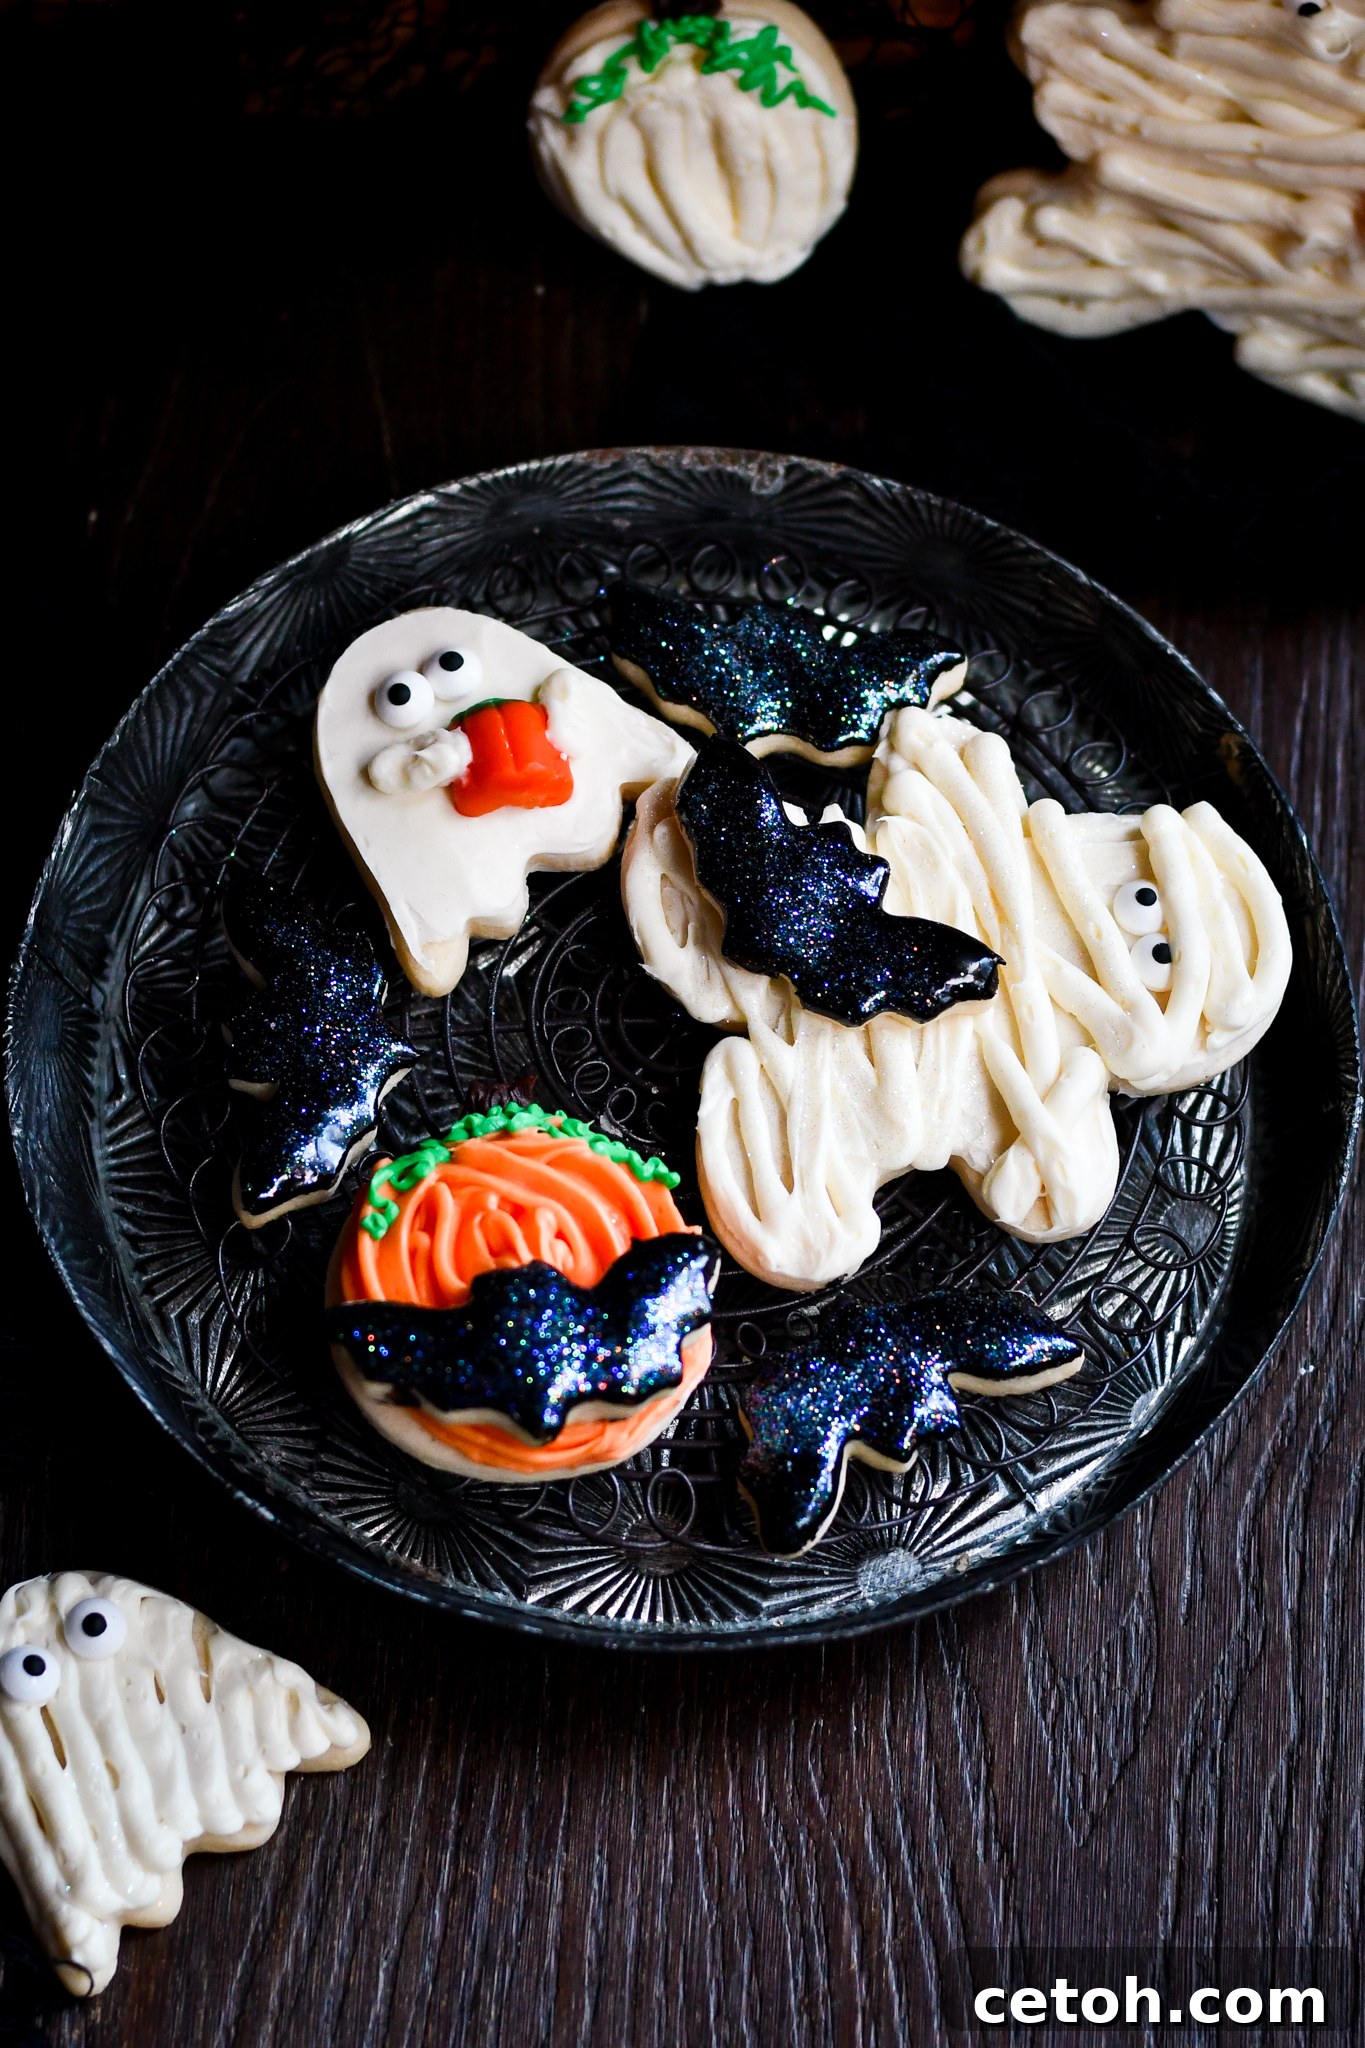
Delightfully Spooky: Easy Halloween Sugar Cookies with a No-Chill Recipe & Decorating Ideas
Embrace the spirit of the spooky season with our ultimate guide to creating enchanting Halloween sugar cookies! This comprehensive article brings you a tried-and-true, hassle-free recipe for no-chill cut-out sugar cookies, paired with simple yet creative decorating ideas that will elevate your October festivities. Say goodbye to long chilling times and hello to delicious, perfectly shaped cookies ready for your artistic touch.
As autumn leaves fall and the air grows crisp, there’s no better way to celebrate Halloween than by baking and decorating homemade treats. Our focus today is on making this process as enjoyable and straightforward as possible, ensuring that even novice bakers can achieve stunning results. We’ll be using buttercream for most of our decorating suggestions due to its ease of use and rich flavor. However, if you’re aiming for a super smooth, glossy finish, you might prefer royal icing. For those interested in an alternative, a fantastic recipe for cookie icing can be found in our No-Chill Easy Sugar Cookie Recipe post.
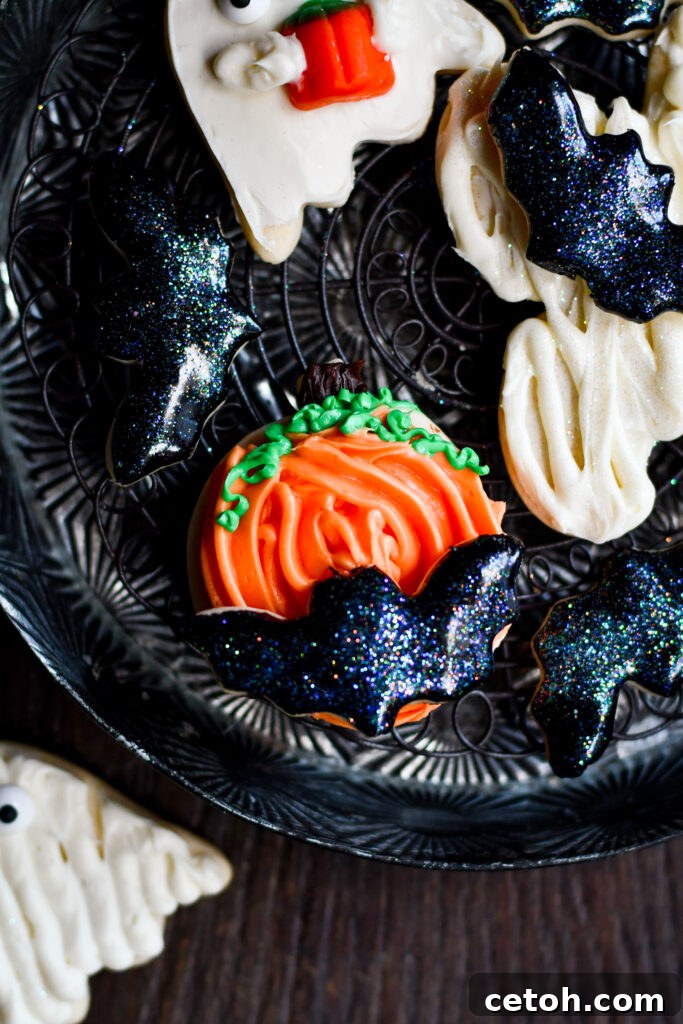
The Secret to Perfect No-Chill Cut-Out Sugar Cookies
Achieving impeccably shaped sugar cookies without the agonizing wait of chilling dough is a game-changer for busy bakers. This recipe is my absolute favorite because it consistently delivers clean, crisp edges and a tender, buttery texture. It’s the only one I turn to when I need reliable, beautiful cut-out cookies, especially when time is of the essence. The magic lies in the precise ratio of ingredients and the technique of using cold butter, which helps maintain the cookie’s structure without the need for extended refrigeration. This means less planning and more spontaneous baking fun!
Essential Ingredients for Your Spooky Creations:
- Cold Butter: The cornerstone of this no-chill recipe, cold butter is crucial for creating the perfect cookie structure. When mixed with other ingredients, it forms tiny pockets of fat. During baking, these pockets release steam, contributing to a tender, crumbly interior and preventing the cookies from spreading excessively, thus preserving those intricate Halloween shapes. Make sure your butter is truly cold, straight from the fridge, and cut into cubes for easier creaming.
- Granulated Sugar: Beyond simply adding sweetness, sugar plays a vital role in the cookie’s texture and appearance. It helps create a delightfully soft and chewy center while encouraging browning and caramelization on the edges, resulting in a subtly crispy exterior. The fine granules of sugar also assist in aerating the butter during the creaming process, leading to a lighter cookie.
- Large Egg: The egg acts as a powerful binder, holding the cookie dough together and providing essential moisture. It enriches the cookies, adding to their softness and contributing to a cohesive, workable dough that resists crumbling. A room-temperature egg can emulsify better with the butter and sugar, creating a smoother dough.
- Pure Vanilla Extract: Vanilla extract is a flavor enhancer that imbues the cookies with a warm, inviting, and aromatic quality, adding depth and complexity to the overall taste profile. For an interesting twist, consider using almond extract, which offers a distinctively delicious and classic flavor often paired with sugar cookies, complementing the buttery notes beautifully.
- All-Purpose Flour: As the primary dry ingredient, flour provides the necessary structure for these cut-out cookies. It contains just enough gluten to hold the cookies together without making them tough or overly chewy. Sifting the flour beforehand can ensure a lighter texture and better incorporation into the wet ingredients, preventing overmixing.
- Baking Powder: This leavening agent is key to giving the cookies a slight rise, resulting in a delicate, puffy, and tender texture. It helps prevent overly dense cookies and contributes to that desirable melt-in-your-mouth quality, ensuring your Halloween shapes aren’t flat and hard.
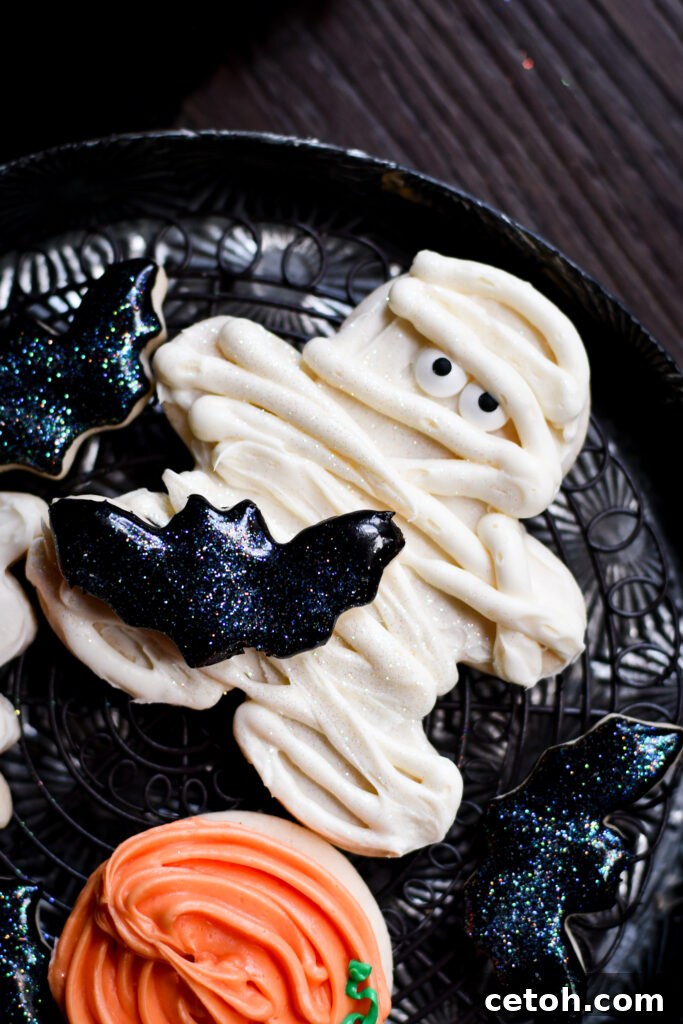
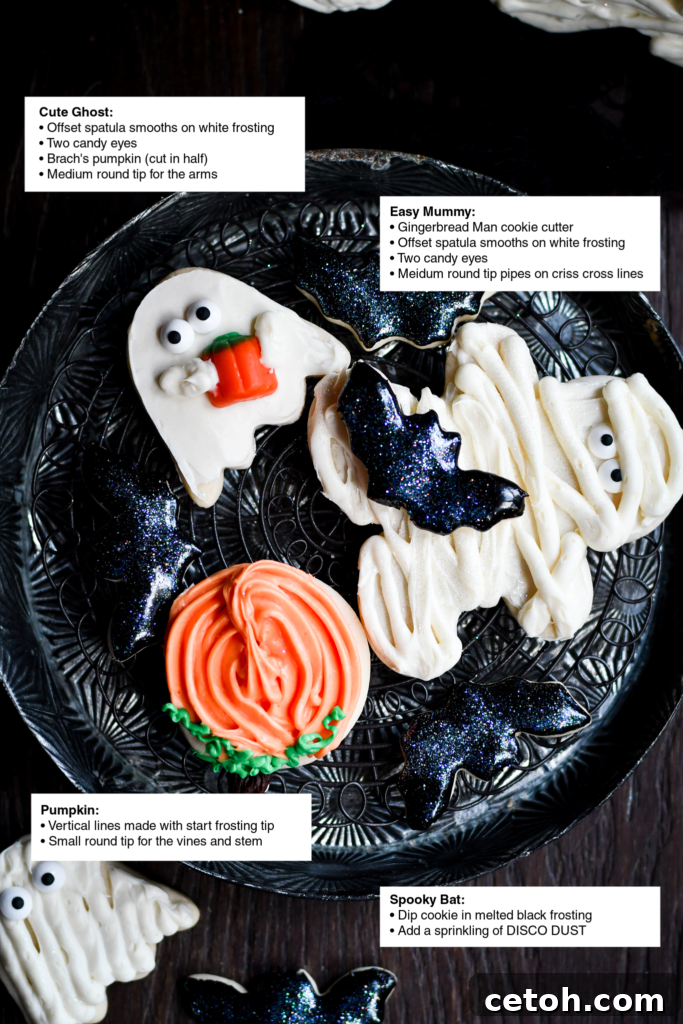
- Pillsbury Vibrant Vanilla Frosting (various colors): For effortless and vibrant decorating, pre-colored store-bought frosting like Pillsbury’s Vibrant Vanilla is a fantastic shortcut. Available in an array of shades such as green, white, black, and orange, it simplifies the decorating process, making it easy to achieve festive Halloween designs without the mess and time of coloring your own buttercream.
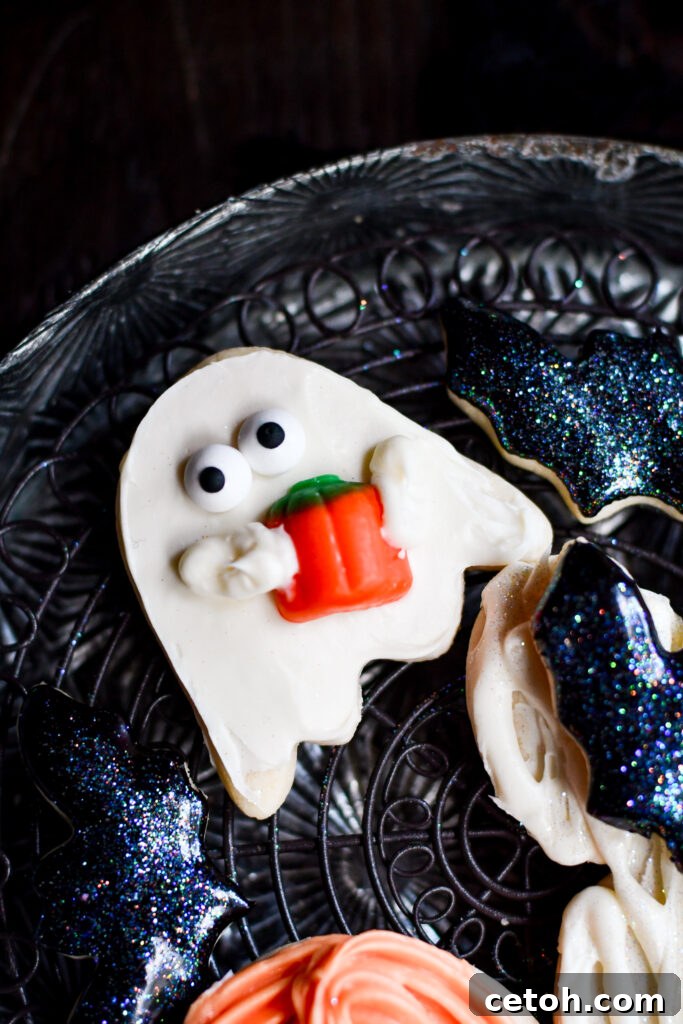
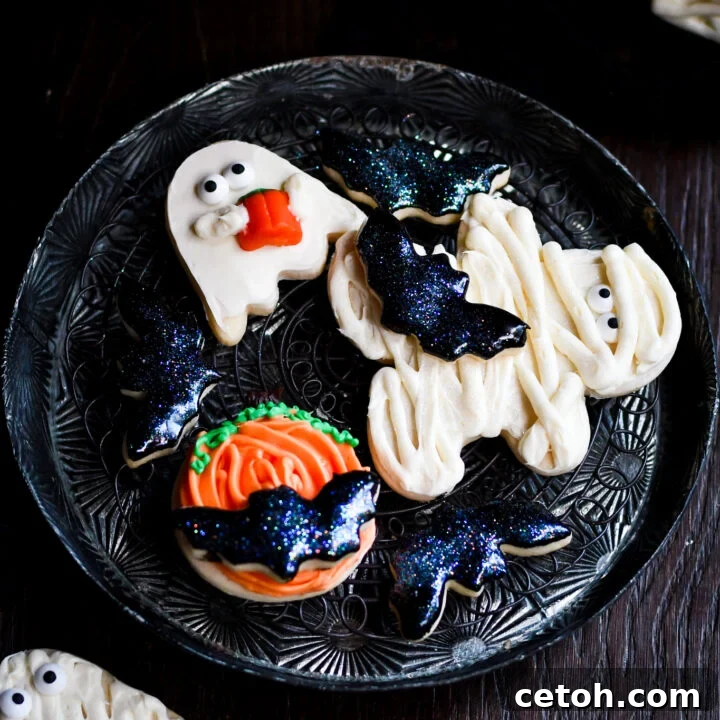
- Spooky Sprinkles and Candy: No Halloween cookie is complete without fun embellishments! For these cookies, I used classic Candy Eyes, charming Candy Corn Pumpkins, and a touch of sparkling Disco Dust to create a truly magical effect. However, the possibilities are endless – let your creativity shine with any Halloween-themed sprinkles, edible glitter, or small candies you can find. Ghost sprinkles, bat confetti, or even crushed candy corn would all be fantastic additions.
Explore More Spooky & Sweet Halloween Recipes
If you’re planning a Halloween party or just looking for more festive treats, be sure to check out some of our other favorite recipes. From sweet delights to savory sensations, we’ve got your holiday menu covered!
Essential Supplies for Decorating Halloween Sugar Cookies
Having the right tools can make all the difference in turning your baking vision into a delightful reality. Here’s a rundown of the essential supplies you’ll need to create those hauntingly good Halloween sugar cookies.
Halloween Cookie Cutters
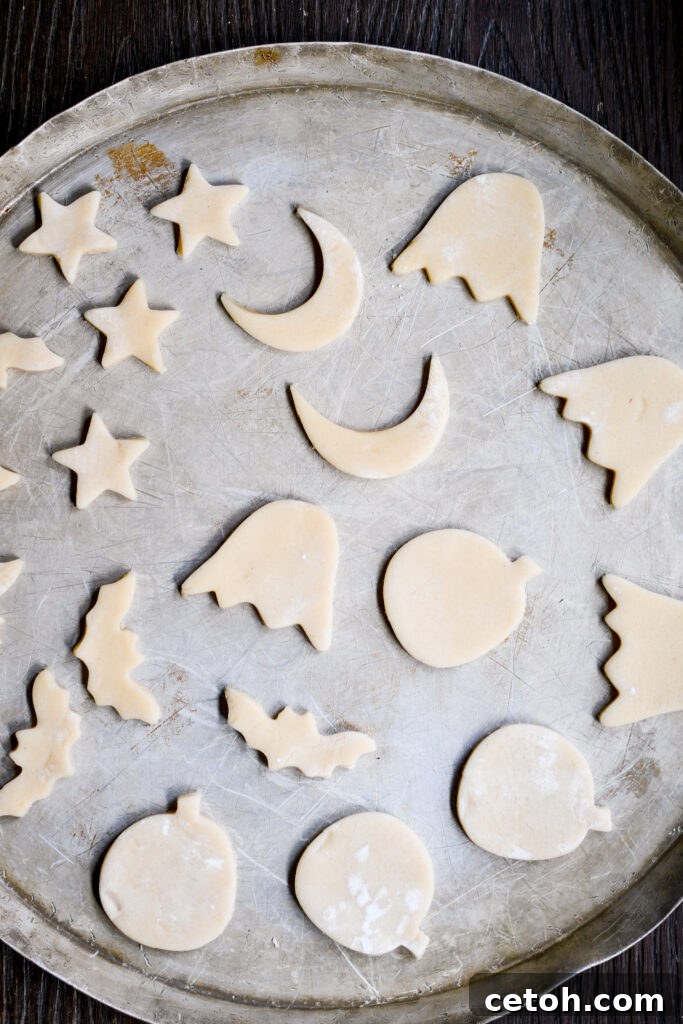
Cookie cutters are your primary tools for shaping festive cookies. They come in an incredible variety of shapes and sizes, instantly transforming your dough into charming or eerie Halloween characters. Investing in a good set of metal cookie cutters ensures clean cuts and durability. For this recipe, we used a selection of classic Halloween shapes to inspire our designs. Here are some of our favorites:
Miniature Bat Cookie CutterBuy on Amazon!
Gingerbread Man (Mummy) Cookie CutterBuy on Amazon!
Ghost Cookie CuttersBuy on Amazon!
Rolling Pin
A high-quality rolling pin is indispensable for achieving uniform thickness in your cookie dough. Evenly rolled dough ensures that all your cookies bake at the same rate, preventing some from burning while others remain undercooked. Adjustable rolling pins with thickness rings are particularly useful for consistent results. Furthermore, an extra-large pastry mat is an excellent companion, providing a non-stick surface that keeps your workspace clean and makes rolling out dough much easier. You can often find a good rolling pin and pastry mat bundled together as a convenient set, which is perfect for new bakers or for upgrading your existing tools.
Baking Sheet
While seemingly obvious, the right baking sheet can significantly impact your cookies. I’ve become obsessed with using certain “pizza baking sheets” for cookies, as they provide excellent heat distribution. Although my specific inherited pans are hard to find, a good quality, heavy-gauge stainless steel baking sheet is key. This Stainless Steel Pizza Pan on Amazon is quite similar to my favorites and will provide reliable results. Always line your baking sheets with parchment paper or a silicone baking mat to prevent sticking and ensure even baking.
Cooling Rack
A wire cooling rack is absolutely crucial for proper cooling. As soon as cookies come out of the oven, transferring them to a wire rack allows air to circulate around them, preventing the bottoms from becoming soggy due to trapped heat and steam. This step is particularly vital for decorated sugar cookies, as they MUST be completely, 100% cooled through before any frosting is applied. A cooling rack significantly speeds up this process, ensuring your cookies are ready for decorating much faster and without any structural compromise.
Icing/Frosting Varieties
The choice of icing or frosting dramatically affects the final look and taste of your Halloween sugar cookies. You have several options, each with its unique characteristics:
- Royal Icing: Known for its hard, smooth, and glossy finish, royal icing is excellent for intricate details and creates a professional, polished look. It dries completely firm, allowing cookies to be stacked without damage. While traditional royal icing involves egg whites, many recipes use meringue powder for convenience. If you want to explore royal icing, you can find a suitable recipe in our confectioners sugar icing post, which is a dream to work with and sets beautifully. When I use icing, I usually embrace a smooth simplicity, adding sprinkles for a touch of sparkle.
- Homemade Buttercream: For a rich, creamy, and flavorful experience, homemade buttercream is a fantastic choice. It’s softer than royal icing and doesn’t dry as hard, but it offers a delightful melt-in-your-mouth texture. Making buttercream isn’t difficult, but it does require dividing and coloring portions, which can add a few extra steps. If I’m baking for a special event or to share, I often go all out and whip up a batch of homemade buttercream, carefully coloring it for maximum visual impact.
- Store-Bought Frosting (Pillsbury Vibrant Vanilla): For maximum convenience, especially when baking for family or the blog, I often opt for pre-made colored frostings like Pillsbury’s Vibrant Vanilla. These come in various vibrant shades (green, white, black, orange, chocolate) and are surprisingly effective for piping, provided you don’t hold the piping bag in your warm hands for too long. A helpful tip for black frosting, which can sometimes have an odd taste, is to use a dark chocolate frosting as your base and gradually add black food coloring. This technique ensures a delicious flavor while achieving a deep, rich black hue. Allow the color to develop for a few hours for the best results.
Piping Bags and Tips
Piping bags and tips are fundamental for precise and controlled application of frosting, allowing you to create various patterns and effects with ease. While beautifully decorated cookies often seem to require an endless array of tools, I strive to keep the necessary equipment to a minimum without sacrificing quality. For this particular batch of easy Halloween cookies, you’ll only need a few key tips:
- Large Star Tip: Perfect for creating decorative borders, rosettes, or adding textured elements like fur for monsters or witches’ hair. It provides a lovely, ruffled effect. We recommend a large star tip for bold designs.
- Medium Round Tip: Essential for outlining, filling larger areas, and creating smooth lines or dots. A medium round tip is versatile and a must-have for most decorating tasks.
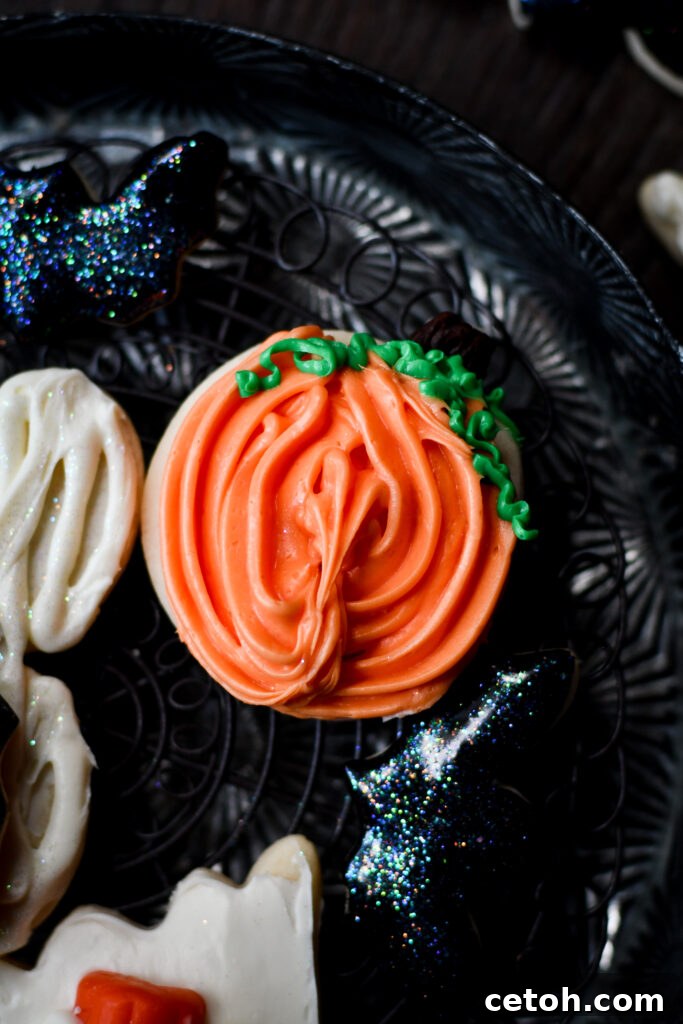
- Small Round Tip (Optional): If you want to add very fine details like pumpkin vines or tiny spider legs, a small round tip is ideal. However, if you don’t have one, you can simply snip a tiny corner off a piping bag to create a makeshift fine-line tip – it works surprisingly well!
While you can purchase these components individually, it’s often more cost-effective and convenient to buy a comprehensive cake decorating set. Many of these kits also include an offset spatula, which is incredibly useful for spreading frosting evenly and managing all sorts of baking and decorating tasks. I always keep several offset spatulas in my kitchen for their sheer versatility.
Expert Tips & Tricks for Decorating Sugar Cookies with Buttercream
Decorating sugar cookies can be incredibly rewarding, transforming simple baked goods into edible works of art. Whether you’re a beginner or have some experience, these tips and tricks will help you achieve beautiful and professional-looking results with buttercream frosting.
- 1. Consistency is Key: The most important aspect of successful buttercream decorating is achieving the right consistency. For outlining and piping fine details like eyes or intricate patterns, your buttercream should be firm enough to hold its shape, similar to toothpaste. For filling larger areas (known as “flooding”), thin your buttercream slightly with a tiny bit of milk or water until it flows smoothly but not so much that it runs off the cookie. Test on a scrap piece of parchment paper before applying to your cookies.
- 2. Master Your Piping Bags: Invest in good quality piping bags, whether reusable silicone ones or disposable plastic bags, for easy and clean frosting application. For beginners, disposable bags offer convenience and easy cleanup. Using couplers with your piping bags can be incredibly helpful, allowing you to switch between different tips without changing bags, especially when working with the same color of frosting.
- 3. Experiment with Color Gradation: Create stunning visual interest by experimenting with color gradation or ombre effects. You can achieve this by piping multiple shades of the same color onto your cookies, or even by adding a lighter shade of frosting to a bag already containing a darker shade, gently pushing it down to create a gradual blend as you pipe. This technique works wonderfully for creating a spooky sunset or misty graveyard effect.
- 4. Add Texture and Detail with Various Tips: Don’t be afraid to explore different piping tips to add unique textures and details. Star tips (like Wilton 1M or 21) are fantastic for creating fluffy fur for monsters, grass-like textures, or decorative borders. Round tips (like Wilton 3 or 5) are perfect for small dots, drawing faces, or writing messages. Leaf tips can create ghostly ethereal wisps, while basketweave tips can add interesting patterns.
- 5. Allow Layers to Set: Patience is a virtue in cookie decorating. If your design involves multiple layers or different colors touching, allow each layer of frosting to set or crust over before adding the next. This crucial step prevents colors from bleeding into one another and helps maintain clean, defined lines and shapes. Depending on the humidity and frosting consistency, this can take anywhere from 15 minutes to an hour.
- 6. Keep Your Workspace and Tools Clean: A clean work area is essential for professional-looking cookies. Keep a damp cloth handy to wipe the tips of your frosting bags frequently and to clean up any excess frosting from your hands or surfaces. This prevents accidental smudges and keeps your colors vibrant and distinct.
- 7. Don’t Fear Mistakes – They’re Fixable!: Even experienced decorators make mistakes. If you pipe something incorrectly, don’t worry! If the frosting is still wet, you can often gently scrape it off with a thin spatula or wipe it away with a damp paper towel and start over. Think of each mistake as a learning opportunity.
- 8. Adjust Frosting Consistency as Needed: Buttercream consistency can change with temperature and time. If your frosting becomes too soft and runny, gradually add more powdered sugar, a tablespoon at a time, until it reaches the desired firmness. If it’s too stiff, add a tiny amount of milk, cream, or water (half a teaspoon at a time) until it’s smooth and pliable.
- 9. Allow Decorated Cookies to Dry Completely: After decorating, let your cookies sit undisturbed until the frosting is completely dry and set. This can take several hours or even overnight, especially for thicker applications of buttercream. Fully dry frosting prevents smudging when handling, stacking, or packaging. Store any leftover frosting in an airtight container at room temperature for a day or in the refrigerator for up to a week.
Spooktacular Halloween Sugar Cookie Recipe
Halloween Sugar Cookies Decorating Ideas + Recipe
2 Dozen (4-Inch Cookies)
15 minutes
10 minutes
10 minutes+
35 minutes
Make your Halloween sweeter with these fun and spooky sugar cookie designs! This no-chill recipe is quick, easy, and perfect for creating beautifully shaped cookies ready for decoration.
Ingredients
- 2 sticks (1 cup) cold salted butter, cut into small cubes
- 1 cup granulated sugar
- 1 large egg
- 2 teaspoons pure vanilla extract (or almond extract for a twist)
- 3 cups all-purpose flour
- 2 teaspoons baking powder
- Optional: Assorted food coloring, sprinkles, candy eyes, and other Halloween-themed edible decorations
Instructions
- Preheat Oven: Begin by preheating your oven to 350ºF (175ºC). Line a baking sheet with parchment paper or a silicone baking mat for easy cleanup and to prevent sticking.
- Cream Butter & Sugar: In a large mixing bowl, using an electric mixer (stand mixer with paddle attachment or hand mixer), beat together the cold cubed butter and granulated sugar until the mixture is light, fluffy, and smooth. This should take about 2-3 minutes.
- Add Wet Ingredients: Mix in the egg and vanilla extract until just combined. Be careful not to overmix at this stage. Scrape down the sides of the bowl as needed to ensure all ingredients are well incorporated.
- Combine Dry Ingredients: Gradually add the all-purpose flour and baking powder to the wet ingredients. Mix on low speed until a cohesive dough forms. Finish by gently bringing the dough together with your hands, forming it into a neat disc. Do not overwork the dough, as this can make the cookies tough.
- Roll & Cut Dough: Lightly flour a clean surface or your pastry mat. Roll out the dough to an even thickness of about 1/4 inch. Use your favorite Halloween-themed cookie cutters to cut out shapes. Carefully transfer the cut-out cookies to your prepared baking sheet.
- Freeze Before Baking (*No-Chill Trick!*): For perfectly crisp edges and to prevent spreading, place the baking sheet with the cut-out cookies into the freezer for 5 minutes before baking. This quick chill is key to our no-chill success!
- Bake Cookies: Bake for 7-10 minutes. The baking time can vary depending on your oven and cookie thickness, so watch them closely. The edges should be lightly golden brown, and the tops should look dry but not browned at all.
- Cool Completely: Remove the cookies from the oven and let them cool on the baking sheet for a few minutes before transferring them to a wire cooling rack to cool completely. It is absolutely essential that the cookies are 100% cooled before you begin decorating, otherwise your frosting will melt and slide off.
- Decorate & Enjoy!: Once fully cooled, unleash your creativity! Decorate your Halloween sugar cookies with buttercream frosting, sprinkles, and candies using the tips and tricks shared above. Let the frosting set before storing or serving.
Nutrition Information:
Yield: 24
Serving Size: 1
Amount Per Serving (approximate):
Calories: 93
Total Fat: 0g
Saturated Fat: 0g
Trans Fat: 0g
Unsaturated Fat: 0g
Cholesterol: 8mg
Sodium: 44mg
Carbohydrates: 20g
Fiber: 0g
Sugar: 8g
Protein: 2g