
Indulge Guilt-Free: The Ultimate Keto Coconut Cheesecake Recipe
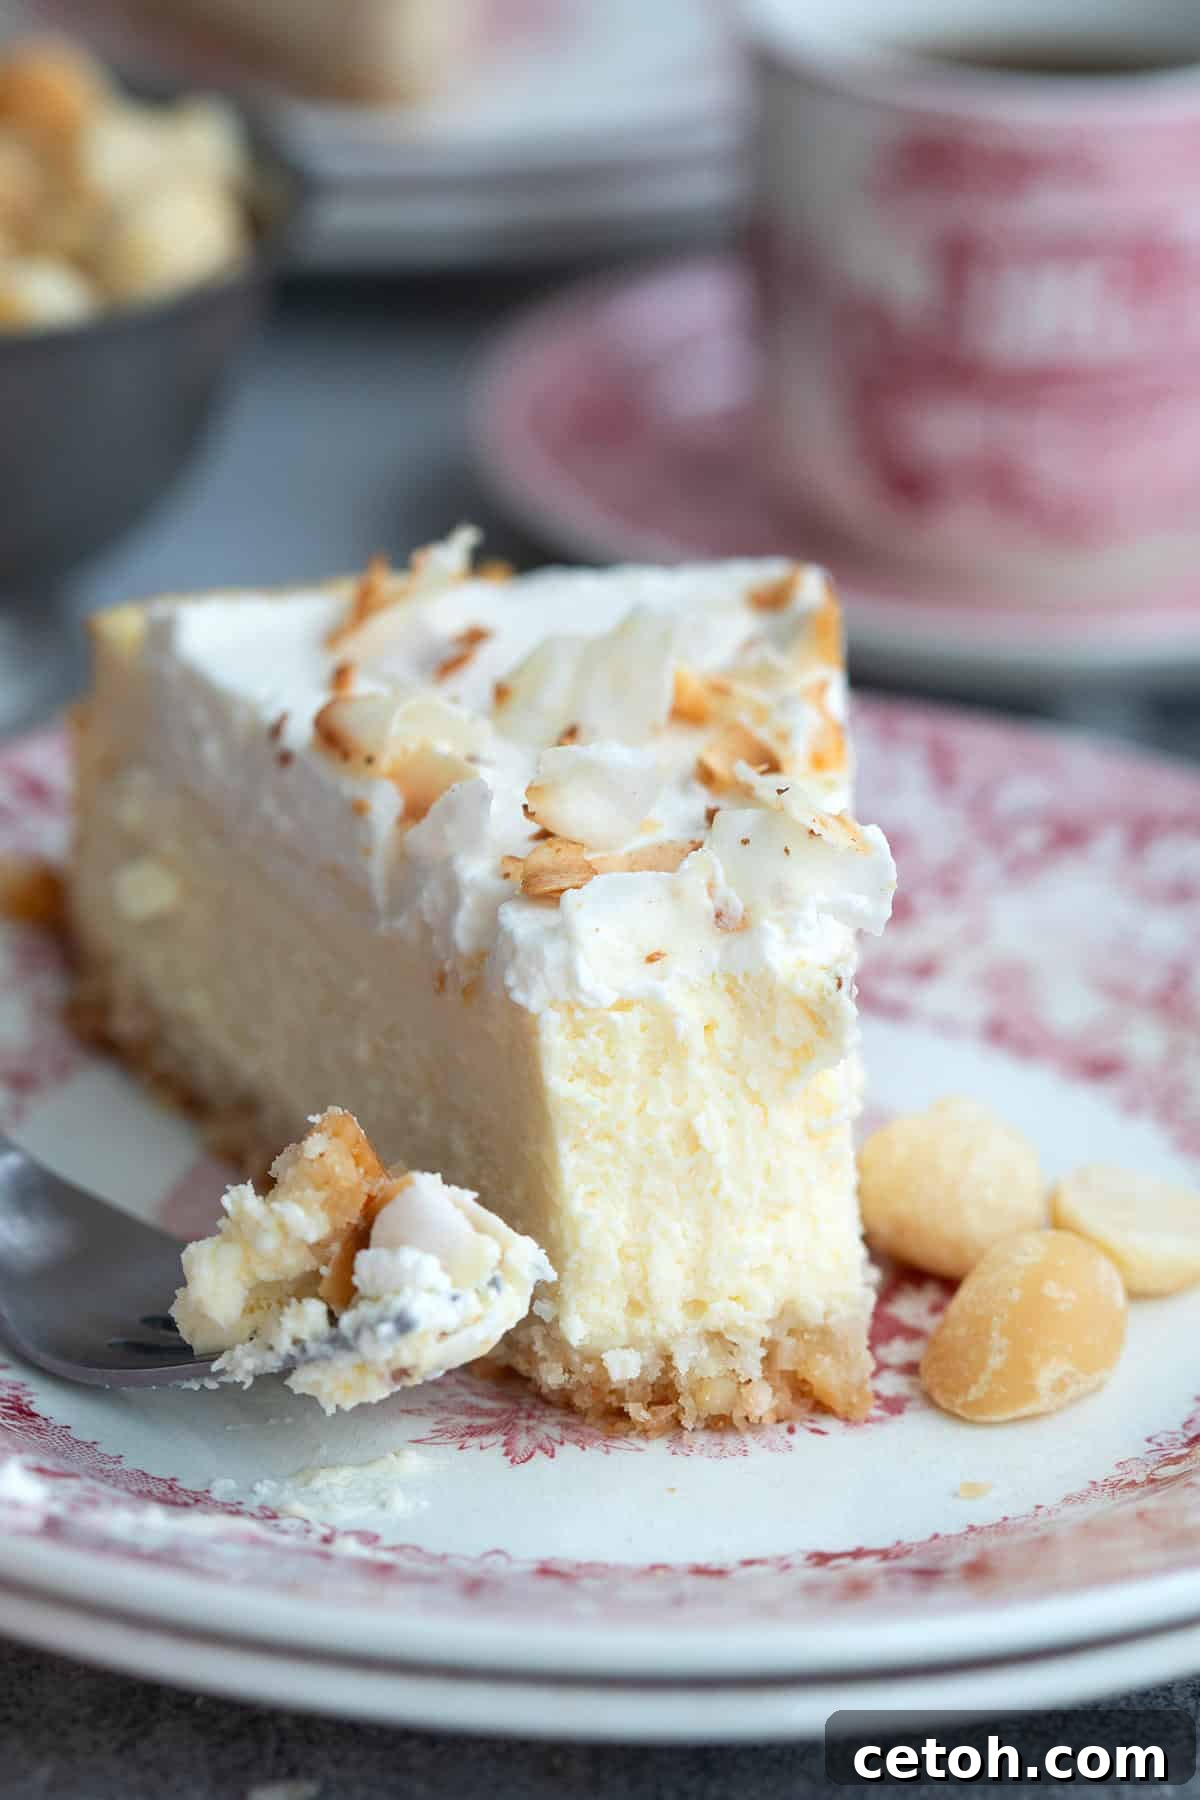
Prepare to have your dessert expectations not just met, but gloriously exceeded, with this incredibly luscious keto coconut cheesecake recipe. It’s a culinary masterpiece that effortlessly defies conventional notions of low-carb and keto-friendly desserts. From its irresistibly creamy texture to its rich, tropical flavor, you’d be hard-pressed to guess it’s sugar-free and gluten-free. We’re confident in saying that once you experience this dessert, finding a better coconut cheesecake anywhere will be a true challenge!
Coconut, in its wonderful versatility, tends to evoke strong reactions – you either adore it or you don’t. As a passionate, lifelong coconut enthusiast, I’ve dedicated countless hours to crafting recipes that truly celebrate its unique, rich tropical essence. My collection boasts everything from delightfully chewy Keto Coconut Macaroons to the perpetually popular Keto Coconut Cream Pie, constantly finding fresh inspiration in this exotic ingredient. This particular coconut cheesecake is a testament to that devotion. I first developed this exquisite recipe back in 2014, and it has gracefully stood the test of time, remaining a firm favorite. Its enduring appeal prompted me to revisit it, making a few minor, yet impactful, updates to further perfect its taste and texture. If you, like me, dream of exceptional coconut desserts, this recipe promises to be an absolute dream come true.
Discover Why Our Keto Coconut Cheesecake Will Be Your New Favorite Dessert
- Unbelievably Creamy Filling: We’ve poured years of cheesecake-making experience into perfecting a filling that is exceptionally smooth and melt-in-your-mouth creamy. Achieving this luxurious consistency involves specific techniques, so be sure to carefully read our detailed “Tips for Success” section to ensure your cheesecake turns out flawlessly every time.
- Irresistible Crunchy, Flavorful Crust: This cheesecake boasts a unique crust crafted from finely ground macadamia nuts and unsweetened shredded coconut. This thoughtful combination not only provides a delightful crunch that perfectly contrasts the silky-smooth filling but also adds an extra layer of rich, nutty, and subtly sweet flavor that elevates the entire dessert experience.
- Authentic Tropical Flavor: Our recipe delivers a beautifully balanced coconut flavor that is distinct yet never overwhelming. Each bite transports your senses to a sun-drenched tropical paradise, offering a refreshing and exotic taste experience that is both comforting and exciting.
- Completely Sugar- and Gluten-Free: Staying true to our commitment to healthy indulgence, this coconut cheesecake is meticulously crafted without any added sugar or gluten. It’s the perfect guilt-free dessert option for those managing dietary restrictions or simply seeking a healthier alternative without compromising on taste or quality.
- Perfect for a Low Carb Lifestyle: Designed with the keto and low-carb community in mind, this cheesecake fits seamlessly into your dietary regimen. Enjoy a decadent dessert that keeps your carb count in check, allowing you to satisfy your sweet cravings responsibly and deliciously.
What Our Readers Are Saying
“Seriously the best cake I have ever made and can’t believe it is keto. A massive hit wherever and whenever I serve it. Such a great recipe from such a talented keto baker – thanks Carolyn!!” — Cindy
Essential Ingredients for Your Perfect Keto Coconut Cheesecake
Crafting this exquisite keto coconut cheesecake begins with selecting the right, high-quality ingredients. Each component plays a crucial role in achieving the perfect flavor and texture, from the crunchy crust to the silky filling and delightful topping.
- Raw Macadamia Nuts: For the crust, we specifically use raw macadamia nuts. This ensures that they toast beautifully and develop a rich, buttery flavor during the baking process without becoming overcooked or bitter. Their natural oils and delicate crunch are key to our perfect crust.
- Coconut: We utilize two forms of coconut to maximize flavor and texture. Finely shredded unsweetened coconut forms an integral part of our crust, providing subtle flavor and binding power. For the topping, large flaked coconut, lightly toasted, adds a delightful textural contrast and an intensified coconut aroma.
- Full-Fat Cream Cheese: The foundation of any great cheesecake is its cream cheese. We highly recommend using full-fat cream cheese, ensuring the richest, creamiest consistency for your filling. Lower-fat alternatives often contain additional fillers or stabilizers that can negatively impact the texture and introduce unwanted carbs, so stick to the good stuff for best results.
- Granular Sweetener (Erythritol-Based): The choice of sweetener is particularly important for the crust. An erythritol-based granular sweetener is essential here, as it allows the crust to crisp up beautifully. Other sweeteners like allulose or xylitol tend to retain moisture, preventing that desired crisp texture. For the filling and topping, you have more flexibility, but we delve deeper into sweetener options in a dedicated section below.
- Coconut Cream: To infuse our cheesecake with an intense coconut essence, we use the thick, rich coconut cream that separates and rises to the top of a can of full-fat coconut milk. Make sure your can has been chilled for several hours or overnight to easily scoop out the thick cream.
- Coconut Extract: To further enhance and amplify that wonderfully distinct coconut flavor, a touch of pure coconut extract is added to the filling. This ensures a vibrant, unmistakable tropical taste throughout the cheesecake.
- Heavy Whipping Cream: The crowning glory of this dessert is a cloud of homemade whipped cream. Whipped to perfection with a touch of sweetener and extract, it provides a light, airy contrast to the dense cheesecake filling.
- Pantry Staples: Don’t forget the everyday essentials that complete this recipe: large eggs for structure and richness, unsalted butter to bind the crust, pure vanilla extract for a hint of warmth, and a pinch of salt to balance and brighten all the flavors.
Mastering Your Keto Coconut Cheesecake: A Step-by-Step Guide
Follow these detailed steps carefully to ensure your keto coconut cheesecake turns out perfectly, from its crisp crust to its creamy filling and delightful topping.
- Prepare the Crust Ingredients: Begin by preheating your oven to 325ºF (160ºC). Lightly grease a 9-inch springform pan, then line the bottom with parchment paper and grease the parchment as well. This prevents sticking and makes for easy removal later. Place the prepared pan on a large rimmed baking sheet; this catches any potential leaks and makes transferring the cheesecake much easier. In a food processor, pulse the raw macadamia nuts on high speed until they transform into coarse, sand-like crumbs. Transfer these crumbs to a mixing bowl, then stir in the finely shredded unsweetened coconut, your chosen erythritol-based sweetener, and a pinch of salt. Finally, pour in the melted butter and mix thoroughly until all ingredients are well combined and the mixture resembles wet sand.
- Bake the Crust to Perfection: Firmly and evenly press the macadamia-coconut crust mixture into the bottom of the prepared springform pan. Ensure it’s packed tightly to create a sturdy base. Bake in the preheated oven for 12 to 15 minutes, or until the edges just begin to turn a light golden brown. Overbaking can make it too hard. Remove the crust from the oven and allow it to cool completely on a wire rack while you prepare the filling. Reducing the oven temperature to 300°F (150°C) for the cheesecake filling.
- Craft the Creamy Cheesecake Filling: In a large mixing bowl, beat the very well-softened full-fat cream cheese on medium speed for 1 to 2 minutes. The goal here is to achieve an incredibly smooth, lump-free base. Next, add your granular sweetener, the thick coconut cream (ensure it’s at room temperature), and both the coconut and vanilla extracts. Continue beating until all these ingredients are thoroughly combined and the mixture is silky smooth. This is a good time to taste the filling and adjust the sweetness or coconut flavor to your personal preference before adding the eggs.
- Incorporate the Eggs Gently: With the mixer on low speed, add the large eggs one at a time. Beat each egg just until it is incorporated into the mixture; over-beating the eggs can introduce too much air, which can lead to cracks in your cheesecake. After each egg addition, make sure to stop and scrape down the sides of the bowl and the beaters with a rubber spatula to ensure everything is evenly mixed.
- Bake the Cheesecake with Care: Carefully pour the prepared cheesecake filling over the cooled crust in the springform pan, spreading it gently to the edges. Place the entire setup (springform pan on its baking sheet) onto the center rack of your oven. On the rack directly below it, place a large baking dish filled with hot water. This creates a humid environment, which is crucial for preventing the cheesecake from cracking and ensuring a wonderfully creamy texture. Bake at 300ºF (150ºC) for 70 to 90 minutes. The cheesecake is done when the edges appear set, but the very center still jiggles slightly when gently shaken.
- Chill for Optimal Texture: Once baked, remove the cheesecake from the oven and the water bath. Allow it to cool completely at room temperature on a wire rack. This slow cooling process is vital for preventing cracks. Once cool, run a sharp, thin knife around the inner edges of the pan before carefully removing the springform sides. Cover the cheesecake tightly with plastic wrap and refrigerate for at least 3 to 4 hours, or ideally overnight, to allow it to fully set and for the flavors to meld beautifully.
- Prepare and Apply the Topping: In a clean, large bowl, combine the cold whipping cream, powdered sweetener, and your choice of vanilla or coconut extract. Beat on high speed until stiff peaks form, indicating a firm, yet airy whipped cream. Carefully spread this homemade whipped cream evenly over your thoroughly chilled cheesecake. For an extra touch of flavor and visual appeal, sprinkle generously with lightly toasted large flaked coconut. To toast coconut, simply spread it in a dry skillet over medium heat, shaking frequently until it turns a light golden brown.
Achieving Perfection: Expert Tips for Your Keto Coconut Cheesecake
Baking a cheesecake, especially a perfect one, truly is a labor of love. The rewarding outcome of a beautifully creamy and smooth dessert is absolutely worth every bit of effort. By following these expert tips and instructions diligently, you will undoubtedly master this keto coconut cheesecake with ease, impressing everyone who tries a slice.
One of the most crucial tips for any baked cheesecake is to ensure that all of your filling ingredients are brought to room temperature before you begin mixing. This detail cannot be overstated. Using cold eggs or cold coconut cream will cause the cream cheese to seize up and become clumpy, leading to a less-than-silky batter. I always make it a point to gently warm the cream cheese slightly as well, often by letting it sit out for several hours, to ensure it beats down into the smoothest possible consistency.
For an even smoother filling, it helps immensely to beat the cream cheese on its own for a minute or two before you incorporate any other ingredients. This initial beating breaks down the cream cheese, making it light and airy, which serves as the perfect base for your batter and ultimately contributes to that coveted silky-smooth cheesecake texture.
Adding the eggs last, and one at a time, is another critical step. This technique helps prevent you from inadvertently over-beating them, which can introduce too much air into the batter. Excessive air can cause the cheesecake to puff up dramatically during baking and then collapse, often resulting in unsightly cracks on the surface. Incorporating them gently, just until combined, maintains the delicate structure of the filling. This method also offers a delightful advantage: you can taste the filling and adjust the sweetener and coconut flavor to your exact preference *before* the eggs are added, ensuring it’s perfectly tailored to your palate.
Employing a baking sheet directly under your springform pan is a simple yet effective safeguard. Springform pans, by design, sometimes have small gaps where butter or oil from the crust can leak out during baking. A rimmed baking sheet underneath catches any drips, preventing a messy oven and potential burning. Furthermore, placing a pan of water on the oven rack below the cheesecake while it bakes is a traditional and highly recommended technique. This creates a humid environment within the oven, which is key to preventing the cheesecake’s top from cracking and ensures a more evenly baked, wonderfully creamy interior.
Always avoid opening the oven door frequently during baking. Fluctuations in temperature can cause the cheesecake to fall or crack. Similarly, once the cheesecake is baked, resist the urge to remove it from the oven immediately. Instead, turn off the oven and leave the cheesecake inside with the door slightly ajar for about an hour. This gradual cooling prevents thermal shock and greatly reduces the risk of cracking.
Navigating Sweeteners: A Guide for Your Keto Coconut Cheesecake
The type of sweetener you choose for this recipe significantly impacts the final results, particularly concerning texture. For the crust, achieving that desirable crispiness is paramount, and only erythritol-based sweeteners will provide this. Erythritol, a sugar alcohol, bakes up with a firm, crisp texture when cooled, which is ideal for a sturdy cheesecake base. Other low-carb sweeteners, due to their different chemical compositions, may prevent the crust from becoming as crisp.
When it comes to the filling, you have a bit more flexibility. While erythritol works well here too, you can also use allulose. However, it’s important to note that allulose tends to cause baked goods to brown faster, especially on the surface. If you opt for allulose in your filling, keep a close eye on your cheesecake as it bakes. Should it begin to brown too quickly, you can simply tent a piece of aluminum foil loosely over the top to protect it for the remainder of the baking time. Many bakers, myself included, enjoy using a blend of erythritol and allulose for the filling and topping, as this can offer a balanced sweetness profile with minimal cooling sensation.
For those who prefer highly concentrated sweeteners, pure stevia extract or monk fruit extract can also be used in the filling and topping. These are incredibly potent, so a very small amount goes a long way. Because their sweetness intensity can vary significantly between brands, I cannot provide precise measurements. The best approach when using these concentrated extracts is to add them gradually, tasting the filling as you go, until you achieve your desired level of sweetness. Remember, it’s always easier to add more sweetener than to correct an overly sweet mixture.
Frequently Asked Questions About Keto Coconut Cheesecake
Absolutely! This keto coconut cheesecake freezes exceptionally well, making it a fantastic make-ahead dessert option. You can choose to freeze the entire cake for future celebrations or cut it into individual slices for convenient portion control. To prevent freezer burn and maintain freshness, ensure it’s wrapped tightly in several layers of plastic wrap, followed by aluminum foil. Properly stored, it will remain delicious for at least 2 months.
Yes, keto cheesecakes are known for holding up beautifully in the refrigerator for 3-4 days. For optimal flavor and texture, we highly recommend preparing the cheesecake a day or two before you plan to serve it. This allows ample time for it to chill thoroughly and for all the tropical flavors to fully develop. You can then add the whipped cream and toasted coconut topping just prior to serving for the freshest presentation.
Each generous serving of this keto coconut cheesecake recipe contains approximately 4.7g of total carbohydrates and 1.3g of fiber. This results in a remarkably low 3.4g net carbs per delicious slice, making it a perfect fit for a ketogenic or low-carb diet.
Cracks in cheesecake are a common occurrence, often due to sudden temperature changes or over-baking. While prevention is key (using a water bath, cooling gradually), if your cheesecake does crack, don’t worry! It’s purely cosmetic and doesn’t affect the taste. The whipped cream and toasted coconut topping will beautifully conceal any imperfections, making your cheesecake look perfect.
While macadamia nuts offer a unique buttery flavor and texture that pairs exceptionally well with coconut, you can experiment with other low-carb nut options. Almond flour or finely ground pecans could be suitable alternatives. Keep in mind that the flavor and texture of the crust will change, so adjust baking times slightly as needed.
Explore More Keto Cheesecake Recipes
If you loved this keto coconut cheesecake, you’ll be thrilled to discover our extensive collection of other low-carb, sugar-free cheesecake creations:
- Decadent Keto Chocolate Cheesecake
- Sumptuous No Bake Chocolate Strawberry Cheesecake
- Luxurious No Bake Irish Cream Cheesecake
- Rustic Keto Burnt Basque Cheesecake
- Effortless Instant Pot Cookies and Cream Cheesecake
Essential Tool: USA Pan Springform Pan
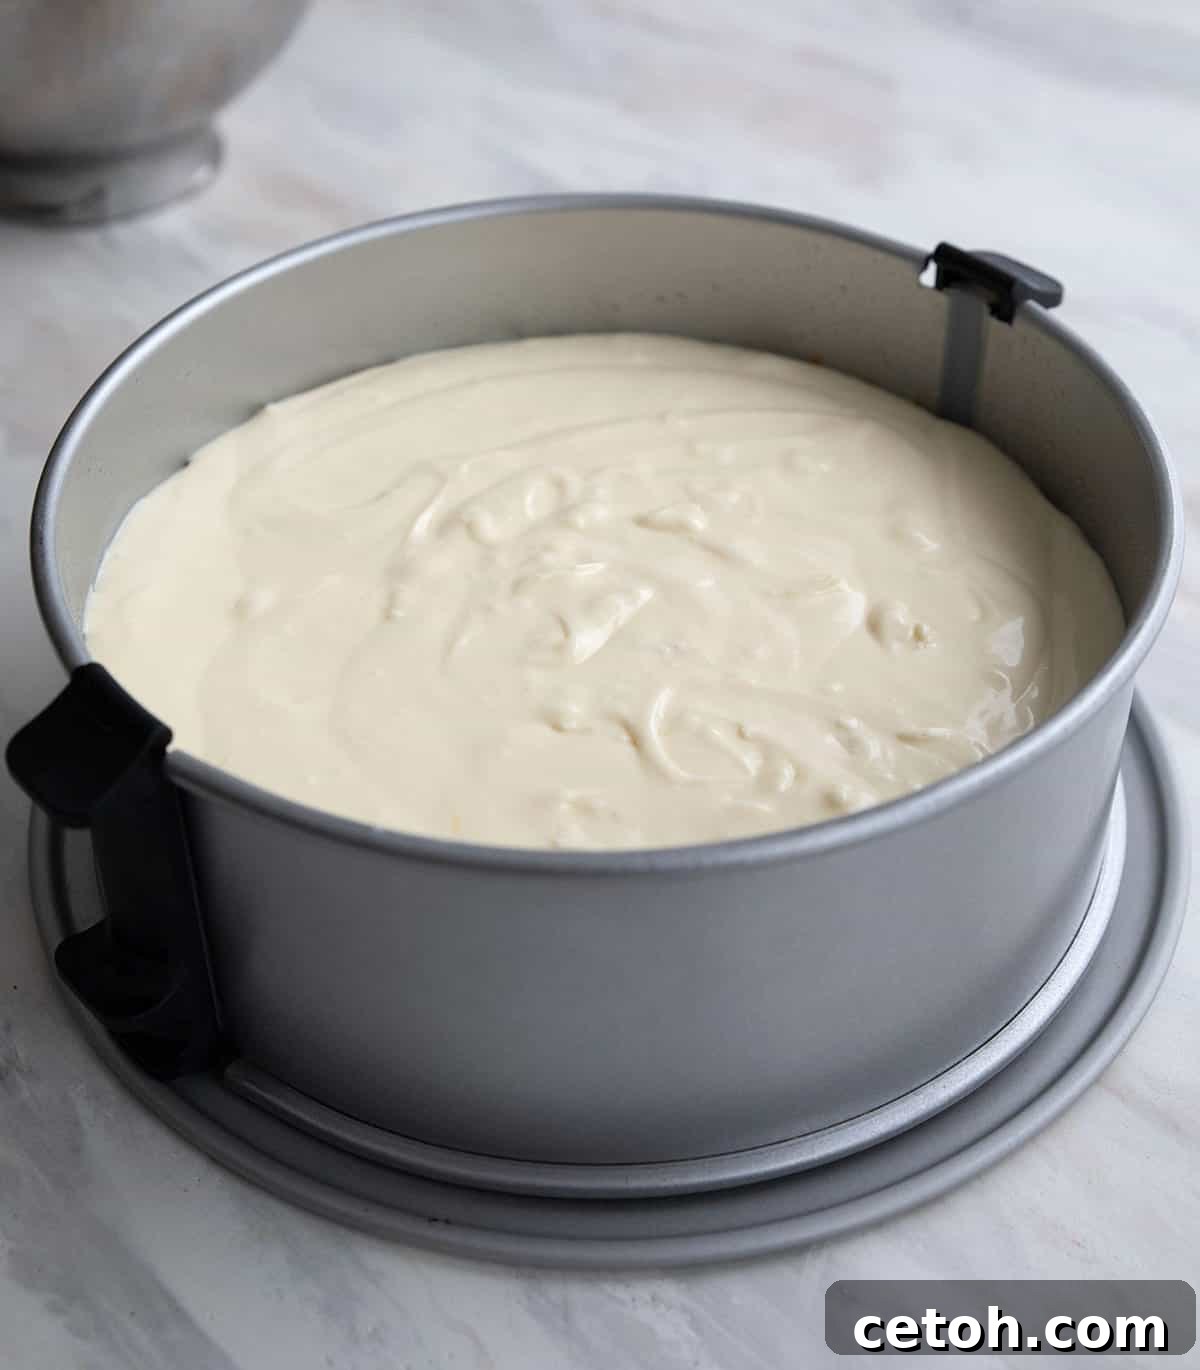
For baking flawless cheesecakes, the right equipment makes all the difference. I wholeheartedly recommend the springform pan from USA Pan. Unlike most traditional pans that rely on a single, often finicky, buckle, this superior pan features two clips that slide in and out with remarkable ease, creating an incredibly tight and secure seal. This design virtually eliminates leaks and makes for effortless release of your delicate cheesecake. It is, without a doubt, the best springform pan I have ever owned, ensuring perfect results every time!
Average Rating: 4.86 from 63 votes
Keto Coconut Cheesecake
Created by: Carolyn Ketchum
Servings: 16 servings
Prep Time: 25 mins | Cook Time: 2 hrs | Total Time: 4 hrs 25 mins
This Keto Coconut Cheesecake is the dreamiest dessert you will ever make. It features a macadamia nut crust topped with a creamy smooth filling, all topped off with sugar-free whipped cream.
Pin Recipe
Share on Facebook
Rate This Recipe
Ingredients
Crust:
- 3/4 cup (100.5 g) raw macadamia nuts
- 3/4 cup (60 g) finely shredded coconut, unsweetened
- 3 tbsp granular sweetener (erythritol-based recommended)
- 1/4 tsp salt
- 2 tbsp melted butter (or oil)
Filling:
- 1 1/2 lbs (680.39 g) cream cheese, very well softened
- 2/3 cup (126.67 g) granular sweetener, depending on how sweet you like it
- 1/2 cup (120 g) coconut cream, canned, room temperature
- 1 tsp coconut extract
- 1/2 tsp vanilla extract
- 3 large eggs, room temperature
Topping:
- 3/4 cup (177.44 ml) whipping cream
- 2 tbsp powdered sweetener
- 1/2 tsp vanilla or coconut extract
- 1/2 cup (42.5 g) large flaked coconut, lightly toasted
Instructions
Crust
- Preheat the oven to 325ºF (160°C) and lightly grease a 9-inch springform pan. Line the bottom with parchment paper and grease the parchment. Set the pan onto a large rimmed baking sheet.
- In a food processor, process the macadamia nuts on high until they resemble coarse crumbs. Transfer to a bowl and stir in the coconut, sweetener, and salt. Add the melted butter and stir to combine.
- Press the crust mixture firmly and evenly into the bottom of the prepared pan. Bake 12 to 15 minutes or until just beginning to brown around the edges. Remove and let cool completely.
Filling
- Reduce oven temperature to 300°F (150°C).
- In a large bowl, beat the cream cheese on medium for 1 to 2 minutes, until super creamy and smooth. Beat in the sweetener, coconut cream, and extracts until well combined. Taste and adjust the sweetener and coconut flavor as desired before adding eggs.
- Beat in the eggs one at a time until just incorporated. Make sure to scrape down the sides of the bowl and the beaters after each addition to ensure a uniform batter.
- Pour the creamy filling over the cooled crust and gently spread it to the edges of the pan.
- Place the entire setup (springform pan on the cookie sheet) on the center rack of the oven. On the rack below, place a large baking dish filled with water to create a humid baking environment.
- Bake for 70 to 90 minutes, or until the edges are set but the center still jiggles just a little when shaken. Remove from oven and let it come to room temperature on a wire rack for at least an hour.
- Once cooled, run a sharp knife around the edges of the pan and carefully remove the springform sides. Cover the cheesecake with plastic wrap and refrigerate for at least 2 to 3 hours, or ideally overnight, until thoroughly chilled and set.
Topping
- In a large bowl, beat the cold whipping cream, powdered sweetener, and extract until stiff peaks form.
- Carefully spread the whipped cream over the chilled cheesecake. Sprinkle generously with lightly toasted coconut (simply toast in a dry skillet over medium heat, shaking until golden brown). Serve immediately or keep refrigerated.
Notes
For the best results, ensure all dairy and eggs are at room temperature before mixing the filling. This helps prevent lumps and ensures a smoother, creamier cheesecake. Chilling time is crucial for cheesecake to set properly, so don’t rush it!
Nutrition Information
Serving: 1 slice | Calories: 306 kcal | Carbohydrates: 4.7g | Protein: 4.6g | Fat: 28g | Saturated Fat: 16.2g | Fiber: 1.3g