
Mastering Steakhouse Quality Steaks at Home: The Ultimate Grilling Guide
Craving that perfect, succulent steakhouse steak but prefer the comfort of your own backyard? You’re in luck! Achieving restaurant-quality grilled steaks at home is not just possible, it’s surprisingly simple. With a few key techniques, the right equipment, and a dash of passion, you can transform your everyday grill into a gourmet steak station. Forget paying exorbitant prices and sitter fees; this guide will equip you with all the tips and tricks to grill the best low-carb steak, ensuring every bite is a celebration of flavor and texture. High heat, generous seasoning, and a luscious pat of compound butter are your secret weapons for an unforgettable meal.
The Joy of the Home-Grilled Steak
For many, the end of a long week calls for a special treat. In our household, Friday night is reserved for a cherished date night ritual – not at a pricey restaurant, but right here at home. While the kids enjoy their movie and finger foods downstairs, my husband and I settle in for a relaxed evening with a drink, a show, and a truly wonderful meal. And more often than not, that meal features perfectly grilled steak and fresh vegetables. There’s a unique satisfaction in preparing a meal that rivals any steakhouse experience, especially when it’s crafted with care and enjoyed in a relaxed setting.
Over the years, what started as my husband’s domain at the grill has become largely my own. With his late work schedule, I find immense pleasure in having a meticulously prepped and perfectly cooked steak, adorned with a melting pat of butter, ready the moment he walks through the door. Living in a climate that allows for grilling most of the year is a blessing, making this delicious tradition a frequent occurrence. Through countless Friday night sessions, I’ve truly honed my steak-grilling skills, transforming good cuts of meat into extraordinary culinary delights.
Essential Tips for Steakhouse-Quality Grilling
When Kingsford® approached me to share my best tips for grilling steakhouse steaks at home, I was thrilled to pass on the knowledge I’ve gathered. Their Professional Briquets are a game-changer, designed to burn hotter and consistently, making them ideal for achieving that coveted steakhouse char in your own backyard. But high-quality charcoal is just one piece of the puzzle. Here are the critical factors you need to master:
1. Select a Premium Cut of Meat
The foundation of an outstanding steak is undoubtedly the quality of the meat itself. This is perhaps the most crucial step in replicating that restaurant experience. While premium cuts might seem a bit pricier at the butcher, remember that it’s still significantly less expensive – often less than half the cost – than what you’d pay at a high-end steakhouse. Investing in good meat ensures superior flavor, tenderness, and juiciness. I particularly favor New York Strip or boneless rib-eye for their excellent marbling and robust flavor, though a bone-in rib-eye is always a welcome treat. Regardless of your choice, aim for steaks that are at least one inch thick; this thickness is key to achieving a beautiful sear on the outside while maintaining a tender, juicy interior, preventing the steak from drying out too quickly on the intense heat of the grill.
2. Bring Steaks to Room Temperature and Pat Them Dry
This simple preparation step is often overlooked but profoundly impacts the final result. Take your steaks out of the refrigerator at least 30-60 minutes before grilling, allowing them to come closer to room temperature. This ensures more even cooking from edge to center. Cold steaks hitting a hot grill will cook unevenly, potentially leaving the outside overdone and the inside still raw. Equally important is to pat your steaks thoroughly dry with paper towels. Excess surface moisture will steam rather than sear, preventing the formation of that desirable, flavorful crust. Remember, you want to achieve a delicious, crispy sear, not a steamy, grey exterior!
3. Season Generously with Salt and Pepper
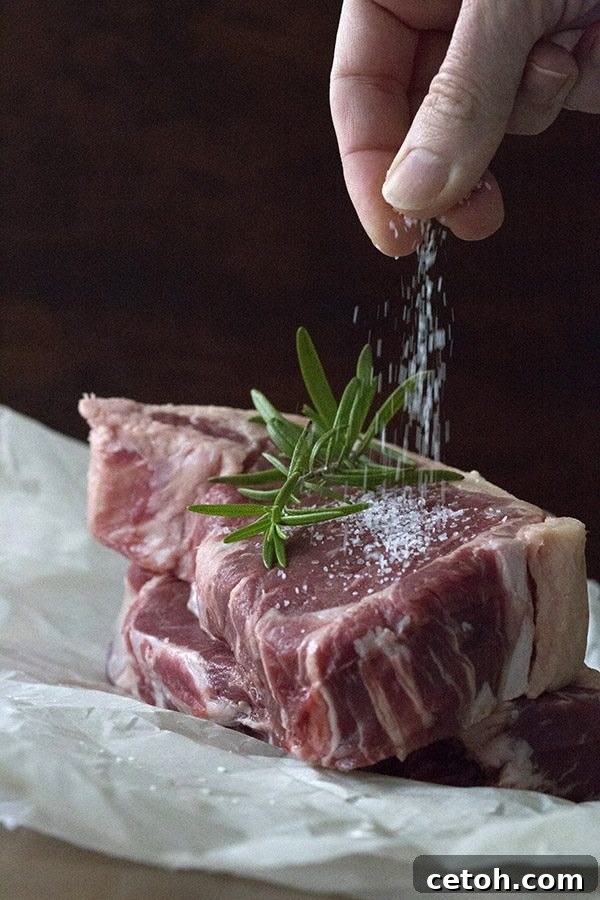
I cannot emphasize this enough: **SEASON YOUR STEAKS WELL WITH SALT AND PEPPER!** If there’s one mistake many home cooks (and even some restaurants) make, it’s under-seasoning. A beautifully cooked steak that lacks adequate salt and pepper is a truly sad affair. Salt does more than just add flavor; it also helps to draw out moisture to the surface, which then evaporates, aiding in the searing process and creating that perfect crust. I personally love salt and apply a generous sprinkling both before and sometimes even a touch after cooking. While you should always adjust to your taste, don’t be shy. A good kosher or sea salt works wonders, paired with freshly ground black pepper for a pungent kick that complements the rich beef flavor.
4. Consider Other Rubs and Seasonings
While a high-quality steak truly shines with just salt and pepper, there’s no harm in experimenting with other rubs and seasonings if you wish to add complexity. Garlic powder, onion powder, paprika, or a touch of cayenne can all elevate your steak. However, always check the ingredients of pre-made rubs, as many already contain a significant amount of salt. If your chosen rub is salty, you’ll need a lighter hand with the salt shaker to avoid over-seasoning. For the compound butter recipe included in this guide, the butter itself provides a burst of additional flavor, often making extra rubs unnecessary for the steak itself.
5. Achieve Blazing High Heat
The secret to a perfect steakhouse crust is intense, unrelenting heat. The best steaks are cooked quickly over a very hot grill. This high temperature creates the Maillard reaction, resulting in a dark, flavorful crust without overcooking the interior. Preheat your grill for a good 10-15 minutes. If you’re using charcoal, this is where Kingsford® Professional Briquets truly shine, burning hotter and longer than standard briquets. No weak coals here! Stand by your grill and don’t walk away during this crucial searing phase, as just a few extra minutes can turn a perfectly cooked steak into an overdone one.
6. Utilize a Two-Zone Fire
For optimal control and perfect doneness, I highly recommend setting up a two-zone fire, especially for thicker cuts. This technique involves moving all your hot coals (or having one side of your gas grill on high and the other off/low) to one side of the grill. This creates a direct heat zone for searing and an indirect heat zone for finishing. I used this method for the recipe below, and it worked flawlessly. You’ll start by searing the outside of your steaks over the direct, high-heat zone to develop that beautiful crust, then transfer them to the indirect heat side to cook through gently to your desired internal temperature without burning the exterior.
7. Trust Your Instant-Read Thermometer
Guessing doneness is a recipe for disappointment. An instant-read thermometer is your absolute best friend in the grilling process. Every person has their preferred level of doneness, and relying solely on visual cues or the touch test can be misleading. Insert the thermometer into the thickest part of the steak, avoiding any bones. Here’s a general guide for internal temperatures (remember, the temperature will rise a few degrees as the steak rests):
- Rare: 120-125°F (49-52°C)
- Medium-Rare: 130-135°F (54-57°C) – My personal favorite, and what this recipe aims for.
- Medium: 135-140°F (57-60°C)
- Medium-Well: 140-145°F (60-63°C)
- Well-Done: 150°F+ (66°C+)
I never let my steaks go above 140°F if I’m aiming for a medium-rare to medium finish, ensuring maximum juiciness.
8. Rest Your Meat and Add Compound Butter
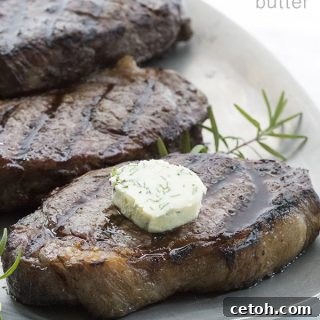
The debate about resting meat is ongoing, but in my experience, a short rest is always beneficial. Resting allows the juices, which have been pushed to the center during cooking, to redistribute throughout the meat, resulting in a more tender and juicy steak. Always transfer your grilled steaks to a platter or cutting board and top each with a generous pat of compound butter. This butter, which melts slowly into the warm meat, adds incredible flavor and richness. This time, I enhanced my compound butter with fresh garlic, fragrant rosemary, and a sprinkle of Parmesan – pure heaven! The melting butter and the steak’s natural juices create an irresistible combination that will make you want to lick your plate clean (and yes, I’m guilty as charged, every single time!).
Grilled Steak with Rosemary Garlic Parmesan Butter Recipe
Grilled Steak with Rosemary Garlic Parmesan Butter
Prep Time: 15 mins
Cook Time: 15 mins
Total Time: 35 mins
It’s easy to grill your own steakhouse-quality steaks at home. High heat, salt and pepper, and you are good to go! Add a pat of compound butter for a delicious low carb meal.
Pin
Share
Ingredients
Rosemary Garlic Parmesan Butter:
- 1/4 cup salted butter, softened
- 2 tbsp chopped fresh rosemary
- 2 cloves garlic, minced
- 1/4 cup grated parmesan
Steaks:
- 4 New York Strip or Boneless Rib Eye steaks, 1-inch thick each, room temperature
- 2 tsp kosher or sea salt, more to taste
- 2 tsp freshly ground pepper
Instructions
- In a small bowl, combine softened butter, chopped fresh rosemary, minced garlic, and grated parmesan. Mix very well until all ingredients are thoroughly combined. Transfer the mixture to a square of waxed paper and roll it into a neat log. Twist the ends of the waxed paper to seal and refrigerate until the butter is firm.
- Generously season both sides of your steaks with kosher or sea salt and freshly ground pepper. Allow the seasoned steaks to sit at room temperature while you prepare and preheat your grill.
- Preheat your grill using Kingsford Professional Briquets. For quick lighting and heating, I highly recommend using a charcoal chimney starter. Once the coals are glowing hot and covered in a light ash, distribute them to one side of the grill to create a two-zone fire (one side with direct high heat, the other for indirect lower heat).
- Place the seasoned steaks directly over the hot coals (direct heat zone). Cook undisturbed for 2 to 3 minutes to develop a beautiful sear. Carefully flip the steaks and cook on the second side for another 2 to 3 minutes. After searing, transfer the steaks to the cooler, indirect heat side of the grill and continue to cook until they reach your desired internal temperature. Use an instant-read thermometer frequently. For a perfect medium-rare, aim for an internal temperature of around 135°F (57°C).
- Once the steaks reach the desired doneness, remove them from the grill and place them on a clean platter. Top each steak with a generous pat of the prepared compound butter. Let the steaks rest for 4 or 5 minutes before slicing and serving. This resting period allows the juices to redistribute, ensuring a tender and flavorful steak.
Notes
This recipe yields 4 substantial 12-ounce steaks. While this is a hearty portion, it can comfortably serve 6 to 8 people when accompanied by sides. The nutritional calculations provided below are based on 6 servings.
Food energy: 573kcal
Total fat: 31.94g
Calories from fat: 287
Cholesterol: 203mg
Carbohydrate: 1.09g
Total dietary fiber: 0.49g
Protein: 62.95g
Nutrition
Serving: 8g | Calories: 573kcal | Carbohydrates: 1.09g | Protein: 62.95g | Fat: 31.94g | Cholesterol: 203mg | Fiber: 0.49g
For even more fantastic grilling tips and a wealth of delicious recipes, be sure to explore the Kingsford website. They offer a treasure trove of ideas to elevate your outdoor cooking. You can also follow them on Facebook and Twitter for the latest updates and inspiration.
I’d love to know your thoughts and how your grilled steaks turn out. Leave your rating below!
This is a sponsored conversation written by me on behalf of Kingsford. The opinions and text are all mine.