
Mastering the Art of Spooky Halloween Candy Apples
As the leaves begin to change and a crisp chill fills the air, there’s one holiday that truly captures the imagination with its blend of fun, fright, and fantastic treats: Halloween! And what better way to celebrate the season than with a classic confection given a wickedly wonderful twist? Forget the ordinary caramel apples; this year, we’re diving into the enchanting world of “poison” candy apples – a stunning, delicious, and delightfully eerie dessert that will be the talk of any Halloween gathering.
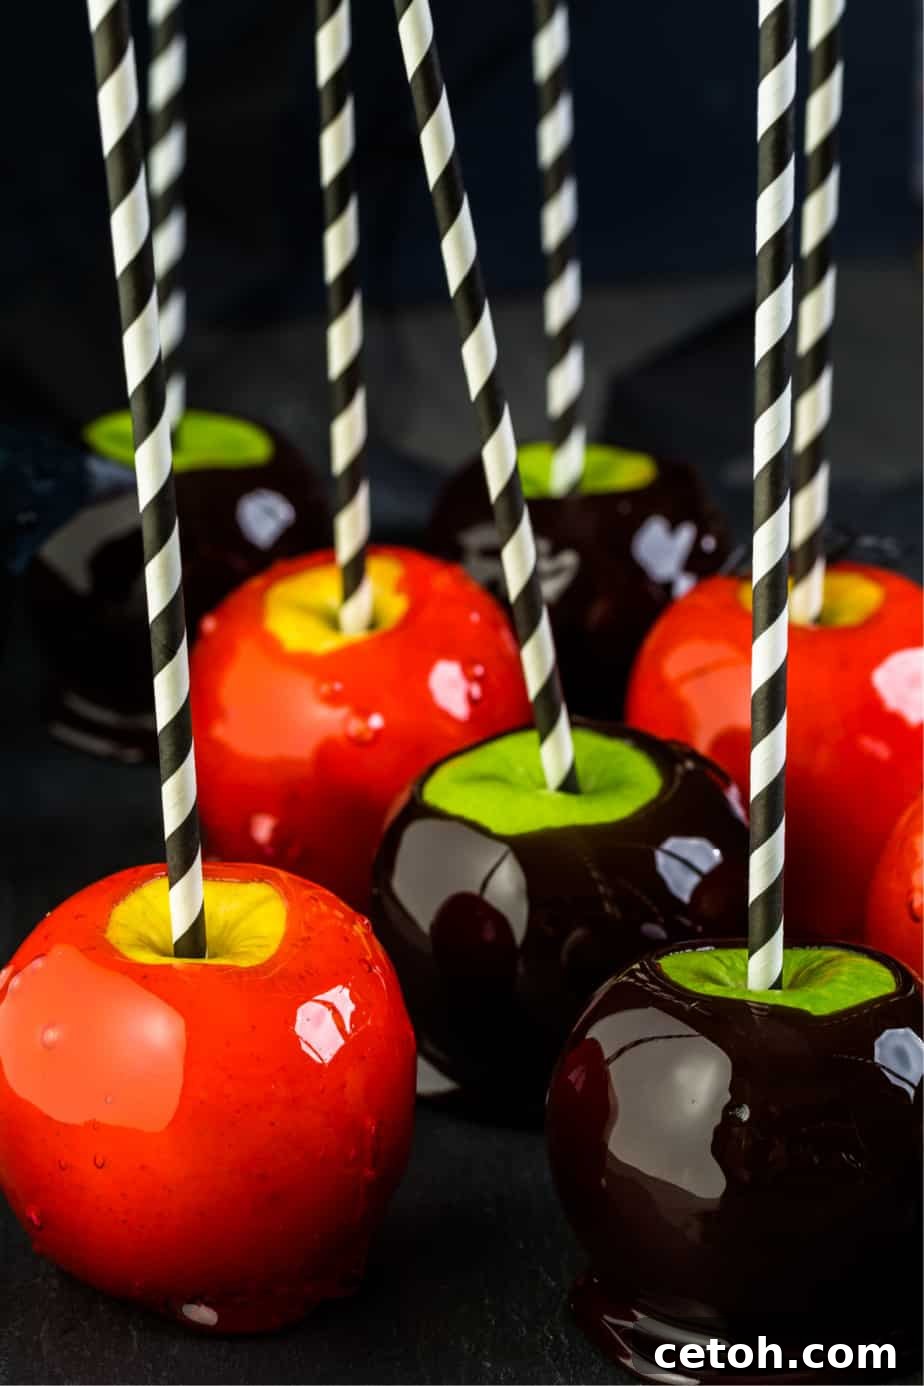
These Halloween Candy Apples aren’t just a treat for the taste buds; they’re a visual spectacle, boasting a glossy, jet-black coating reminiscent of a witch’s brew or a magical, forbidden fruit straight out of a fairy tale. Easy to make and incredibly satisfying, this recipe is perfect for home bakers looking to add a touch of professional flair to their spooky celebrations. Gather your ingredients, prepare for some sweet magic, and let’s create some unforgettable Halloween memories with these ultimate spooky treats!
Why “Poison” Candy Apples Are Your Must-Have Halloween Treat
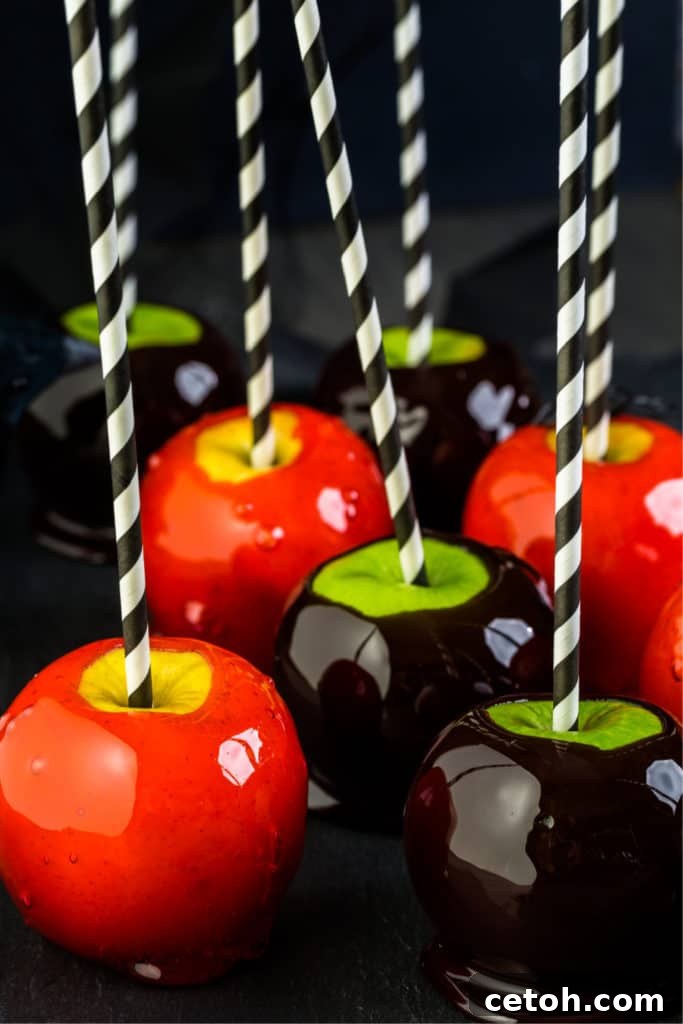
The allure of the “poison” candy apple lies in its dramatic presentation and the subtle nod to classic folklore and dark fantasy. Inspired by tales like Snow White, where a single bite could change everything, these apples evoke a sense of mystery and enchantment. The deep, dark hue achieved with black food coloring transforms a simple fruit into a captivating centerpiece that’s both spooky and sophisticated. It’s a guaranteed conversation starter and a memorable addition to any Halloween spread, instantly elevating your party decor.
Beyond their captivating appearance, homemade Halloween candy apples offer a delightful crunch and a burst of tart apple flavor perfectly complemented by the sweet, hard candy coating. They’re a fantastic interactive activity for families, turning the kitchen into a mad scientist’s lab or a witch’s cauldron. Plus, customizing them with sprinkles, edible glitter, or even a contrasting drizzle of white chocolate makes each apple a unique work of art. Imagine the joy of making these with loved ones, creating traditions, and then savoring the fruits of your labor – a truly fun and tasty Halloween experience!
Choosing the Perfect Apple for Your Spooky Creation
The foundation of any great candy apple is, of course, the apple itself! For these spooky Halloween treats, we highly recommend using Granny Smith apples. Their distinct tartness provides a wonderful counterpoint to the intensely sweet candy coating, creating a balanced flavor profile that prevents the treat from being overwhelmingly sugary. Beyond flavor, Granny Smiths are firm and hold up exceptionally well to the heat of the candy dip, ensuring your finished product is crisp, satisfying, and doesn’t become mushy.
When selecting your apples, look for ones that are firm to the touch, free of bruises, and of a medium size. Avoid overly large apples, as they can be challenging to dip evenly and difficult to eat comfortably. Thoroughly wash and dry your apples before beginning, as any residual wax or moisture on the skin can prevent the candy coating from adhering properly, leading to an uneven or peeling finish. Some dedicated candy makers even briefly dip their apples in boiling water to remove wax, followed by a quick ice bath and thorough drying, but a good scrub with warm water and vigorous drying with a paper towel is usually sufficient for home preparation.
Essential Ingredients for Your Black Candy Apple Potion
Creating these magical “poison” candy apples requires a few simple ingredients, but each plays a crucial role in achieving that perfect glossy, hard candy shell. Attention to detail with measurements and quality of ingredients will make all the difference in your spooky Halloween dessert. Here’s what you’ll need and why:
Ingredients:
- 12 Granny Smith Apples: As discussed, their tartness and firmness are ideal for this recipe.
- 12 Wooden Skewers or Candy Apple Sticks: Essential for handling, dipping, and ultimately enjoying your candy apples. Ensure they are sturdy and long enough for easy gripping.
- 1 ½ cups Granulated Sugar: The primary component of our candy coating, providing both sweetness and the necessary crystalline structure for a hard shell.
- ½ cup Light Corn Syrup: This is a secret weapon in candy making! Corn syrup is crucial for preventing sugar crystallization, ensuring your candy coating remains beautifully smooth, clear, and perfectly hard, rather than grainy or cloudy.
- ¾ cup Water: Dissolves the sugar and corn syrup, allowing them to reach the correct temperature and consistency required for the hard crack stage.
- 1 teaspoon Black Gel Food Coloring: Gel food coloring is vastly preferred over liquid as it provides a more intense, vibrant color with just a small amount, without adding too much extra moisture to the candy mixture, which could adversely affect its setting.
Pro Tip for Success: Invest in a good quality candy thermometer. This tool is absolutely non-negotiable for candy making. Achieving the precise temperature (310°F or the hard crack stage) is critically important for the candy to set properly and have the desired brittle, crunchy texture. If the temperature is too low, the candy will remain sticky; if it’s too high, the sugar will burn, resulting in a bitter taste and dark, uneven color.
Crafting Your Spooky Halloween Candy Apples: Step-by-Step Directions
Now that you have all your ingredients gathered and are ready to embark on this culinary adventure, let’s meticulously go through the process of making these show-stopping Halloween candy apples. Precision and attention to detail are key in candy making, so follow these steps carefully for the best, most beautiful, and spookiest results!
Directions:
-
Prepare Your Apples and Baking Sheets: Begin by thoroughly washing and drying your 12 Granny Smith apples. It is paramount that they are completely dry to ensure proper candy adhesion. Remove any stems. Insert a wooden skewer or candy apple stick about halfway down through the core of each apple, pushing firmly to ensure it’s securely anchored. Place these skewered apples aside where they won’t roll around. Next, prepare a baking sheet (or two, depending on size) by lining it with parchment paper. Lightly grease or butter the parchment paper thoroughly. This non-stick surface is absolutely crucial for easily removing the apples once the candy has completely set without sticking. Alternatively, you can generously spray the parchment paper with a non-stick cooking spray.
-
Create the Candy Coating Base: In a heavy-bottomed saucepan (preferably non-stick to help prevent sticking and burning), combine the granulated sugar, light corn syrup, and water. Place the saucepan over medium heat. Stir continuously with a heat-resistant spatula or wooden spoon until the sugar is completely dissolved. It’s important to ensure no sugar crystals remain on the sides of the pan; if any do, you can use a wet pastry brush to gently wash them down. Once the sugar is fully dissolved and the mixture begins to simmer, stop stirring. Carefully insert your candy thermometer, making sure the bulb does not touch the bottom of the pan to ensure an accurate reading.
-
Cook to Hard Crack Stage: Allow the mixture to boil without stirring until it reaches precisely 310°F (154°C) on your candy thermometer. This specific temperature signifies the “hard crack stage,” which ensures the candy will be perfectly brittle and crunchy when cooled. Boiling too quickly or not reaching the correct temperature will result in a soft, sticky, or chewy coating that doesn’t hold up. Patience is key here. Once the thermometer registers 310°F, immediately and carefully remove the saucepan from the heat.
-
Add the Spooky Color: Carefully, but quickly, stir in the black gel food coloring until the mixture is evenly and vibrantly colored. Be extremely cautious, as the candy mixture is incredibly hot and can cause severe burns. The color will rapidly transform the clear syrup into a deep, mysterious, opaque black, giving your apples their iconic “poison” look. Work efficiently as the candy will begin to cool and thicken quite rapidly once off the heat.
-
Dip the Apples: Holding an apple firmly by its skewer, carefully dip it into the hot candy mixture. Rotate the apple slowly and steadily to ensure it is evenly coated on all sides. Lift the apple out of the candy and allow any excess to drip back into the saucepan for a few seconds. You might need to gently scrape the very bottom edge of the apple against the lip of the pan to remove any large drips or pooling. The goal is a thin, smooth, and even coating across the entire apple surface.
-
Cool and Set: Immediately place the dipped apple onto your prepared greased parchment paper. Repeat the dipping process with the remaining apples, working quickly before the candy cools too much in the saucepan. If the candy starts to thicken excessively during dipping, you can gently warm it over very low heat for a few seconds to restore its fluidity, but avoid bringing it back to a rolling boil. Let the candy apples cool completely at room temperature, ideally in a low-humidity environment, until the coating is hard, brittle, and fully set. This usually takes approximately 30-60 minutes, depending on your room temperature and humidity.
Tips for Achieving Perfect Black Candy Apples Every Time
Making candy can be a delicate art, but with these expert tips, you’ll master the “poison” candy apple recipe like a seasoned confectionery professional, ensuring a flawless batch of spooky treats for your Halloween festivities:
- Meticulously Clean Apples Are Key: Reiterate the importance of ensuring your apples are not only spotlessly clean but also completely dry. Any residual wax, oil, or moisture will act as a barrier, preventing the candy from adhering properly, which can lead to a runny, bubbly, or peeling coating.
- Mind the Humidity: Candy making is best done on a dry day with low humidity. High humidity in the air can cause your candy apples to become sticky or “sweat” even after cooling, as the sugar coating readily absorbs moisture from the environment.
- Don’t Stir Once Boiling: After the sugar has fully dissolved and the mixture begins to boil, resist the urge to stir the syrup. Stirring can agitate the sugar crystals, causing them to form on the sides of the pan and leading to a grainy, rather than smooth, candy. If crystals appear, gently brush them down with a wet pastry brush dipped in warm water.
- Safety First with Hot Sugar: Hot sugar syrup is incredibly dangerous and can cause severe, painful burns. Always exercise extreme caution when working with it. Keep children and pets away from the stovetop and work area. Have a bowl of ice water nearby in case of accidental splashes – submerging a burned area quickly can help minimize damage.
- Work Efficiently and Quickly: The candy mixture cools and thickens rapidly once removed from the heat. Therefore, it’s crucial to have all your apples skewered and your parchment-lined baking sheets ready and within reach *before* you even start cooking the candy. This organized approach minimizes delays and ensures smooth dipping.
- Achieve an Even Coating: To achieve a beautifully smooth and uniform coating, dip and twist the apple slowly and deliberately. Lift it out and allow any excess candy to drip off naturally. Avoid re-dipping the apples if possible, as this can create a thick, uneven, and potentially lumpy layer of candy.
Creative Variations & Serving Suggestions for Your Spooky Candy Apples
While the classic black “poison” candy apple is undeniably striking on its own, don’t hesitate to unleash your creativity with different variations and captivating serving ideas. These additions can further customize your spooky treats and make them even more unique:
- Color Palette Expansion: Experiment with other spooky colors to create a diverse array of themed apples! Consider deep red for “blood” apples, vibrant green for “slime” apples, or even a swirling mix of colors for a mesmerizing galaxy or potion effect.
- Dazzling Toppings: Once the candy coating is set but still slightly tacky (or after it’s fully set and you’ve melted a bit of chocolate for adhesion), roll your apples in festive Halloween sprinkles, edible glitter for a shimmering effect, finely chopped nuts for texture, or even crushed chocolate cookies (like Oreos) for an extra layer of flavor and visual appeal, perhaps creating a “dirt” effect.
- Chocolate Drizzle Magic: Melt some white or dark chocolate and drizzle it artfully over the cooled black candy apples. This creates a striking contrast and adds an extra layer of richness. You can create intricate spiderweb patterns, ghostly swirls, or even simple stripes to enhance their visual appeal.
- Aromatics and Flavor Infusions: For an extra dimension of flavor, a few drops of food-grade essential oils like cinnamon, peppermint, or even a hint of raspberry flavoring can be added to the candy mixture *after* it’s removed from the heat (and before the food coloring). This infuses the hard candy shell with delightful and unexpected tastes.
These Halloween Candy Apples are perfect for:
Halloween Parties: Arrange them artfully on a festive platter as a show-stopping centerpiece that will impress all your guests.
Trick-or-Treat Alternatives: Offer a thoughtful, homemade treat to close friends, family, or neighbors as a unique alternative to store-bought candy.
Fall Harvest Festivals: Bring a unique and spooky twist to a traditional fall favorite, making them stand out at any autumnal gathering.
Storing Your Spooky Sweet Treats
Once your “poison” candy apples are completely set and the candy coating is hard and firm, proper storage is key to maintaining their texture and preventing stickiness. Wrap each apple individually in plastic wrap. This protective layer will shield the candy coating from humidity in the air and keep it from becoming sticky or soft. Store them in a cool, dry place at room temperature. It is generally advised to avoid refrigerating them, as the moisture and cold environment in a refrigerator can cause the candy to “weep” (become wet and sticky) or soften. They are best enjoyed within 2-3 days for optimal texture and freshness, ensuring that satisfying crunch with every bite.
More Spooktacular Halloween Recipes to Explore
If you loved making these chillingly delicious candy apples and are hungry for more festive culinary adventures, you’re in for even more treats! Dive into our curated collection of other festive and fun Halloween-themed recipes perfect for adding more magic, fright, and flavor to your celebration:
Enchanting Pumpkin Recipes for Fall
- One Bowl Pumpkin Pie Cupcakes: The quintessential taste of autumn captured in a delightful, easy-to-make cupcake.
- Starbucks Copycat Pumpkin Bread: Recreate your favorite cozy coffee shop treat right in your own kitchen with this delicious recipe.
- Pumpkin Cinnamon Rolls: A warm, spiced indulgence, these gooey cinnamon rolls are absolutely perfect for a chilly fall morning or a festive brunch.
Mysterious & Spooky Desserts and Treats
- Black Widow Cupcakes: These creepy-crawly, yet utterly delicious, cupcakes are sure to be a hit and a delightful scare at any spooky Halloween party.
- Blood Soup & Mummy Hot Dogs: While not a dessert, these savory delights are too fun and festive not to mention for a full Halloween feast that perfectly complements your sweet treats!
- Pumpkin Patch Donuts: Adorable and delicious, these themed donuts offer a sweeter and cuter take on the classic pumpkin patch experience.
- 101 Halloween Recipes: An extensive collection of ideas from Pinterest, providing endless spooky inspiration for your entire Halloween season.
- Jack Skellington Oreo Pops: Bring a beloved character to life in a delicious and easy-to-make dessert form that’s perfect for fans of all ages.
Final Thoughts on Your Halloween Creation
Making “poison” candy apples is more than just following a recipe; it’s an enchanting experience. It’s about bringing a little bit of magic and mystery into your home, creating something beautiful and delicious that truly embodies the whimsical and eerie spirit of Halloween. Whether you’re making them for a grand Halloween party, as a festive family activity, or simply to indulge in a deliciously spooky treat, these black candy apples are guaranteed to impress, delight, and become a cherished part of your holiday traditions.
So, roll up your sleeves, embrace the enchantment of the season, and enjoy the wonderfully creative process of crafting these eerily elegant confections. Share your creations, savor the moment, and most importantly, have a fantastically spooky Halloween, filled with delicious treats and unforgettable memories!