
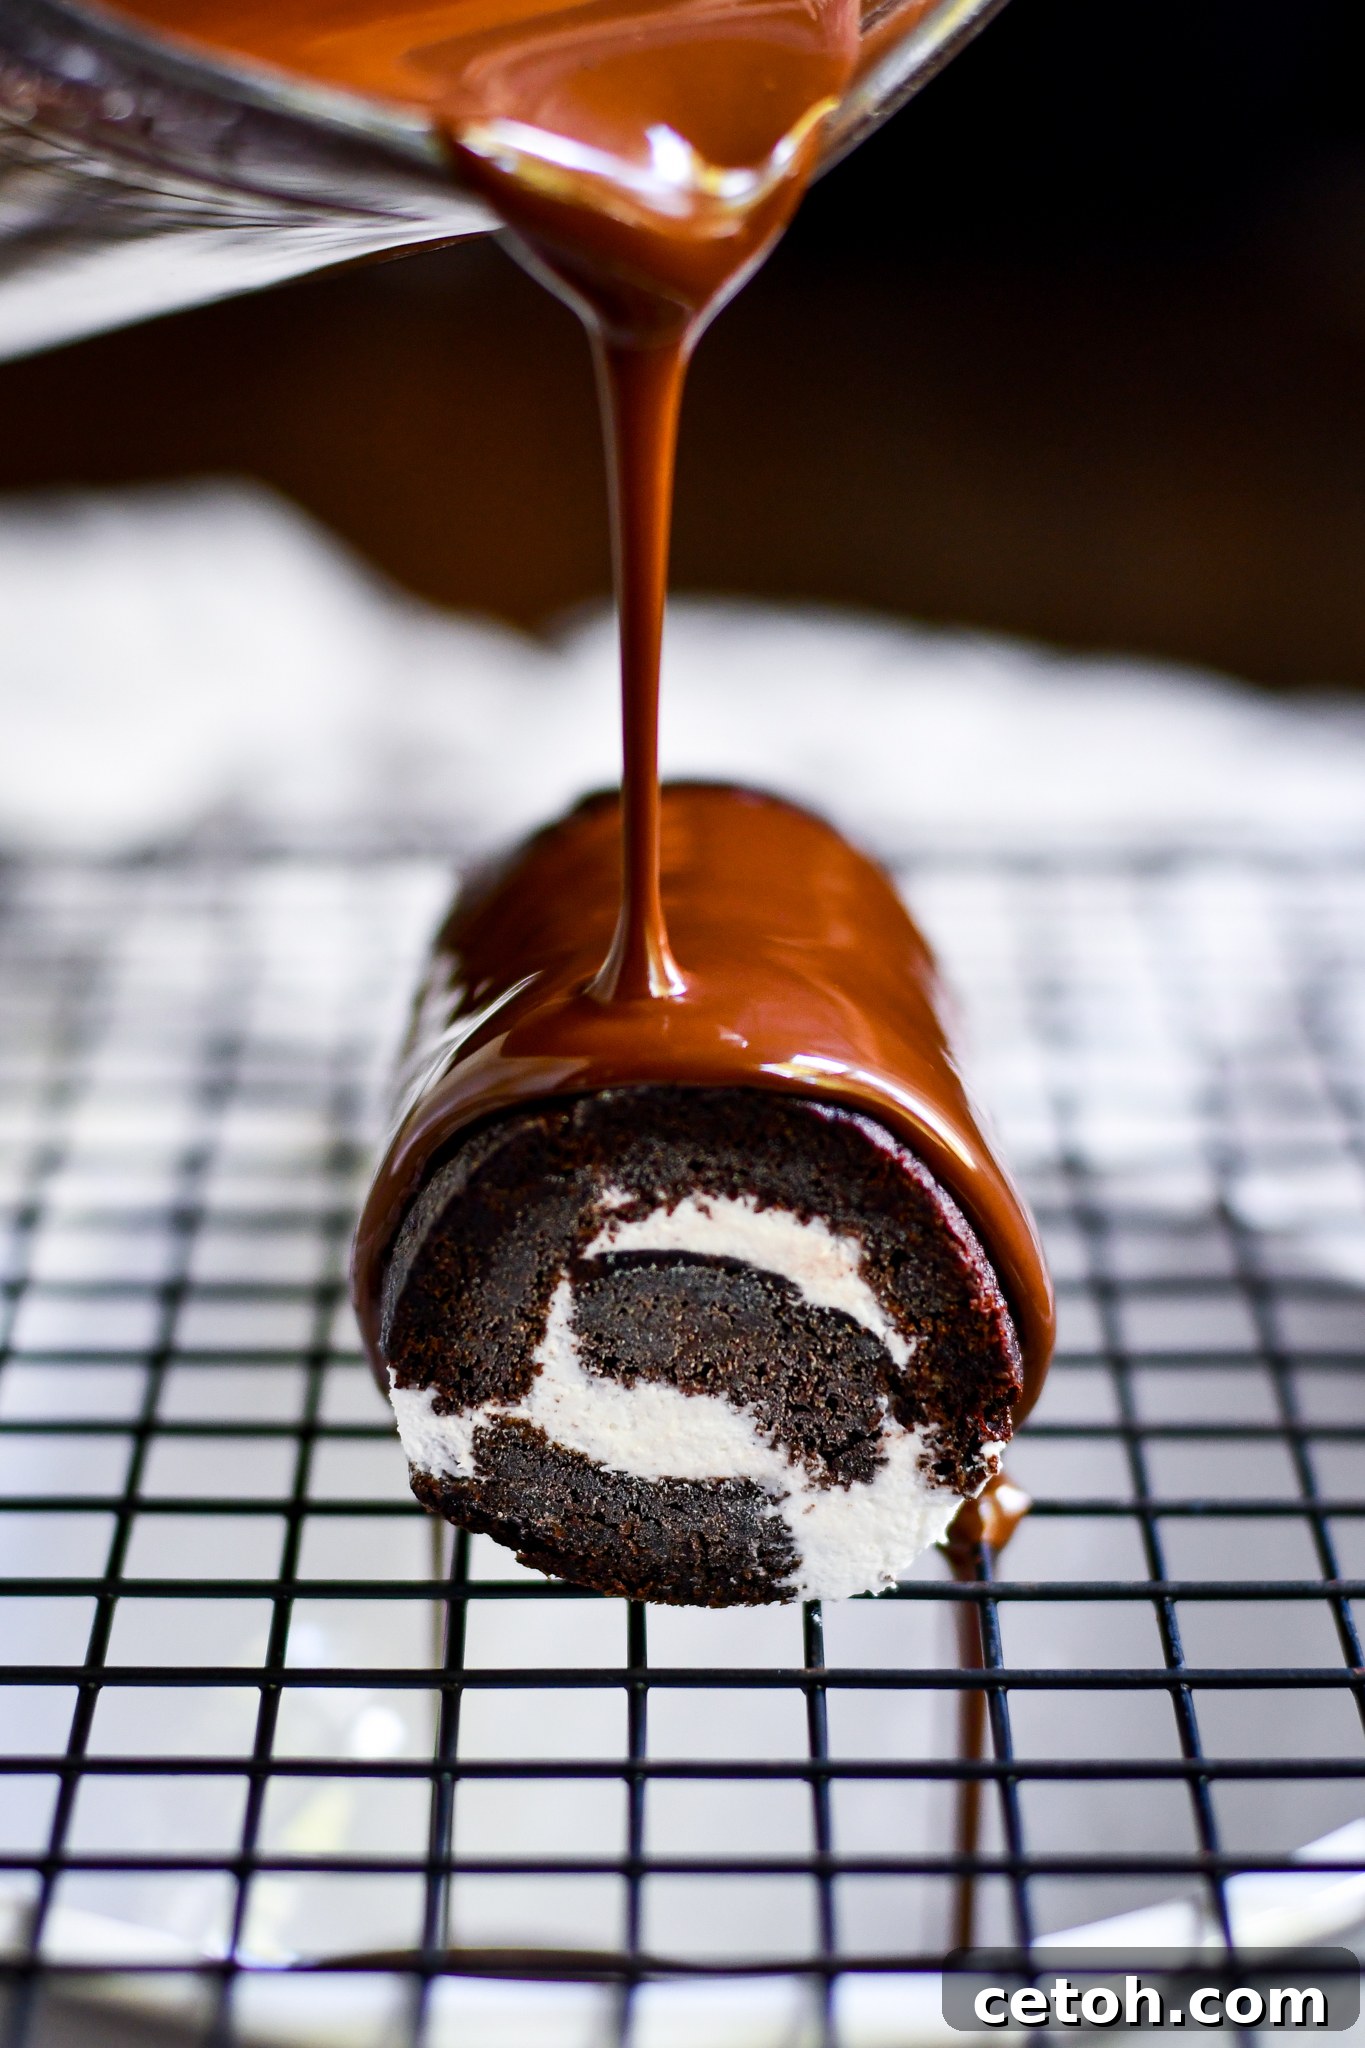
Decadent Homemade Swiss Roll Snack Cakes: A Copycat Recipe You’ll Love
Remember those iconic Swiss roll snack cakes from your childhood? The ones with the soft, moist chocolate cake wrapped around a creamy white filling, all coated in a luscious chocolate shell? Now, imagine making them right in your own kitchen, tasting even better than the store-bought version. This comprehensive copycat Swiss roll recipe is your ticket to nostalgic bliss, perfect for lunchboxes, delightful after-school snacks, or a sweet indulgence anytime the craving strikes. Get ready to impress your family and friends with these irresistible homemade treats.
Craving delicious treats but need to avoid dairy? You’re in luck! This fantastic recipe just happens to be completely dairy-free, making it suitable for those with dietary restrictions or preferences. Explore a world of flavor with all of our incredible Dairy Free Recipes!
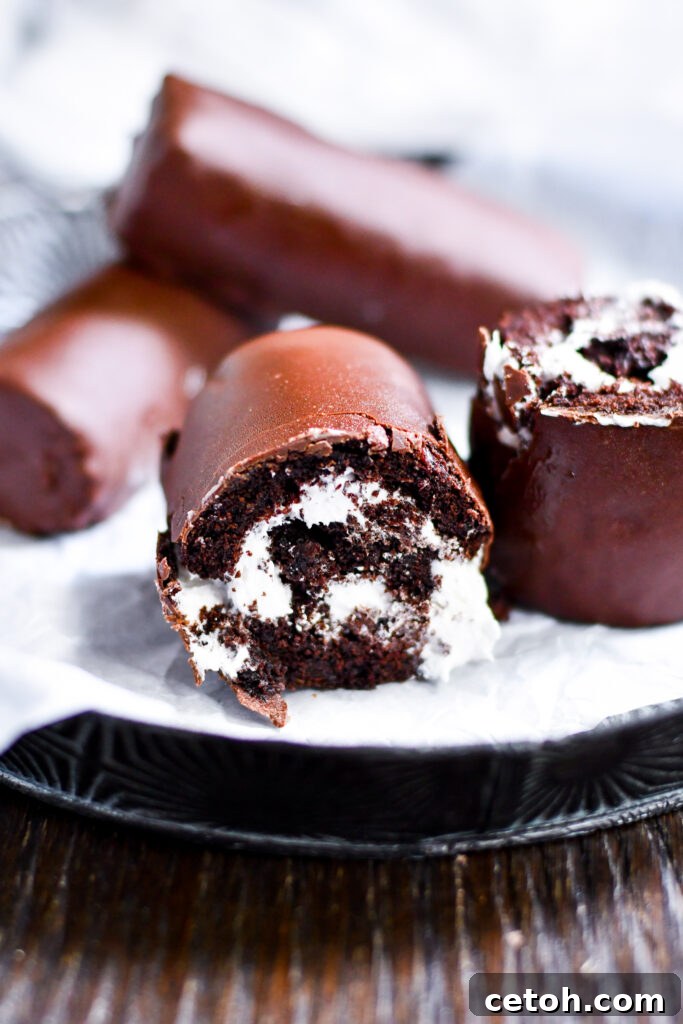
Easy Homemade Swiss Roll Snack Cakes | Craft your own delicious Swiss roll snack cakes at home with this simple yet satisfying copycat recipe. Enjoy a classic, chocolatey treat that tastes even better when homemade!
Why These Homemade Swiss Rolls Will Become Your New Favorite
- Unforgettable Nostalgic Flavor: This recipe perfectly captures the classic taste of store-bought Swiss rolls, elevating it with the freshness and quality of homemade ingredients. Each bite will transport you back to cherished childhood memories.
- Utilizes Simple, Accessible Ingredients: Say goodbye to obscure components. Our recipe relies on readily available pantry staples that you likely already have on hand, making it incredibly convenient to whip up a batch whenever inspiration strikes.
- Thoughtfully Dairy-Free: Enjoy all the deliciousness without any dairy, making these snack cakes an excellent choice for individuals with lactose intolerance, dairy allergies, or those following a dairy-free lifestyle. Everyone can indulge!
- A Guaranteed Kid-Friendly Hit: These delightful Swiss rolls are tailor-made for lunchboxes, perfect as an after-school snack, or simply a sweet treat that the entire family, from the youngest to the oldest, will adore.
- Achieves the Perfect, Irresistible Texture: Experience the ideal combination of a soft, incredibly spongy chocolate cake that gently cradles a rich, creamy filling, all enveloped in a snappy chocolate coating – truly just like, if not better than, the original.
- Ideal for Sharing (or Savouring Alone): Whether you’re making a generous batch to share with friends at a gathering, bringing them to a potluck, or secretly keeping them all to yourself for a week of indulgent treats, these Swiss rolls are always a good idea. No judgment here!
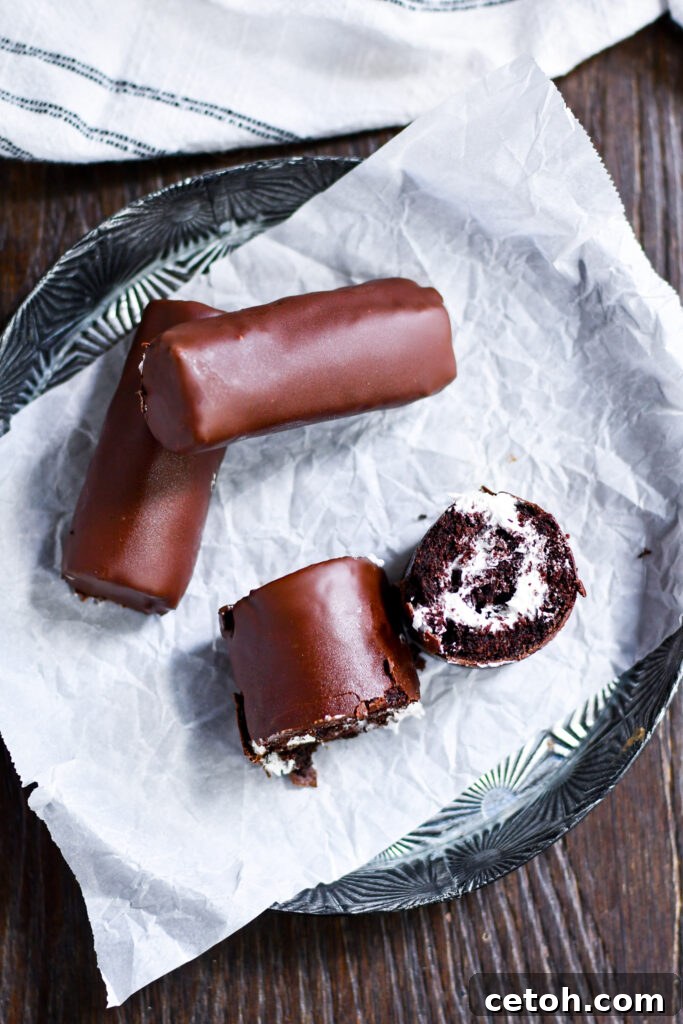
Copycat Swiss Roll Cake Recipe | Successfully recreate the iconic Swiss roll cake with this straightforward homemade recipe. Prepare to enjoy a beautifully soft chocolate sponge filled with creamy, dreamy goodness!
Essential Ingredients and Smart Substitutions for Your Swiss Rolls
Crafting the perfect homemade Swiss roll begins with selecting the right ingredients. Here’s a detailed look at what you’ll need and potential swaps:
- Duncan Hines Dark Chocolate Fudge Cake Mix: This specific mix provides a rich, deep chocolate flavor and a wonderfully moist texture that forms the perfect base for your Swiss rolls. If Duncan Hines isn’t available, any high-quality chocolate cake mix will work. Just be sure to double-check the label for dairy-free certification if that’s a dietary requirement.
- Required Ingredients from the Box: Most standard cake mixes call for additional wet ingredients like eggs, water, and oil. Always follow the specific instructions provided on your chosen cake mix box. If maintaining a dairy-free profile, verify that your chosen oil (e.g., vegetable, canola) and any egg substitutes (if used) also align with your dietary preferences.
- Crisco Shortening: A crucial ingredient for achieving a remarkably smooth, stable, and perfectly creamy filling that holds its shape beautifully. Crisco is naturally dairy-free. While you can substitute with softened butter (or dairy-free butter alternative) or a combination of shortening and butter, be aware that this may slightly alter the filling’s texture and stability, potentially making it a bit softer.
- Marshmallow Fluff: This is the secret ingredient that imparts the distinctive, light, and airy sweetness, along with that classic creamy texture, to the filling. It melts seamlessly into the shortening, creating a dreamy center for your rolls.
- Powdered Sugar: Essential for adding sweetness and providing structure to the marshmallow fluff filling. It helps thicken the mixture to an ideal, spreadable consistency while dissolving smoothly, preventing any graininess. You can adjust the amount to suit your personal sweetness preference.
- Semi-Sweet Chocolate Chips: These chips are melted down to create the indulgent outer coating. I personally favor Wegman’s brand for their excellent flavor profile, dairy-free status, and affordability. However, feel free to use any other brand of semi-sweet chocolate chips that meets your taste and dietary needs. Look for brands specifically labeled “dairy-free” if necessary.
- Coconut Oil: A vital component for the chocolate coating, coconut oil works wonders by adding smoothness, enhancing the shine, and ensuring the chocolate has the correct viscosity for easy dipping. It also plays a key role in helping the coating set quickly and firm up properly, providing that satisfying snap.
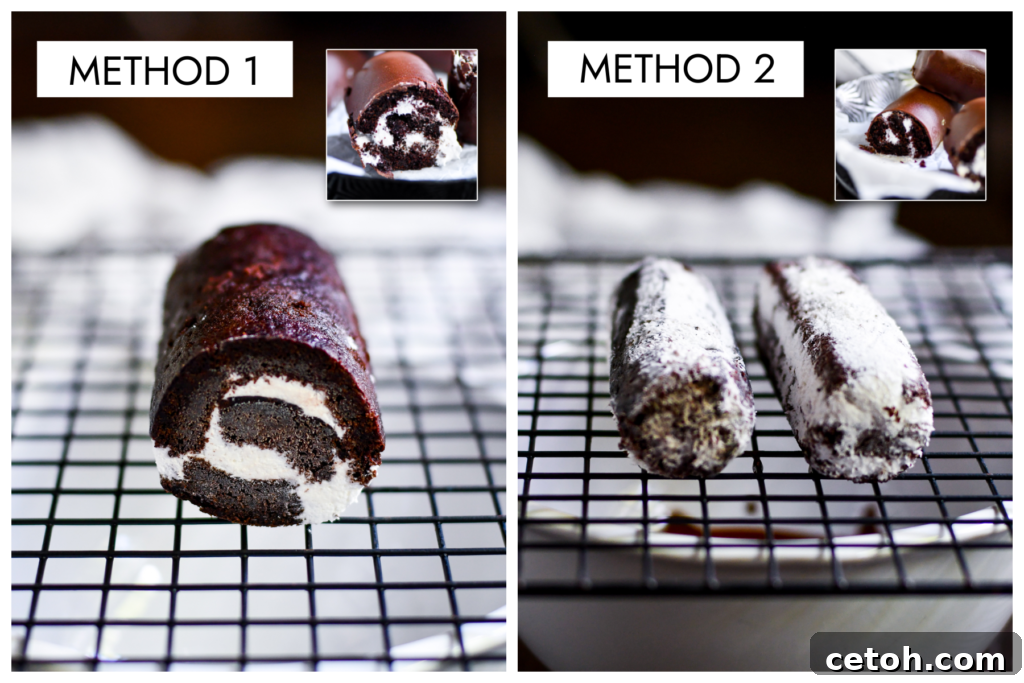
Two Effective Methods to Assemble and Coat Your Homemade Swiss Roll Snack Cakes
While the classic Swiss roll shape with its distinctive swirl is iconic, achieving it can sometimes be a bit challenging. That’s why we’re providing two excellent methods for assembling your snack cakes: the traditional rolled technique and a simplified approach that delivers all the flavor with less fuss.
Method 1: The Classic Cake Roll with a Signature Swirl
This method yields the traditional spiral appearance that most people associate with Swiss rolls. It requires a bit more care but is incredibly rewarding.
STEP 1 – Bake the Cake: Follow the detailed instructions within the recipe card to bake your chocolate cake batter into a thin, even layer on a prepared jelly roll pan. A thin cake is crucial for successful rolling.
STEP 2 – Gently Roll the Warm Cake: This step is critical for preventing cracks and encouraging the cake to hold its shape.
- Immediately after baking and while the cake is still warm (but not piping hot), carefully invert the cake onto a clean kitchen towel that has been generously dusted with powdered sugar. This prevents sticking.
- Starting from one of the shorter ends, gently and firmly roll the cake up with the towel, creating a tight spiral. The towel helps to cradle the cake and sets its memory for the roll.
- Allow the rolled cake to cool completely in the towel, seam-side down, on a wire rack. This cooling process helps the cake retain its rolled shape and makes it less prone to cracking during subsequent steps.
STEP 3 – Unroll and Precisely Cut: Once the cake has cooled entirely, carefully and slowly unroll it from the towel. The cake should now have a natural curve. Using a sharp knife, trim any uneven edges and then cut the large cake into smaller, uniform sections, typically 3-4 inches wide, depending on your desired snack cake size.
STEP 4 – Frost and Re-Roll: Spread an even, generous layer of your prepared creamy filling over each individual cake section. Starting from one end, gently but firmly re-roll each frosted section into its individual Swiss roll shape. Wrap each roll tightly in plastic wrap to maintain its form and prevent drying, then place them in the freezer to set firmly for at least 4-6 hours, or ideally, overnight. This freezing step is essential for easy handling and coating.
STEP 5 – Coat with Melted Chocolate: After the rolls are thoroughly frozen and firm, prepare your melted chocolate coating. Quickly dip each individual roll into the warm chocolate mixture, ensuring it’s completely covered. Allow any excess chocolate to drip back into the bowl before placing the coated roll on a parchment-lined baking sheet to set.
Note: This traditional method delivers the beautiful, classic Swiss roll look with the iconic swirl in the middle. While visually stunning, it can be a bit more intricate and requires patience and precise timing to prevent cracking. Don’t be discouraged if your first attempt isn’t perfect – practice makes perfect!
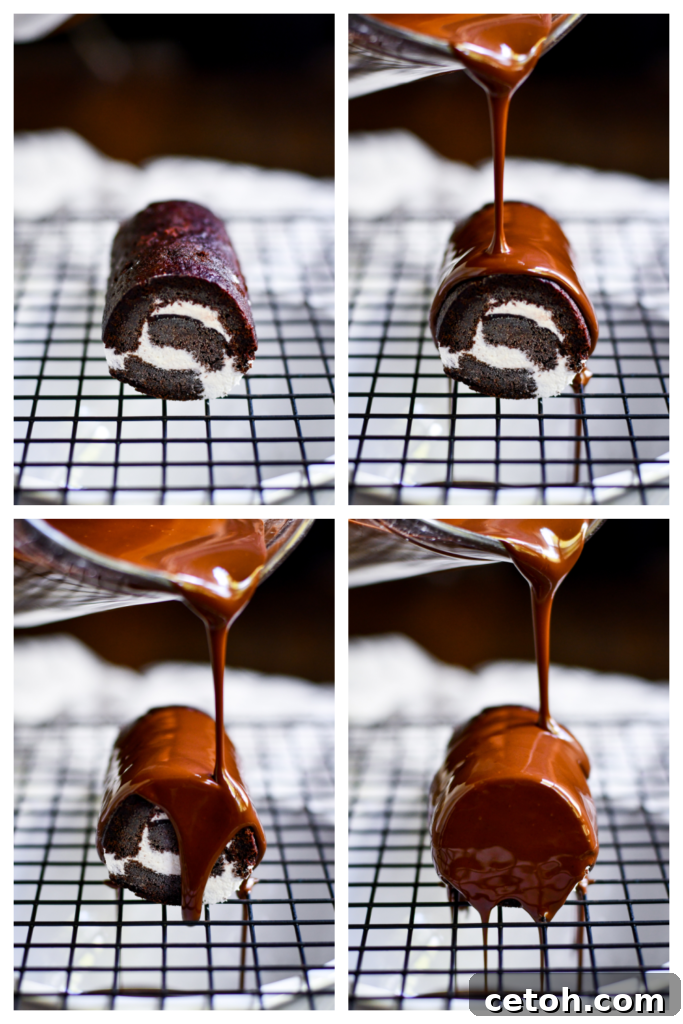
DIY Swiss Roll Snack Cakes | Ditch the store-bought versions and dive into making these incredible DIY Swiss roll snack cakes right at home. They’re deliciously nostalgic and incredibly satisfying!
Method 2: Simplified Assembly for Effortless Swiss Rolls (No Swirl)
If you’re looking for an easier, quicker approach that still yields amazing flavor and texture without the concern of cracking, this simplified method is perfect for you.
STEP 1 – Bake the Cake: Just like in the classic method, bake your chocolate cake in a thin, even layer on a prepared jelly roll pan according to the recipe instructions. The evenness is still important for uniform layers.
STEP 2 – Flatten the Warm Cake: Once the cake is out of the oven and still warm, carefully use oven mitts to protect your hands and gently press down on the entire surface of the cake. Alternatively, you can use a rolling pin to lightly flatten it. This step helps create a denser, more uniform cake base, making it easier to stack later.
STEP 3 – Frost the Entire Cooled Cake: Allow the cake to cool completely. Once cooled, give it another gentle flatten with a rolling pin if needed to ensure a truly flat surface. Then, spread your prepared creamy filling evenly across the entire surface of the cake, from edge to edge. Ensure a consistent layer for a balanced bite.
STEP 4 – Cut into Strips and Layer: Using a sharp knife, cut the frosted cake into uniform strips, approximately 3 inches wide. Carefully stack three of these frosted strips directly on top of each other. This layering technique creates the height and density reminiscent of a roll without the actual rolling.
STEP 5 – Shape and Freeze into Cylinders: Take each stack of three layered strips. Working quickly, roll each set in plastic wrap, carefully shaping and compressing them into a cylindrical form as you wrap. The plastic wrap helps to bind the layers together and shape the “roll.” Place these tightly wrapped cylinders into the freezer to set firmly overnight. Freezing is essential for the structure and ease of coating.
STEP 6 – Coat with Melted Chocolate: Once your “rolls” are completely frozen and firm, prepare your melted chocolate coating. Dip each frozen cylinder into the chocolate mixture, ensuring full coverage. Allow any excess chocolate to drip off before placing them on a parchment-lined baking sheet to set. The cold cake will help the chocolate set quickly.
Note: This method is significantly easier and less frustrating, especially for beginners. It provides the same delectable taste and satisfying texture of a traditional Swiss roll without the common challenges of rolling a delicate cake. It’s a fantastic shortcut that doesn’t compromise on flavor!
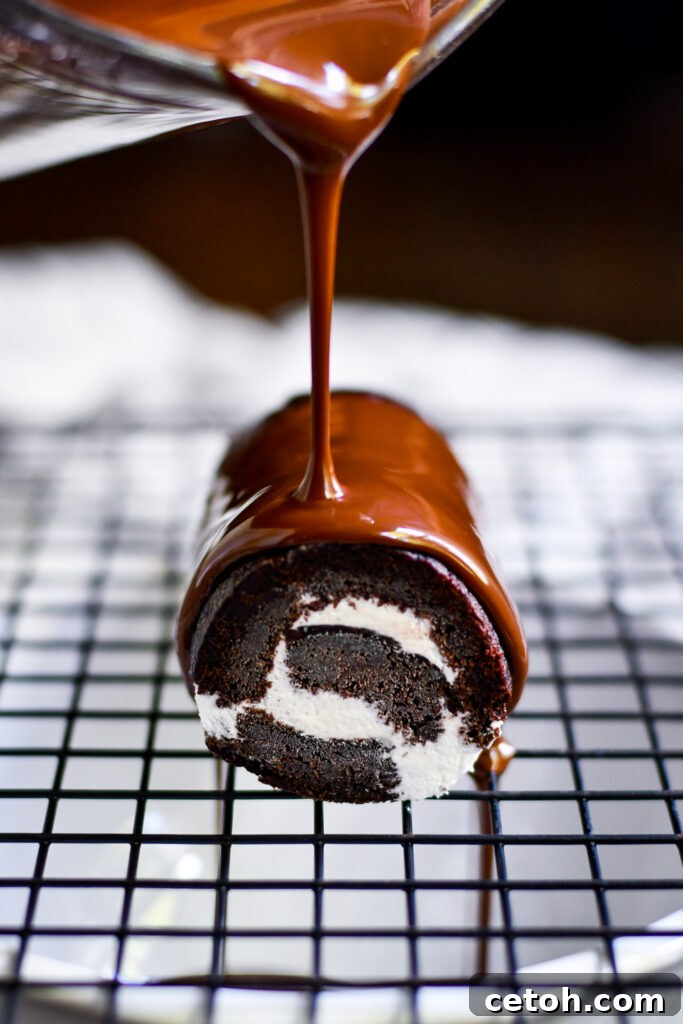
Best Copycat Swiss Roll Recipe | Searching for the best copycat Swiss roll recipe? Look no further! This homemade version not only rivals your favorite snack cake but tastes even better and fresher!
Exciting Variation Possibilities to Customize Your Swiss Rolls
One of the joys of baking at home is the ability to customize. Here are several ways to put your unique spin on these delightful Swiss roll snack cakes:
- Experiment with Cake Flavors: While chocolate is classic, don’t limit yourself! Swap out the dark chocolate cake mix for a different flavor to completely transform your rolls. Vanilla, strawberry, red velvet, or even lemon cake mixes can introduce exciting new twists to this beloved treat. Imagine a vibrant red velvet roll with a cream cheese-style filling!
- Creative Filling Alternatives: The marshmallow fluff filling is delightful, but the possibilities are endless for creamy centers. Try using rich peanut butter for a nutty twist, decadent Nutella for a hazelnut-chocolate dream, or a flavored buttercream (like mint or coffee) for an elegant touch. For added texture and surprise, mix in crushed cookies (Oreos, graham crackers), finely chopped fresh berries, or colorful sprinkles.
- Decorative Coating Enhancements: Elevate the visual appeal of your Swiss rolls by adding decorative touches to the chocolate coating. Before the chocolate sets, drizzle contrasting melted white chocolate in an attractive pattern, sprinkle on crunchy crushed nuts (like pecans or almonds), vibrant coconut flakes, or a scattering of colored sugars for a festive look.
- Seasonal Infusion for Festive Treats: Adapt your Swiss rolls for holidays and seasons by incorporating specific flavors. During autumn, infuse your filling with pumpkin spice or cinnamon. For the winter holidays, a hint of peppermint extract in the filling or even a peppermint-flavored chocolate coating can create a wonderfully festive treat.
- Bite-Sized Mini Rolls: For parties, portion control, or just adorably small snacks, create mini versions of these rolls. Simply cut smaller strips of cake (e.g., 1.5 to 2 inches wide) before rolling or layering. These bite-sized delights are perfect for dessert platters.
- Transform into a Layered Sheet Cake: If rolling seems too daunting, or you prefer a more traditional cake presentation, convert this recipe into a layered cake. Bake two thinner cake layers, then stack them with a generous spread of the creamy filling between them. You can then frost the entire outside with either the chocolate coating or a complementary frosting for a beautiful, celebratory dessert.
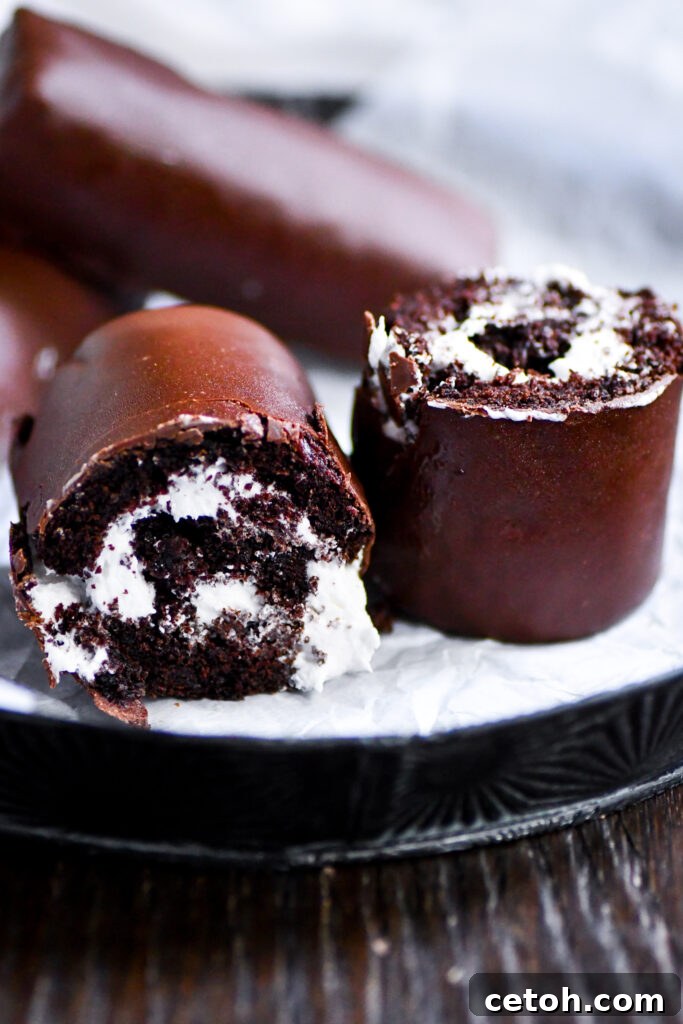
Homemade Swiss Rolls Recipe | Savor the classic taste of Swiss rolls crafted from scratch with this simple and enjoyable homemade recipe. It’s a fun and truly delicious treat that the whole family will adore!
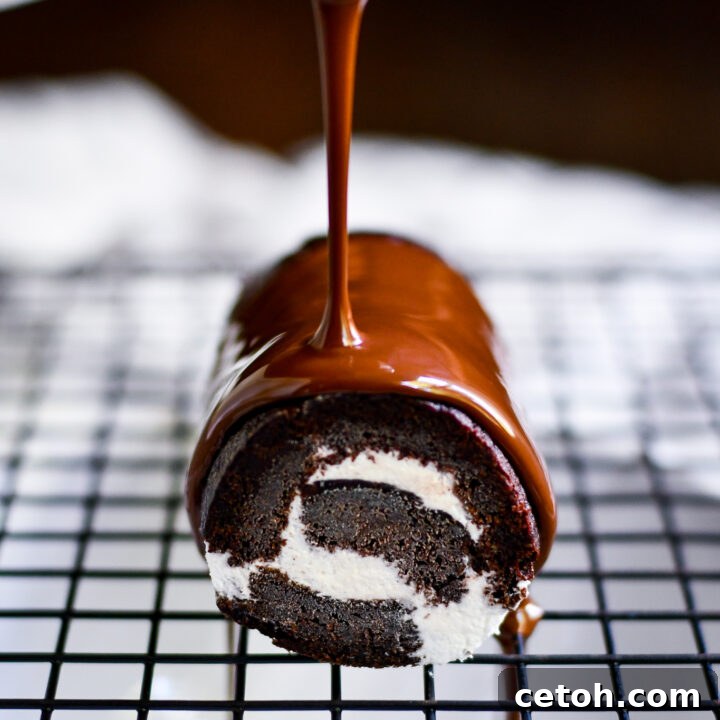
Copycat Recipe: Homemade Swiss Roll Snack Cakes
12 delightful snack cakes
45 minutes
25 minutes
12 hours (recommended for best results)
13 hours 10 minutes (includes freeze time)
Craft your very own delectable copycat Swiss rolls right at home with this incredibly easy and rewarding recipe. These homemade treats are perfect for any occasion – whether it’s a quick dessert, a delightful snack time indulgence, or simply a sweet moment to enjoy anytime!
Ingredients You’ll Need
For the Chocolate Cake
- 1 box Duncan Hines Dark Chocolate Fudge Cake Mix (or your preferred dairy-free chocolate cake mix for dietary needs)
- All additional ingredients specifically listed on the cake mix box (this typically includes water, eggs, and vegetable oil)
For the Creamy Marshmallow Filling
- ¾ cup Crisco shortening (essential for a smooth, stable filling)
- 12-13 ounces marshmallow fluff (the secret to that classic taste)
- ½ – 1 cup powdered sugar (adjust to your desired sweetness and consistency)
For the Rich Chocolate Coating
- 2 cups semi-sweet chocolate chips (Wegman’s brand is recommended for dairy-free and affordability)
- 2 tablespoons coconut oil (helps with smoothness and setting)
Step-by-Step Instructions
Part 1: Preparing and Baking the Cake
- Preheat Your Oven: Begin by preheating your oven to the exact temperature recommended on your specific cake mix box. This is typically around 350°F (180°C), but always refer to the package for accuracy.
- Prepare the Cake Batter: In a large mixing bowl, follow the instructions on your cake mix box precisely to prepare the batter. This usually involves combining the dry mix with water, eggs, and oil, then beating until smooth and well-combined.
- Bake the Cake Layer: Generously grease and line a 10×15-inch jelly roll pan with parchment paper, allowing some overhang on the sides for easy removal. Pour the prepared cake batter into the pan, spreading it evenly to create a thin, uniform layer. Bake according to the time specified on the box (generally 20-25 minutes), or until a toothpick inserted into the center of the cake comes out clean, indicating it’s fully baked.
- Allow Cake to Cool Slightly: Once baked, remove the cake from the oven. Let it cool in the pan for just a few minutes, usually 5-10 minutes. It’s crucial for the cake to still be warm, but not hot, for the rolling or flattening steps that follow.
Part 2: Assembling Your Swiss Rolls (Choose Your Method)
Method 1: Classic Cake Rolls with the Signature Swirl
- Roll the Warm Cake (Crucial Step): While the cake is still warm from the oven, carefully invert it onto a clean kitchen towel that you’ve generously dusted with powdered sugar. Starting from one of the shorter ends of the cake, gently but firmly roll the cake up with the towel, creating a tight spiral. The towel acts as a cushion and helps the cake retain its rolled shape as it cools. Allow the rolled cake to cool completely in this position on a wire rack, which can take an hour or more.
- Unroll and Frost: Once the cake is completely cooled, carefully and slowly unroll it from the towel onto a flat surface. Spread an even layer of the prepared creamy filling (instructions in Part 3) over the entire surface of the cake, leaving a small border free on one of the short ends to prevent squeezing out.
- Cut and Re-Roll Individual Rolls: Using a sharp knife, trim any uneven edges from the cake. Then, cut the frosted cake into individual sections, approximately 3 inches wide. Gently re-roll each section back up, without the towel this time, to form individual Swiss rolls with a visible swirl.
- Wrap each finished roll tightly in plastic wrap to secure its shape and prevent drying. Place the wrapped rolls in the freezer overnight (at least 12 hours) until they are firm and solid. This freezing step is vital for making the coating process clean and easy.
Method 2: Simplified Assembly for No-Fuss Swiss Rolls (No Swirl)
- Flatten the Warm Cake: Immediately after the cake has cooled slightly (as per Step 4 in Part 1), use oven mitts to gently but firmly press down on the entire surface of the warm cake with your hands, or use a rolling pin to flatten it evenly. This helps to create a denser, more uniform cake base for layering. Let the cake cool completely in the pan.
- Frost the Cooled and Flattened Cake: Once the cake is completely cool, you can give it another gentle press with a rolling pin to ensure it’s perfectly flat. Then, spread the prepared creamy filling (instructions in Part 3) evenly over the entire surface of the cake, covering it from edge to edge.
- Cut into Strips and Stack Layers: Using a sharp knife, carefully cut the entire frosted cake into uniform strips, each approximately 3 inches wide. Take three of these frosted strips and carefully stack them directly on top of each other, aligning the edges as best as possible.
- Shape and Freeze into Cylinders: For each stack of three layered strips, carefully wrap them tightly in plastic wrap. As you wrap, gently mold and compress the stack into a cylindrical shape. This tight wrapping helps to bind the layers and form a compact “roll.” Place these tightly wrapped cylinders into the freezer overnight (at least 12 hours) until they are completely frozen and firm.
Part 3: Crafting the Creamy Marshmallow Filling
- Cream the Shortening: In a large mixing bowl, using an electric mixer, beat the Crisco shortening on medium speed until it becomes incredibly smooth, light, and creamy. Scrape down the sides of the bowl as needed.
- Incorporate Marshmallow Fluff: Add the entire container of marshmallow fluff to the creamed shortening. Continue beating on medium-high speed until the two ingredients are thoroughly combined, resulting in a homogenous and fluffy mixture.
- Gradually Add Powdered Sugar: Begin gradually adding the powdered sugar, starting with about half a cup. Beat well after each addition. Continue adding sugar, a little at a time, until the filling is smooth, stable, fluffy, and reaches your desired level of sweetness and consistency. Taste as you go to ensure it’s perfect for you. The total amount used will vary based on preference.
Part 4: The Decadent Chocolate Coating
- Melt Chocolate and Coconut Oil: In a microwave-safe bowl, combine your semi-sweet chocolate chips and coconut oil. Microwave the mixture in short 30-second intervals, stirring thoroughly after each interval. Continue this process until the chocolate is fully melted and beautifully smooth, with no lumps remaining.
- Coat the Frozen Rolls: Remove the thoroughly frozen Swiss rolls (from either Method 1 or 2) from the freezer and unwrap them. Dip each frozen roll into the warm, melted chocolate mixture, ensuring it’s completely covered. Use a fork or a dipping tool to help lift the roll, allowing any excess chocolate to drip off back into the bowl.
- Set the Chocolate Coating: Carefully place each chocolate-coated roll onto a baking sheet lined with parchment paper. Allow the chocolate coating to set completely at room temperature. The coldness of the frozen cake will help the chocolate harden quickly. Don’t worry if some condensation forms initially; simply leave the rolls undisturbed and allow it to evaporate naturally. Once set, your homemade Swiss rolls are ready to enjoy!
Helpful Notes & Frequently Asked Questions
Frequently Asked Questions About Homemade Swiss Rolls
1. Can I use a different brand or type of cake mix for this recipe?
Absolutely! While Duncan Hines Dark Chocolate Fudge Cake Mix is recommended for its rich flavor and texture, you are welcome to use any chocolate cake mix you prefer. Just be sure to carefully read the label if you require a dairy-free option to ensure it meets your dietary needs. The baking times may vary slightly with different brands, so keep an eye on your cake.
2. What if I don’t own a 10×15-inch jelly roll pan? Are there alternatives?
If a 10×15-inch jelly roll pan isn’t available, you can certainly use a standard 9×13-inch baking pan. However, please be aware that the cake will be noticeably thicker, which means it will require a slightly longer baking time (add an extra 5-10 minutes, checking for doneness) and it might be a bit more challenging to roll successfully if you’re attempting Method 1. The simplified layering method (Method 2) would be a better choice in this case.
3. How can I adapt this recipe to be completely gluten-free?
Making these Swiss rolls gluten-free is straightforward! Simply substitute the standard chocolate cake mix with a certified gluten-free chocolate cake mix. Additionally, ensure that all other ingredients used, such as the powdered sugar, marshmallow fluff, and chocolate chips, are verified as gluten-free by checking their labels.
4. Is there an acceptable substitute for Crisco shortening in the filling?
Yes, you can substitute Crisco shortening with another brand of vegetable shortening, or even a dairy-free margarine if you prefer. However, it’s important to note that the texture and overall stability of the filling might change slightly. Crisco provides a unique smoothness and firmness that other fats may not fully replicate.
5. What is the best way to store these delicious homemade Swiss rolls?
To maintain their freshness and optimal texture, store the prepared Swiss rolls in an airtight container. They will keep well in the refrigerator for up to 5 days. For longer storage, these rolls freeze beautifully for up to 3 months. When ready to enjoy, simply thaw them in the refrigerator overnight or at room temperature for a couple of hours before serving.
6. I’m worried about the cake cracking when I roll it. Any tips to prevent this?
Rolling the cake while it is still warm (but not hot) is the most critical step to prevent cracking, as warmth makes the cake more pliable. Dusting the towel with powdered sugar also helps prevent sticking and tearing. If you’re still concerned or find the classic method too challenging, we highly recommend trying the simplified Method 2, which eliminates the need for rolling altogether.
7. Can I infuse the filling with other flavors for variety?
Absolutely! Customizing the filling is a fantastic idea. You can add various extracts like vanilla, almond, mint, or even a touch of orange zest to the marshmallow fluff filling for different flavor profiles. For added texture and surprise, consider folding in finely crushed cookies, miniature chocolate chips, or even a swirl of fruit preserves (ensure they are thick enough not to make the filling too wet).
8. What if I don’t have coconut oil for the chocolate coating? What can I use?
If coconut oil isn’t available, you can substitute it with another neutral-flavored oil, such as vegetable oil or canola oil. While these alternatives will still help thin the chocolate, they may not provide quite the same glossy finish or quick-setting properties as coconut oil. You could also skip the oil entirely, but the chocolate coating might be thicker and harder to work with, and less shiny.
9. Is the iconic swirl absolutely necessary for these Swiss rolls?
While the swirl is a beautiful and traditional characteristic of Swiss rolls, it is by no means essential for enjoying these delicious snack cakes. The simplified Method 2, which involves layering rather than rolling, delivers the exact same incredible taste and texture with significantly less effort and without the stress of achieving a perfect swirl. Choose the method that best suits your comfort level and desired outcome!
10. Are there any fun ways to decorate the finished Swiss rolls?
Definitely! Once the chocolate coating has almost set but is still slightly tacky, you can get creative with decorations. Drizzle contrasting melted white chocolate in patterns, sprinkle on colorful sprinkles, crushed nuts (like pecans or walnuts), or even a dusting of cocoa powder for a sophisticated finish. These small touches can make your homemade Swiss rolls even more special and visually appealing.
Nutrition Information:
Yield: 12 Servings
Serving Size: 1 Swiss Roll Snack Cake
Amount Per Serving (Estimated):
Calories: 1717Total Fat: 28gSaturated Fat: 14gTrans Fat: 0gUnsaturated Fat: 12gCholesterol: 9mgSodium: 648mgCarbohydrates: 377gFiber: 3gSugar: 268gProtein: 10g
Did you make this recipe? Share your creations!
We’d love to see your homemade Swiss rolls! Please leave a comment on our blog below with your feedback, or share a photo of your beautiful creations on Instagram using #KeatsEatsSwissRolls.