
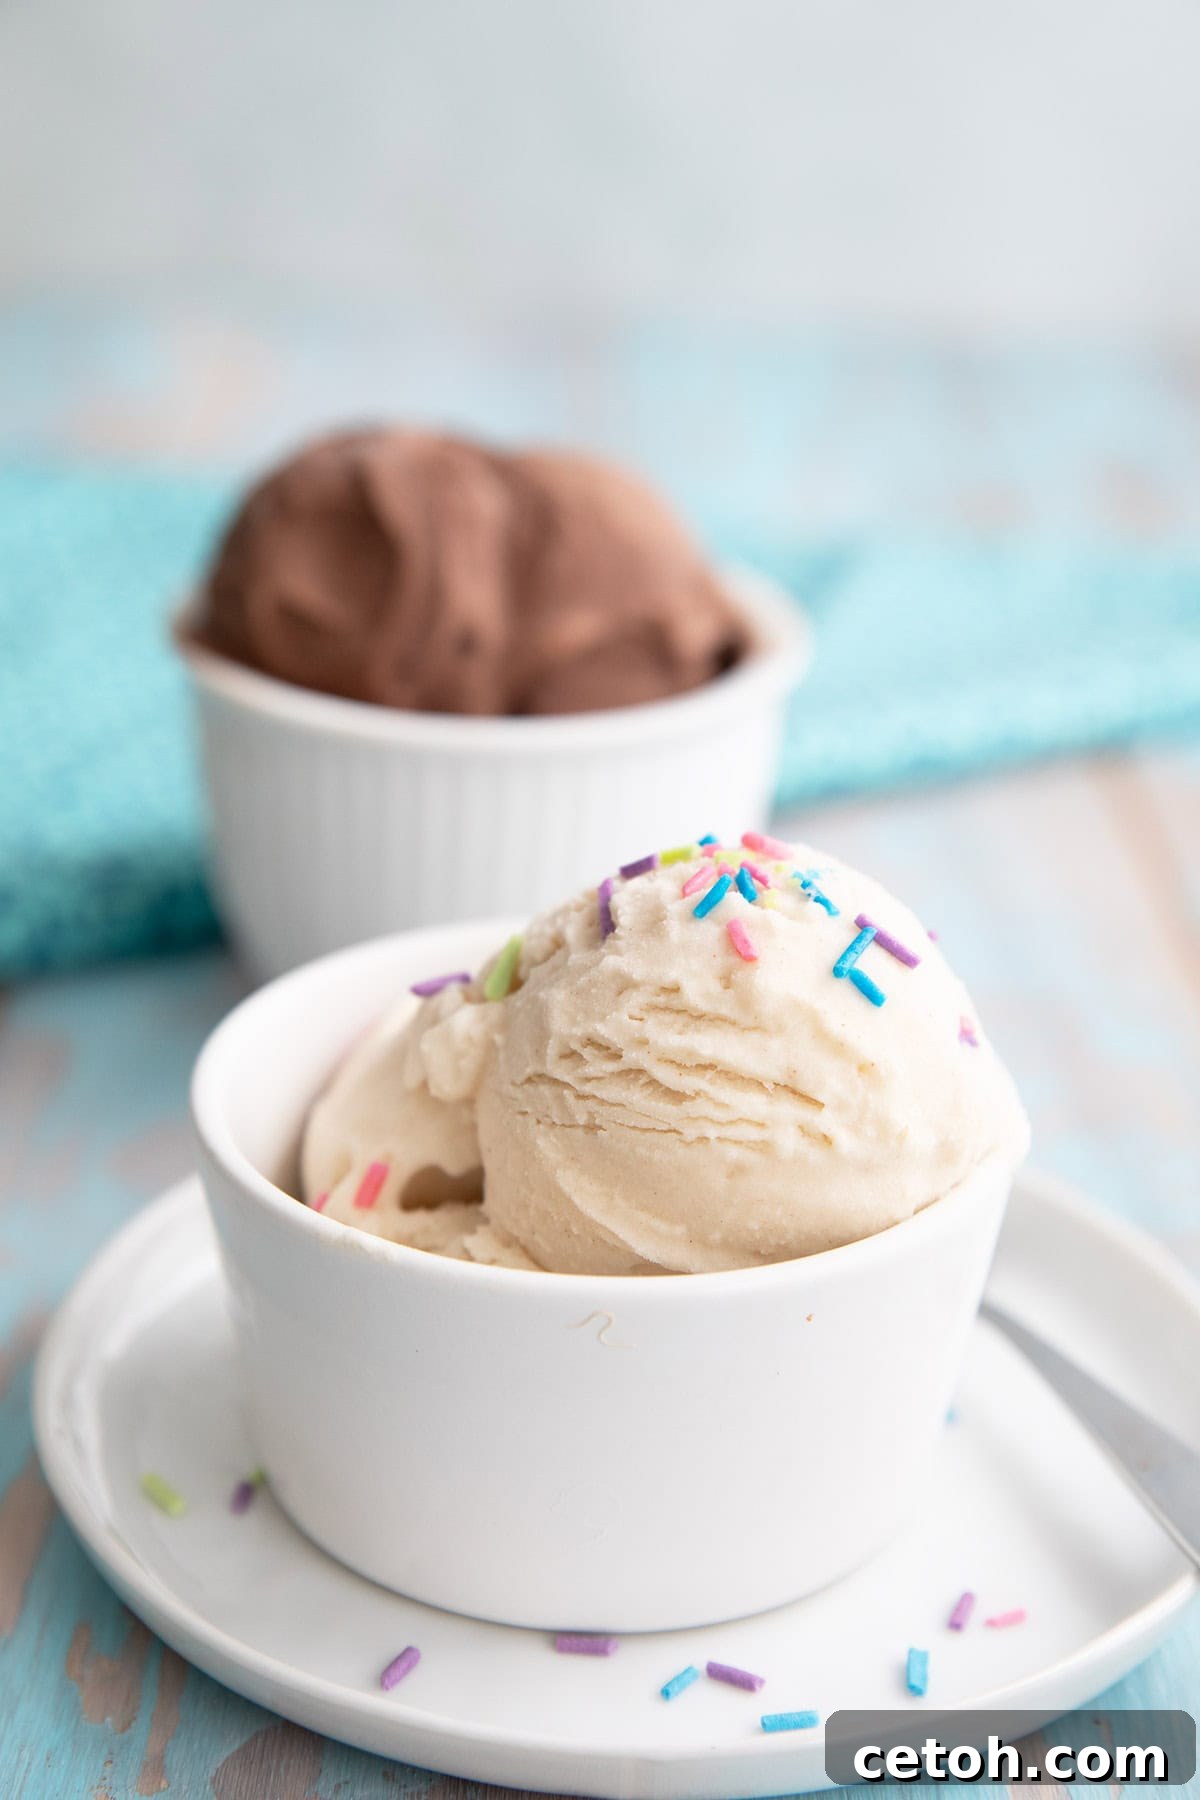
For those who appreciate the delightful indulgence of frozen treats, there’s a revolutionary way to enjoy them without compromising your health goals: Keto Protein Ice Cream. Whether you’re a long-time enthusiast of low-carb living or just beginning your journey into healthier eating, this recipe offers a perfect blend of rich flavor, creamy texture, and incredible nutritional benefits. Forget bland, watery diet foods; this is a dessert that truly satisfies. And with the rising popularity of kitchen gadgets like the Ninja Creami, crafting your own guilt-free, high-protein ice cream has never been easier or more enjoyable. Get ready to transform simple ingredients into an extraordinary treat that supports your wellness aspirations.
My passion for keto ice cream runs deep. From experimenting with new flavors to sharing the joy of these low-sugar delights, it’s a culinary adventure I wholeheartedly embrace. Given my recent focus on low-carb, high-protein recipes, it was only a matter of time before I perfected a truly exceptional Protein Ice Cream. For years, dedicated readers have requested Ninja Creami recipes, and I finally succumbed to the craze last summer when the machine was on sale. It genuinely is a game-changing piece of kitchen equipment, especially when it comes to whipping up a high-protein ice cream recipe with an unparalleled creamy texture.
If you don’t own a Ninja Creami, don’t fret! I’ve included several alternative methods below to help you achieve a delicious, protein-packed frozen dessert. And for all the Baskin Robbins enthusiasts out there, be sure to explore my keto-friendly take on Jamoca Almond Fudge – another low-carb treat you won’t want to miss.
Why This Keto Protein Ice Cream Recipe Will Become Your New Favorite!
This isn’t just another ice cream recipe; it’s a lifestyle enhancer! Here’s why you’ll absolutely adore this low-carb, high-protein ice cream:
- Made with only 4 simple, wholesome ingredients: Say goodbye to long grocery lists and complicated processes. This recipe focuses on minimal, high-quality components for maximum impact and ease.
- Exceptionally high in protein and remarkably low in carbs: Perfect for anyone following a ketogenic, low-carb, or high-protein diet. This ice cream helps with muscle recovery, satiety, and maintaining stable blood sugar levels, making it an ideal choice for a healthy lifestyle.
- Fully customizable with two irresistibly delicious base flavors: classic vanilla or rich chocolate. These versatile foundations allow for endless experimentation with mix-ins and toppings, ensuring you never get bored.
- Quick and effortless to prepare with the Ninja Creami: The process is incredibly straightforward – just blend your ingredients, freeze the mixture, and let the Creami spin its magic. Minimal hands-on time means more time enjoying your treat.
- Boasts an incredibly creamy, smooth texture with absolutely no added sugar: Unlike many homemade ice creams that can turn icy, the Ninja Creami ensures a velvety consistency that rivals premium store-bought brands, all while keeping it sugar-free.
- The perfect guilt-free summertime treat that won’t spike your blood sugar: Enjoy the refreshing coolness of ice cream even on the strictest diets. It’s a fantastic way to cool down and satisfy sweet cravings without the usual sugar crash.
- Freezer-friendly for convenient meal prep and ready-to-eat desserts: Prepare a batch in advance and have a healthy, delicious dessert waiting for you whenever a craving strikes. It’s excellent for portion control and healthy habit building.
- A fantastic way to boost your protein intake while enjoying a dessert.
Essential Ingredient Notes for Perfect Protein Ice Cream
Crafting the perfect keto protein ice cream begins with understanding each ingredient’s role. Here’s a deeper dive into the components that make this recipe shine:
- Low Carb Milk: The foundation of our ice cream. I typically opt for unsweetened almond milk or hemp milk due to their neutral flavor and low carbohydrate content. However, feel free to use any low-carb milk alternative you prefer, such as unsweetened coconut milk or macadamia milk. Ensure it’s unsweetened to control the overall sugar and carb count of your ice cream. Different milk alternatives can subtly alter the final texture and richness, so experiment to find your favorite.
- Heavy Cream: This is the secret to achieving that luxuriously rich and incredibly creamy consistency we all desire in ice cream. Heavy cream adds essential fat, which not only enhances flavor but also prevents the formation of large ice crystals, ensuring a smooth, melt-in-your-mouth experience. Don’t skip this for the best results!
- Protein Powder: The star ingredient that boosts the nutritional profile of this dessert. You can use your preferred brand and type of protein powder. For this recipe, I personally used Just Ingredients (specifically their Vanilla Bean and Chocolate flavors) for excellent results. Whey protein isolate often works well for a smooth texture, while casein can provide a slightly thicker consistency. If using an unflavored protein powder, you might need to adjust the amount of sweetener and add additional flavor extracts (like vanilla extract for vanilla ice cream). Always check the carb count of your protein powder, as some brands can contain hidden sugars or higher carb fillers.
- Sweetener: Achieving the perfect balance of sweetness and texture in keto ice cream is crucial. For this recipe, I found that a 50/50 blend of allulose and erythritol-based sweeteners yielded the ideal consistency and flavor profile. Allulose is known for its ability to create a softer, scoopable texture, while erythritol helps prevent the ice cream from becoming overly soft or melting too quickly. See the “Tips for Success” section below for a more detailed explanation on sweetener options and their impact.
- Cocoa Powder: (For the chocolate variation) To achieve a deep, robust chocolate flavor, I highly recommend using Dutch-processed cocoa powder. Dutch-processed cocoa has been treated to reduce its acidity, resulting in a darker color and a smoother, less bitter chocolate taste, which is perfect for ice cream. Natural cocoa powder can also be used, but it will result in a lighter color and a slightly more intense, acidic chocolate note.
Step-by-Step Overview: How to Make This Ninja Creami Protein Ice Cream
Making delicious protein ice cream with your Ninja Creami is incredibly simple. Follow these straightforward steps to achieve a perfectly creamy, low-carb treat:
- Blend the Ingredients: Begin by combining all your chosen ingredients (low-carb milk, heavy cream, protein powder, and sweetener, plus cocoa powder for chocolate) in a Ninja Creami pint container. For best results and ultimate smoothness, use an immersion blender directly in the container. Alternatively, you can use a standard blender to mix everything until completely smooth and then pour the mixture into the Ninja Creami container. Ensure there are no lumps of protein powder remaining.
- Freeze Thoroughly: Securely place the lid on the container. Transfer the pint to your freezer, making sure it remains upright and level to prevent uneven freezing. It is absolutely crucial for the Ninja Creami to process properly that the mixture is frozen solid for a minimum of 24 hours. Freezing for this duration ensures the mixture is consistently hard throughout, which is key for the Creami’s blade to create that signature smooth texture.
- Process in the Ninja Creami: Once fully frozen, place the pint into your Ninja Creami machine. Select the “Light Ice Cream” setting. This setting is specifically designed for mixtures with lower fat content and will yield the best creamy consistency for this protein ice cream. After the initial spin, check the texture. If it appears powdery or crumbly, select the “Re-spin” option one or more times until you achieve a perfectly smooth, scoopable ice cream.
- Adjust if Needed: If after processing and re-spinning, your ice cream is a little too soft or melty, simply return the container to the freezer for an additional hour. This extra chill time will firm it up to the ideal scooping consistency without making it too hard.
Expert Tips for Ninja Creami Protein Ice Cream Success
While making this Ninja Protein Ice Cream is wonderfully simple, a few expert tips can ensure your frozen treat turns out perfectly every time. Paying attention to these small details will make a significant difference in the final product’s texture and enjoyment.
- Avoid Overfilling the Container: If you’re blending your ingredients directly in the Ninja Creami pint containers using an immersion blender, be mindful not to overfill. Exceeding the container’s capacity can lead to splashing and mess, making cleanup more arduous than it needs to be.
- Respect the Maximum Fill Line: This is a crucial guideline for the Ninja Creami’s optimal operation. Never fill the container beyond the maximum fill line indicated on the pint. Overfilling can prevent the machine from working properly, potentially damaging it or leading to an unsatisfactory consistency because the blade needs adequate space to spin and process the mixture effectively.
- Utilize the “Light Ice Cream” Setting: For this particular mixture, the “Light Ice Cream” setting on your Ninja Creami is your best friend. I’ve experimented with the regular ice cream setting, and I consistently found myself having to re-spin the mixture multiple times to achieve a decently creamy texture. The “Light Ice Cream” setting is specifically calibrated for mixtures that are typically less dense or lower in fat, making it perfect for our protein-packed, low-carb base. It delivers a smoother, more desirable consistency on the first or second spin.
Understanding Sweetener Options for Perfect Texture
The choice of sweetener plays a surprisingly significant role in the texture of your protein ice cream. While you technically can use any preferred low-carb sweetener, achieving the ideal scoopable consistency requires a bit of nuance. Given that most protein powders already contain some form of sweetener, it’s wise to start with a smaller amount of added sweetener and adjust to your taste preferences.
Through extensive testing, I discovered that a 50/50 blend of erythritol-based sweeteners and allulose works most effectively. This combination provides the best balance between sweetness and texture:
- Allulose: This rare sugar behaves much like regular sugar in terms of texture, helping to keep the ice cream softer and less prone to freezing solid. However, using 100% allulose can make the ice cream a little too soft and prone to melting quickly, especially in warmer environments.
- Erythritol: While a great zero-calorie sweetener, erythritol has a tendency to make frozen desserts freeze very hard. If you were to use all erythritol, your protein ice cream would likely require a substantial amount of thawing time – perhaps 15 to 20 minutes on the counter – before it becomes scoopable.
By combining them, you leverage allulose’s softening properties with erythritol’s firmer set, resulting in an ice cream that’s perfectly creamy, scoopable straight from the freezer (or with minimal thawing), and delightfully sweet without the excess carbs or sugar.
No Ninja Creami? No Problem! Alternative Methods to Make Protein Ice Cream
While the Ninja Creami offers an unparalleled creamy texture, you absolutely can make this keto protein ice cream without a specialized machine. Please note that the texture may not be quite as smooth and airy as with the Creami, but it will still be a delicious and satisfying treat. Here are a few alternative options:
- Conventional Ice Cream Maker Method: If you own a traditional ice cream maker, this is your best alternative. Prepare the blended mixture as described in the main recipe. Ensure your ice cream maker bowl is thoroughly chilled (usually 12-24 hours in the freezer) before you begin. Pour the mixture into the chilled bowl and churn according to the manufacturer’s instructions. This typically takes 20-30 minutes, or until the mixture reaches a soft-serve consistency. Once churned, transfer the ice cream to an airtight container and freeze for at least 2-4 hours to allow it to firm up to a scoopable texture. This method often yields a very good creamy texture.
- Ice Cube + High-Powered Blender Method: This is a fantastic option for making small, individual servings on demand. First, pour your blended ice cream mixture into ice cube trays and freeze until solid (at least 4-6 hours, or overnight). Once frozen, pop out a few ice cubes (enough for one serving) and place them into a high-powered blender or food processor. Add a tiny splash of low-carb milk (start with 1-2 tablespoons) to help with blending. Process until completely smooth and creamy, scraping down the sides as needed. This method can create a remarkably smooth texture similar to a soft-serve, and it’s excellent for customization right before serving.
- Blender + Freezer (No-Churn) Method: This is the most labor-intensive option and will likely result in the least creamy texture compared to the other methods, but it’s still viable. Blend all ingredients until perfectly smooth. Pour the mixture into a shallow, freezer-safe container (a loaf pan works well). Place it in the freezer. To minimize ice crystal formation and achieve the best possible texture, you will need to stir the mixture every 30-60 minutes for the first 3-4 hours of freezing. Use a fork or whisk to break up any ice crystals and re-incorporate the softer parts. Continue this process until the ice cream is firm enough to scoop. This method requires diligence but can still produce a tasty frozen dessert.
No matter which method you choose, you’re on your way to enjoying a delicious, homemade protein-packed treat!
Frequently Asked Questions About Keto Protein Ice Cream
Yes, ice cream that features a higher proportion of protein per serving can indeed be a much better option for you compared to traditional, sugar-laden varieties. Protein is vital for muscle repair, satiety, and maintaining stable energy levels, making this a smart dessert choice. However, it’s always important to consider the other ingredients and overall nutritional components. This specific keto protein ice cream recipe is meticulously crafted to contain approximately 15 grams of protein and only 2-3.7 grams of net carbs per serving (depending on flavor), making it an ideal and delicious fit for healthy low-carb and ketogenic diets. It allows you to indulge without derailing your dietary goals.
The carbohydrate count is impressively low, especially for a dessert! The vanilla protein ice cream variation of this recipe contains approximately 2.1 grams of net carbs per serving. If you opt for the rich chocolate protein ice cream, it has about 3.7 grams of net carbs per serving. These low carb counts make it an excellent choice for managing blood sugar and adhering to a low-carb or keto lifestyle.
Once your protein ice cream has been prepared and has set to its desired consistency, it should be stored in an airtight container in the freezer. When stored properly, it will maintain its quality and deliciousness for up to 3 months. To prevent freezer burn and preserve the best texture, ensure the container is tightly sealed, perhaps with a layer of plastic wrap pressed directly onto the surface of the ice cream before sealing the lid.
Explore More High Protein Keto Recipes
If you loved this protein ice cream, you’ll definitely want to check out these other delicious and healthy high-protein, low-carb recipes:
- Fluffy Cottage Cheese Protein Pancakes: A savory and protein-rich breakfast option that’s quick and easy to make.
- High Protein Keto Frosty: Get that fast-food treat experience without the guilt, packed with protein!
- Decadent Keto Protein Mousse: An airy and rich dessert, perfect for satisfying chocolate cravings while boosting protein intake.
- Easy Protein Pizza: Enjoy your favorite comfort food with a high-protein, low-carb twist.
- Refreshing Key Lime Protein Popsicles: A tangy, cool, and protein-packed snack for warmer days.
Ninja Creami Protein Ice Cream Recipe
4
servings
10 mins
10 mins
Equipment
Ingredients
Vanilla Ice Cream Base
-
3/4 cup
(177.44 ml)
unsweetened almond or hemp milk -
2/3 cup
(157.73 ml)
heavy cream -
1/2 cup
(54 g)
vanilla protein powder -
1/3 cup
(63.33 g)
low-carb sweetener blend, See Tips for Success for optimal consistency
Chocolate Ice Cream Base
-
3/4 cup
(177.44 ml)
unsweetened almond or hemp milk -
2/3 cup
(157.73 ml)
heavy cream -
1/2 cup
(54 g)
chocolate protein powder -
1/3 cup
(63.33 g)
low-carb sweetener blend -
2 tbsp
(10.14 g)
Dutch process cocoa powder
Instructions
-
Combine Ingredients: Pour all of your chosen ice cream ingredients (milk, heavy cream, protein powder, and sweetener; plus cocoa powder for chocolate) into a Ninja Creami pint container. Use an immersion blender to thoroughly combine and blend until the mixture is perfectly smooth with no lumps. Alternatively, you can mix the ingredients in a regular blender and then pour into the Creami container.
-
Freeze Solid: Securely place the lid on the Creami container. Transfer the container to your freezer, ensuring it remains upright and level to prevent any uneven freezing. It is absolutely essential to freeze the mixture for a minimum of 24 hours to ensure it is completely solid throughout. This firm freeze is crucial for the Ninja Creami to achieve its signature smooth texture.
-
Process in Creami: Once thoroughly frozen, remove the pint from the freezer and place it into your Ninja Creami machine. Select the “Light Ice Cream” setting. After the initial processing, check the consistency. If it appears crumbly or powdery, select the “Re-spin” option one or more times until you achieve a perfectly smooth, creamy, and scoopable consistency.
-
Serve or Re-freeze: If the ice cream is a little too soft or melty after processing, simply return the container to the freezer for approximately 1 hour. This brief chill time will firm it up to the ideal serving consistency. Scoop and enjoy your delicious homemade protein ice cream!
Notes
Chocolate Ice Cream Nutrition (per serving): 203 calories; Fat: 15.6g; Carbohydrate: 3.7g; Protein: 15g; Fiber: 0.8g.
Nutritional values are approximate and can vary based on specific ingredients and brands used.
Nutrition Information
|
Calories: 197kcal
|
Carbohydrates: 2.1g
|
Protein: 15g
|
Total Fat: 15.3g
|
Saturated Fat: 9.6g
|
Fiber: 0.4g
I’d love to know your thoughts, leave your rating below!