
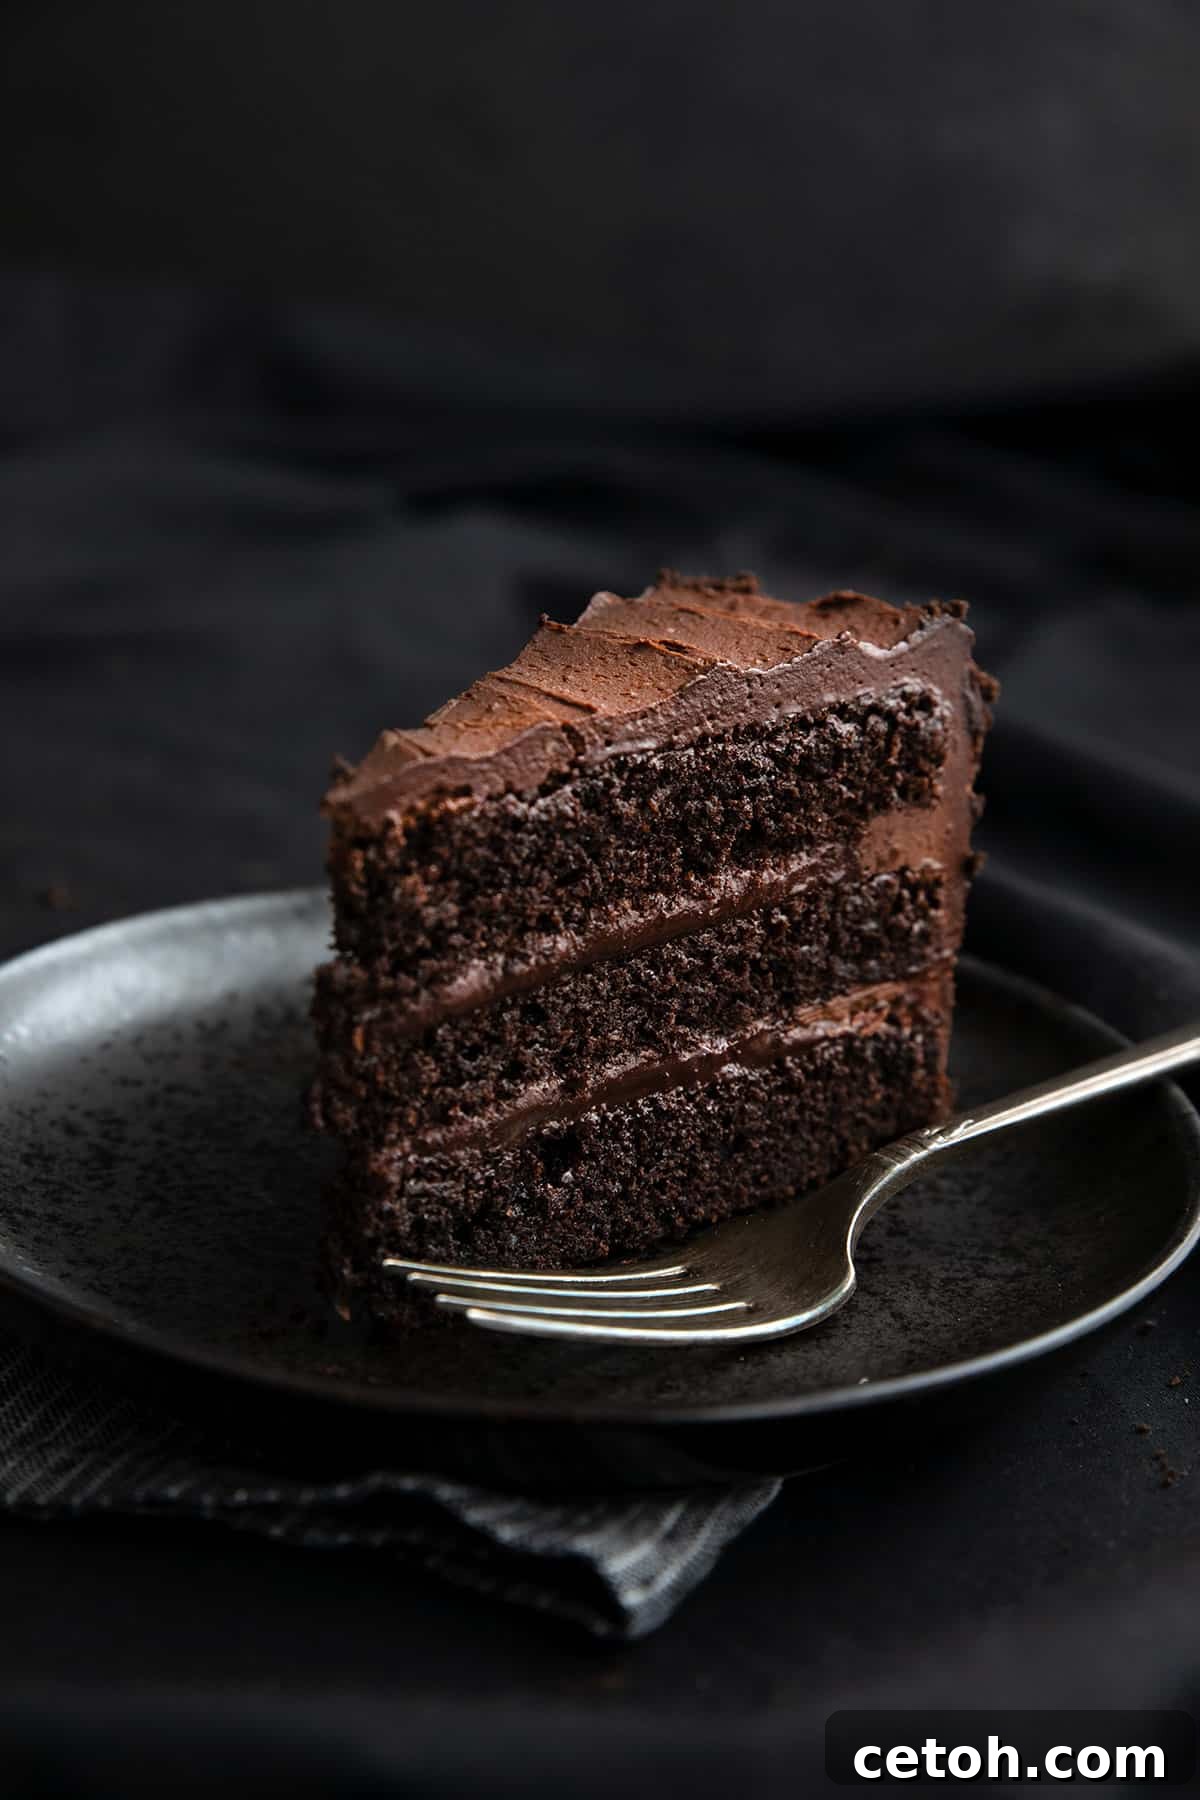
Prepare to indulge in the most extraordinarily rich and decadent Keto Chocolate Blackout Cake you will ever encounter. This show-stopping, low-carb marvel takes its inspiration from the legendary Brooklyn Blackout Cake, a dessert famous for its intense chocolate flavor and impressive presentation. Crafted for special occasions, this sugar-free masterpiece combines moist chocolate cake layers, a luxurious creamy chocolate pudding filling, and a velvety smooth chocolate frosting, creating an experience that is truly beyond compare.
Some moments in life call for something truly spectacular – a dessert that not only captivates the eye but also promises an unforgettable taste sensation. Imagine a confection so deeply, darkly chocolatey, so moist and rich, that it’s hard to believe it could possibly be low carb or keto-friendly. This remarkable creation, often dubbed the “Keto Chocolate Blackout Cake,” is precisely that dessert. It’s an absolute game-changer, arguably the most amazing chocolate cake you’ll ever bake, keto or not.
I originally developed this stunning sugar-free dessert to celebrate a significant milestone: my 50th birthday. After all, reaching half a century on this planet certainly deserves a celebration adorned with serious chocolatey goodness! From the very first bite, I was in absolute heaven. This cake played no small part in making that birthday feel incredibly special and truly memorable.
Why This Keto Chocolate Blackout Cake is a Must-Try
This extraordinary cake is a thoughtful low-carb adaptation of the legendary Brooklyn Blackout Cake, a recipe made famous by Ebinger’s bakery in Brooklyn during World War II. While crafting a keto-friendly version, I took several creative liberties to ensure it met stringent low-carb requirements without sacrificing an ounce of flavor or texture. The result is a breathtaking dessert that delivers on all fronts.
This magnificent cake is an ingenious amalgamation of three of my most popular keto dessert recipes, expertly combined to create a harmonious triple-chocolate experience. The foundation consists of tender, rich cake layers inspired by my Keto Devil’s Food Cake. These perfectly moist layers are then generously filled with a thick, luscious Keto Chocolate Pudding. Finally, the entire masterpiece is enveloped in a super creamy, intensely flavorful Keto Chocolate Frosting. It truly is triple the chocolate in one glorious, low-carb creation!
I must be transparent: this is not a cake that comes together in a flash. While it doesn’t demand advanced baking skills, it does require a bit of time and patience to prepare all the individual components and assemble them meticulously. Think of it as a delightful baking project for a leisurely weekend or a special occasion. Block out some dedicated time, put on your favorite music, and savor the creative process. I can unequivocally promise you that the stunning results, the sheer joy of each chocolate-laden bite, are absolutely worth every moment of effort.
Essential Ingredients for Your Keto Chocolate Blackout Cake
Crafting this incredible keto chocolate blackout cake involves carefully selected ingredients that ensure a perfect low-carb, sugar-free profile without compromising on taste or texture. Here’s a closer look at the key components and why they are important:
Please note: This post may contain Amazon or other affiliate links. As an Amazon Associate, I earn from qualifying purchases, which helps support this site at no extra cost to you.
- Almond Flour: The primary flour for the cake layers is fine-ground almond flour. It provides a tender crumb and a rich flavor that complements the chocolate beautifully. If you prefer to use coconut flour, you can adapt the batter from my Keto Chocolate Cupcakes recipe. Be mindful of baking times, as coconut flour absorbs liquids differently.
- Sour Cream: A secret weapon for incredible moisture and tenderness in the cake layers. Sour cream reacts with baking soda to create a beautifully soft and rich texture that is essential for a truly decadent chocolate cake.
- Dutch Process Cocoa Powder: For that deep, dark, and intense chocolate flavor that gives the “blackout” its name, Dutch process cocoa powder is a must. Its alkalized nature reduces acidity, leading to a smoother, less bitter chocolate taste and a darker color. For an even more profound, almost black hue, consider substituting a tablespoon or so of black cocoa powder into both the cake and frosting.
- Protein Powder: Adding whey protein powder or egg white protein powder to the cake batter is crucial for structure. In low-carb baking, where gluten is absent, protein powder helps the cake layers rise properly and maintain their shape, preventing crumbling.
- Unsweetened Chocolate: For the frosting, high-quality unsweetened chocolate is key. It provides an unparalleled depth of chocolate flavor and contributes to the creamy, rich mouthfeel of the buttercream.
- Keto Sweeteners: I primarily use Swerve Sweetener (an erythritol blend) in all three components: the cake, pudding, and frosting. For the pudding, I also incorporate a little allulose to prevent re-crystallization and ensure a smooth, velvety texture. Refer to the “Expert Tips” section for alternative sweetener options and considerations.
- Keto Thickeners: The rich chocolate pudding requires a small amount of glucomannan or xanthan gum to achieve its desired thick, creamy consistency. These low-carb thickeners are essential for creating a stable and luxurious pudding filling.
Crafting Your Keto Chocolate Blackout Cake: A Step-by-Step Guide
Creating this magnificent keto chocolate blackout cake is a rewarding process, best approached with a little planning. Breaking down the steps makes it entirely manageable, even for an ambitious home baker. Here’s how to bring this triple-chocolate dream to life:
1. Prepare the Decadent Chocolate Pudding
The velvety chocolate pudding filling is a cornerstone of this cake. I’ve adapted a scaled-down version of my popular sugar-free chocolate pudding recipe, using about two-thirds of the original quantity. It’s crucial to make this component first, as it requires ample time to cool and thicken properly in the refrigerator. For maximum convenience and to streamline your baking day, consider preparing the pudding a full day in advance. This allows it to set perfectly and reduces stress on assembly day.
2. Bake the Moist Cake Layers
For the cake layers, we utilize the full recipe from my Keto Devil’s Food Cake, focusing solely on the cake itself, excluding its frosting. Detailed instructions for baking these perfectly moist layers can be found in that specific recipe. Once baked, it is absolutely vital that the cake layers cool completely before you even attempt to slice them. Warm cake is prone to tearing and crumbling, which we want to avoid for neat, even layers. A pro tip: if you can, bake the cake layers a day or two in advance and refrigerate them. A little time in the fridge helps them firm up considerably, making horizontal slicing much easier and cleaner. Remember to wrap them tightly in plastic wrap to prevent them from drying out.
3. Craft the Velvety Chocolate Frosting
The frosting for this blackout cake is a rich, fudgy buttercream, a modified and enhanced version of my staple Keto Chocolate Frosting. I’ve increased the quantities slightly and added extra unsweetened chocolate and cocoa powder to achieve an unparalleled depth of flavor and a wonderfully dense, spreadable consistency. Due to these specific modifications, the full instructions for this decadent frosting are provided in the recipe card below, ensuring you create the perfect accompaniment for your cake.
4. Assemble the Triple-Chocolate Masterpiece
Now comes the most exciting part: bringing all the delicious components together to create your show-stopping Keto Chocolate Blackout Cake!
- The first step is to carefully slice each of your two cooled cake layers horizontally through the center. This will yield four thinner, individual cake layers. Use a long serrated knife and take your time to ensure even cuts, rotating the cake as you go.
- Place one of these newly sliced cake layers onto your chosen cake platter or serving stand. Fill a piping bag with some of your prepared chocolate frosting (a large round tip or simply snipping the end off the bag works well). Pipe a generous ring of frosting around the outer edge of the cake layer. This ring acts as a protective barrier, preventing the creamy pudding filling from oozing out.
- Carefully spread half of the rich chocolate pudding evenly within the frosting ring on the first cake layer.
- Gently place a second cake layer on top of the pudding. Repeat the process: pipe another ring of frosting around the edge, then spread the remaining half of the chocolate pudding inside. Crown this with a third cake layer.
- Now, generously spread the remaining chocolate frosting over the top and sides of the entire cake, creating a smooth, elegant finish. If you desire a classic swirling design on top, place the cake on a turntable. Hold the back of a spoon to the very center of the frosted top, and as you slowly turn the cake, gradually move the spoon outwards in a spiral motion.
- For the signature blackout cake crumb coating, take the fourth, reserved cake layer and crumble it finely into a bowl. Carefully press about half of these chocolate crumbs onto the frosted sides of the cake. This adds a beautiful texture and enhances the visual appeal.
- Once assembled, refrigerate the entire cake for at least an hour. This crucial step allows all the layers and fillings to firm up, making for cleaner, more stable slices and a more cohesive texture.
Expert Tips for Keto Chocolate Blackout Cake Success
Achieving perfection with this keto chocolate blackout cake is within reach with a few expert tips:
- Plan Ahead: I cannot stress enough the benefits of breaking down the preparation process over one or even two days. The chocolate pudding can be made a full day in advance, allowing it ample time to chill and thicken to the ideal consistency. Similarly, the cake layers can be baked one or two days ahead of time. In fact, cold cake layers are significantly easier to slice horizontally, resulting in neater, more even divisions. Always remember to wrap baked cake layers tightly in plastic wrap before refrigerating to prevent them from drying out.
- Perfect Pan Preparation: To ensure your cake layers release effortlessly from their pans, always line the bottoms of your baking pans with parchment paper. Even with a non-stick pan, this extra step provides a foolproof release. You should still lightly grease the pan before adding the parchment, and then grease the parchment paper itself for double protection.
- Sweetener Nuances: While Swerve Sweetener is my go-to for its reliable performance, you can certainly experiment with other keto-friendly sweeteners in different components of this cake. However, be aware of a few key characteristics:
- Allulose: If you use allulose as the sole sweetener in your cake layers, you might notice that the cakes brown faster on the outside, potentially appearing a little burnt. Keep a close eye on them during baking. When used in the pudding, allulose can also result in a softer consistency and may take longer to firm up compared to erythritol blends.
- Frosting Consistency: For the frosting, a powdered sweetener is essential to achieve the right smooth structure and consistency. Sweeteners like allulose or BochaSweet may yield a softer frosting. When adding heavy cream to the frosting, do so slowly, a tablespoon at a time, until you reach a perfectly spreadable consistency that is rich and stable, not too runny or “goopy.”
- Quality Ingredients Matter: Using good quality cocoa powder, unsweetened chocolate, and fresh dairy products will significantly impact the final flavor and texture of your cake. Invest in ingredients you trust for the best results.
- Chilling is Key: Don’t skip the final chilling step after assembling the cake. This allows the pudding to set, the frosting to firm, and the layers to meld together beautifully, making for a much cleaner slice and a more enjoyable eating experience.
Frequently Asked Questions About Keto Chocolate Blackout Cake
Can you eat cake on a low carb diet?
Absolutely! Many people are pleasantly surprised and delighted to discover that they can indeed enjoy delicious cake while following a low-carb or ketogenic diet. Modern keto baking utilizes innovative alternative flours like almond flour and coconut flour, along with sugar substitutes, to create fantastic desserts that are both satisfying and diet-compliant. If you’re new to keto baking, I recommend starting with simpler recipes such as an Almond Flour Cake or an easy Keto Mug Cake to familiarize yourself with these unique ingredients and their properties.
How many carbs are in a keto chocolate cake?
This luscious keto chocolate cake recipe is designed to serve 16 people, making it perfect for sharing. Each generous slice contains approximately 8.3g of total carbohydrates and a substantial 4.1g of dietary fiber. Therefore, if you prefer to count net carbs (total carbs minus fiber), each indulgent slice boasts only 4.2g of net carbohydrates, making it an excellent choice for those managing their carb intake.
Why is it called Blackout Cake?
The iconic Blackout Cake gets its evocative name from a fascinating piece of history. It was famously created by Ebinger’s Bakery in Brooklyn during World War II. At that time, mandatory blackouts were imposed across the city to protect the nearby Brooklyn Navy Yard from potential enemy air raids. The cake itself is characterized by its multiple layers of intensely dark chocolate cake, rich chocolate pudding filling, and a generous coating of deep, dark chocolate frosting. The “blackout” name perfectly captures both its historical context and its profound, dark chocolate nature.
How do I store leftover Keto Chocolate Blackout Cake?
Due to its creamy pudding filling and frosting, this cake should be stored in an airtight container in the refrigerator. It will stay fresh and delicious for 4-5 days. For longer storage, slices can be individually wrapped and frozen for up to 1-2 months. Thaw in the refrigerator before serving.
Can I make this cake ahead of time for a party?
Absolutely! This cake is an excellent choice for make-ahead preparation. As detailed in our expert tips, you can prepare the pudding and bake the cake layers a day or two in advance. Store the pudding covered in the fridge and the cooled cake layers tightly wrapped. Assemble the cake a day before your event, allowing it to chill overnight, which often enhances the flavors and texture even further.
Explore More Decadent Keto Cake Recipes
If you’ve fallen in love with this Keto Chocolate Blackout Cake, you’ll be thrilled to discover a world of other low-carb, sugar-free cake possibilities. From simple everyday treats to elaborate celebration cakes, the keto diet doesn’t mean sacrificing your favorite desserts. Explore some of my other popular creations:
- Keto Devil’s Food Cake
- Keto Chocolate Coconut Flour Cupcakes
- Classic Almond Flour Cake
- Keto Snickerdoodle Mug Cake (for a quick single serving!)
- Keto Carrot Cake
Keto Chocolate Blackout Cake Recipe
This is hands-down the most decadent keto chocolate cake you will ever make. Filled with creamy chocolate pudding, this low carb cake recipe takes inspiration from the famous Brooklyn Blackout Cake. Definitely worthy of a special occasion!
Servings: 16 servings
Prep Time: 1 hour
Cook Time: 1 hour
Total Time: 2 hours
Equipment
- 2 8-inch round baking pans
Ingredients
Pudding
- 1/2 cup (118.29 ml) heavy whipping cream
- 1/2 cup (118.29 ml) almond milk (or another low carb milk)
- 3 tbsp Swerve Granular (or other granular sweetener)
- 2 tbsp allulose
- 2 large egg yolks
- 1/4 tsp (0.25 tsp) glucomannan (or xanthan gum)
- 1/4 cup (21.5 g) cocoa powder
- 2 tbsp (2.03 tbsp) butter, cut into two pieces
- 1/2 tsp (0.5 tsp) vanilla extract
Cake
- 1 recipe Keto Devil’s Food Cake (just the cake, without frosting)
Frosting
- 3 ounces (85.05 g) unsweetened chocolate, chopped
- 1/2 cup (113 g) butter, softened
- 4 ounces (113.4 g) cream cheese, softened
- 2/3 cup (157.73 ml) Swerve Confectioners (or other powdered sweetener)
- 3 tbsp cocoa powder
- 1 tsp vanilla extract
- 2/3 cup (157.73 ml) heavy whipping cream
Instructions
Pudding
- In a medium saucepan over medium heat, combine the cream, milk, and sweetener. Bring to a simmer, stirring occasionally.
- In a medium bowl, whisk the egg yolks until smooth. Slowly add ½ cup of the hot cream mixture into the egg yolks, whisking continuously to temper them.
- Slowly whisk the tempered egg yolks back into the saucepan of hot cream. Reduce heat to medium low and sprinkle with xanthan gum, whisking continuously until combined.
- Stir in the cocoa powder and cook until the mixture thickens, about 3 to 4 minutes, whisking continuously. Remove from heat and stir in the butter and vanilla extract until smooth and fully incorporated.
- Pour the pudding into a clean bowl, cover the surface directly with plastic wrap to prevent a skin from forming, and refrigerate for 2 to 3 hours, or until thoroughly chilled and firm.
Cake
- Prepare the cake layers exactly according to the instructions provided in the Keto Devil’s Food Cake recipe.
- Allow the baked cake layers to cool completely on a wire rack. Once fully cooled, carefully slice each layer horizontally through the middle to create two thinner layers. (Tip: If you prepare the cake layers several hours or a day in advance and chill them in the refrigerator, they will firm up and be significantly easier to slice neatly. Ensure they are tightly wrapped in plastic film to prevent drying out.)
Frosting
- Place the chopped unsweetened chocolate in a microwave-safe bowl. Melt it in 30-second intervals, stirring well after each interval until it is completely smooth. Alternatively, you can melt the chocolate and softened butter together in a heat-proof bowl set over a pan of barely simmering water (double boiler method). Set the melted chocolate aside to cool to lukewarm.
- In a large mixing bowl, using an electric mixer, beat the softened butter and cream cheese together until the mixture is smooth and creamy.
- Gradually beat in the powdered sweetener and cocoa powder until they are well combined and the mixture is fluffy.
- Add the cooled melted chocolate and vanilla extract to the mixture and beat until thoroughly smooth. At this point, the frosting will be quite thick. Gradually add the heavy whipping cream, a few tablespoons at a time, beating after each addition, until a perfectly spreadable, rich buttercream consistency is achieved.
To Assemble
- Place one sliced cake layer onto your desired cake platter or serving stand. Fill a piping bag with a portion of the chocolate frosting. Pipe a continuous ring of chocolate frosting around the outermost edge of this cake layer. This creates a protective dam to contain the pudding filling. Spread half of the prepared chocolate pudding evenly inside this frosting ring.
- Carefully place a second cake layer on top of the pudding. Repeat the process: pipe another ring of frosting around the edge, and then spread the remaining pudding inside. Top with the third cake layer.
- Using an offset spatula or knife, spread the remaining chocolate frosting evenly over the top and sides of the entire cake. For an elegant swirl design on the top, place the cake on a turntable. Hold a clean spoon gently to the center of the frosted top and slowly rotate the cake, gradually moving the spoon outwards to create a beautiful spiral pattern.
- Take the fourth, unused cake layer and crumble it finely into a bowl. Carefully press a portion (you will likely use about half) of these chocolate crumbs onto the frosted sides of the cake. This gives the cake its signature “blackout” appearance and adds textural contrast.
- Refrigerate the assembled cake for at least one hour (or longer) to allow all the layers to firm up and meld together before attempting to slice and serve.
Nutrition Information
Serving: 1 slice (1/16th of cake) | Calories: 357kcal | Carbohydrates: 8.3g | Protein: 9.4g | Fat: 31.3g | Fiber: 4.1g