
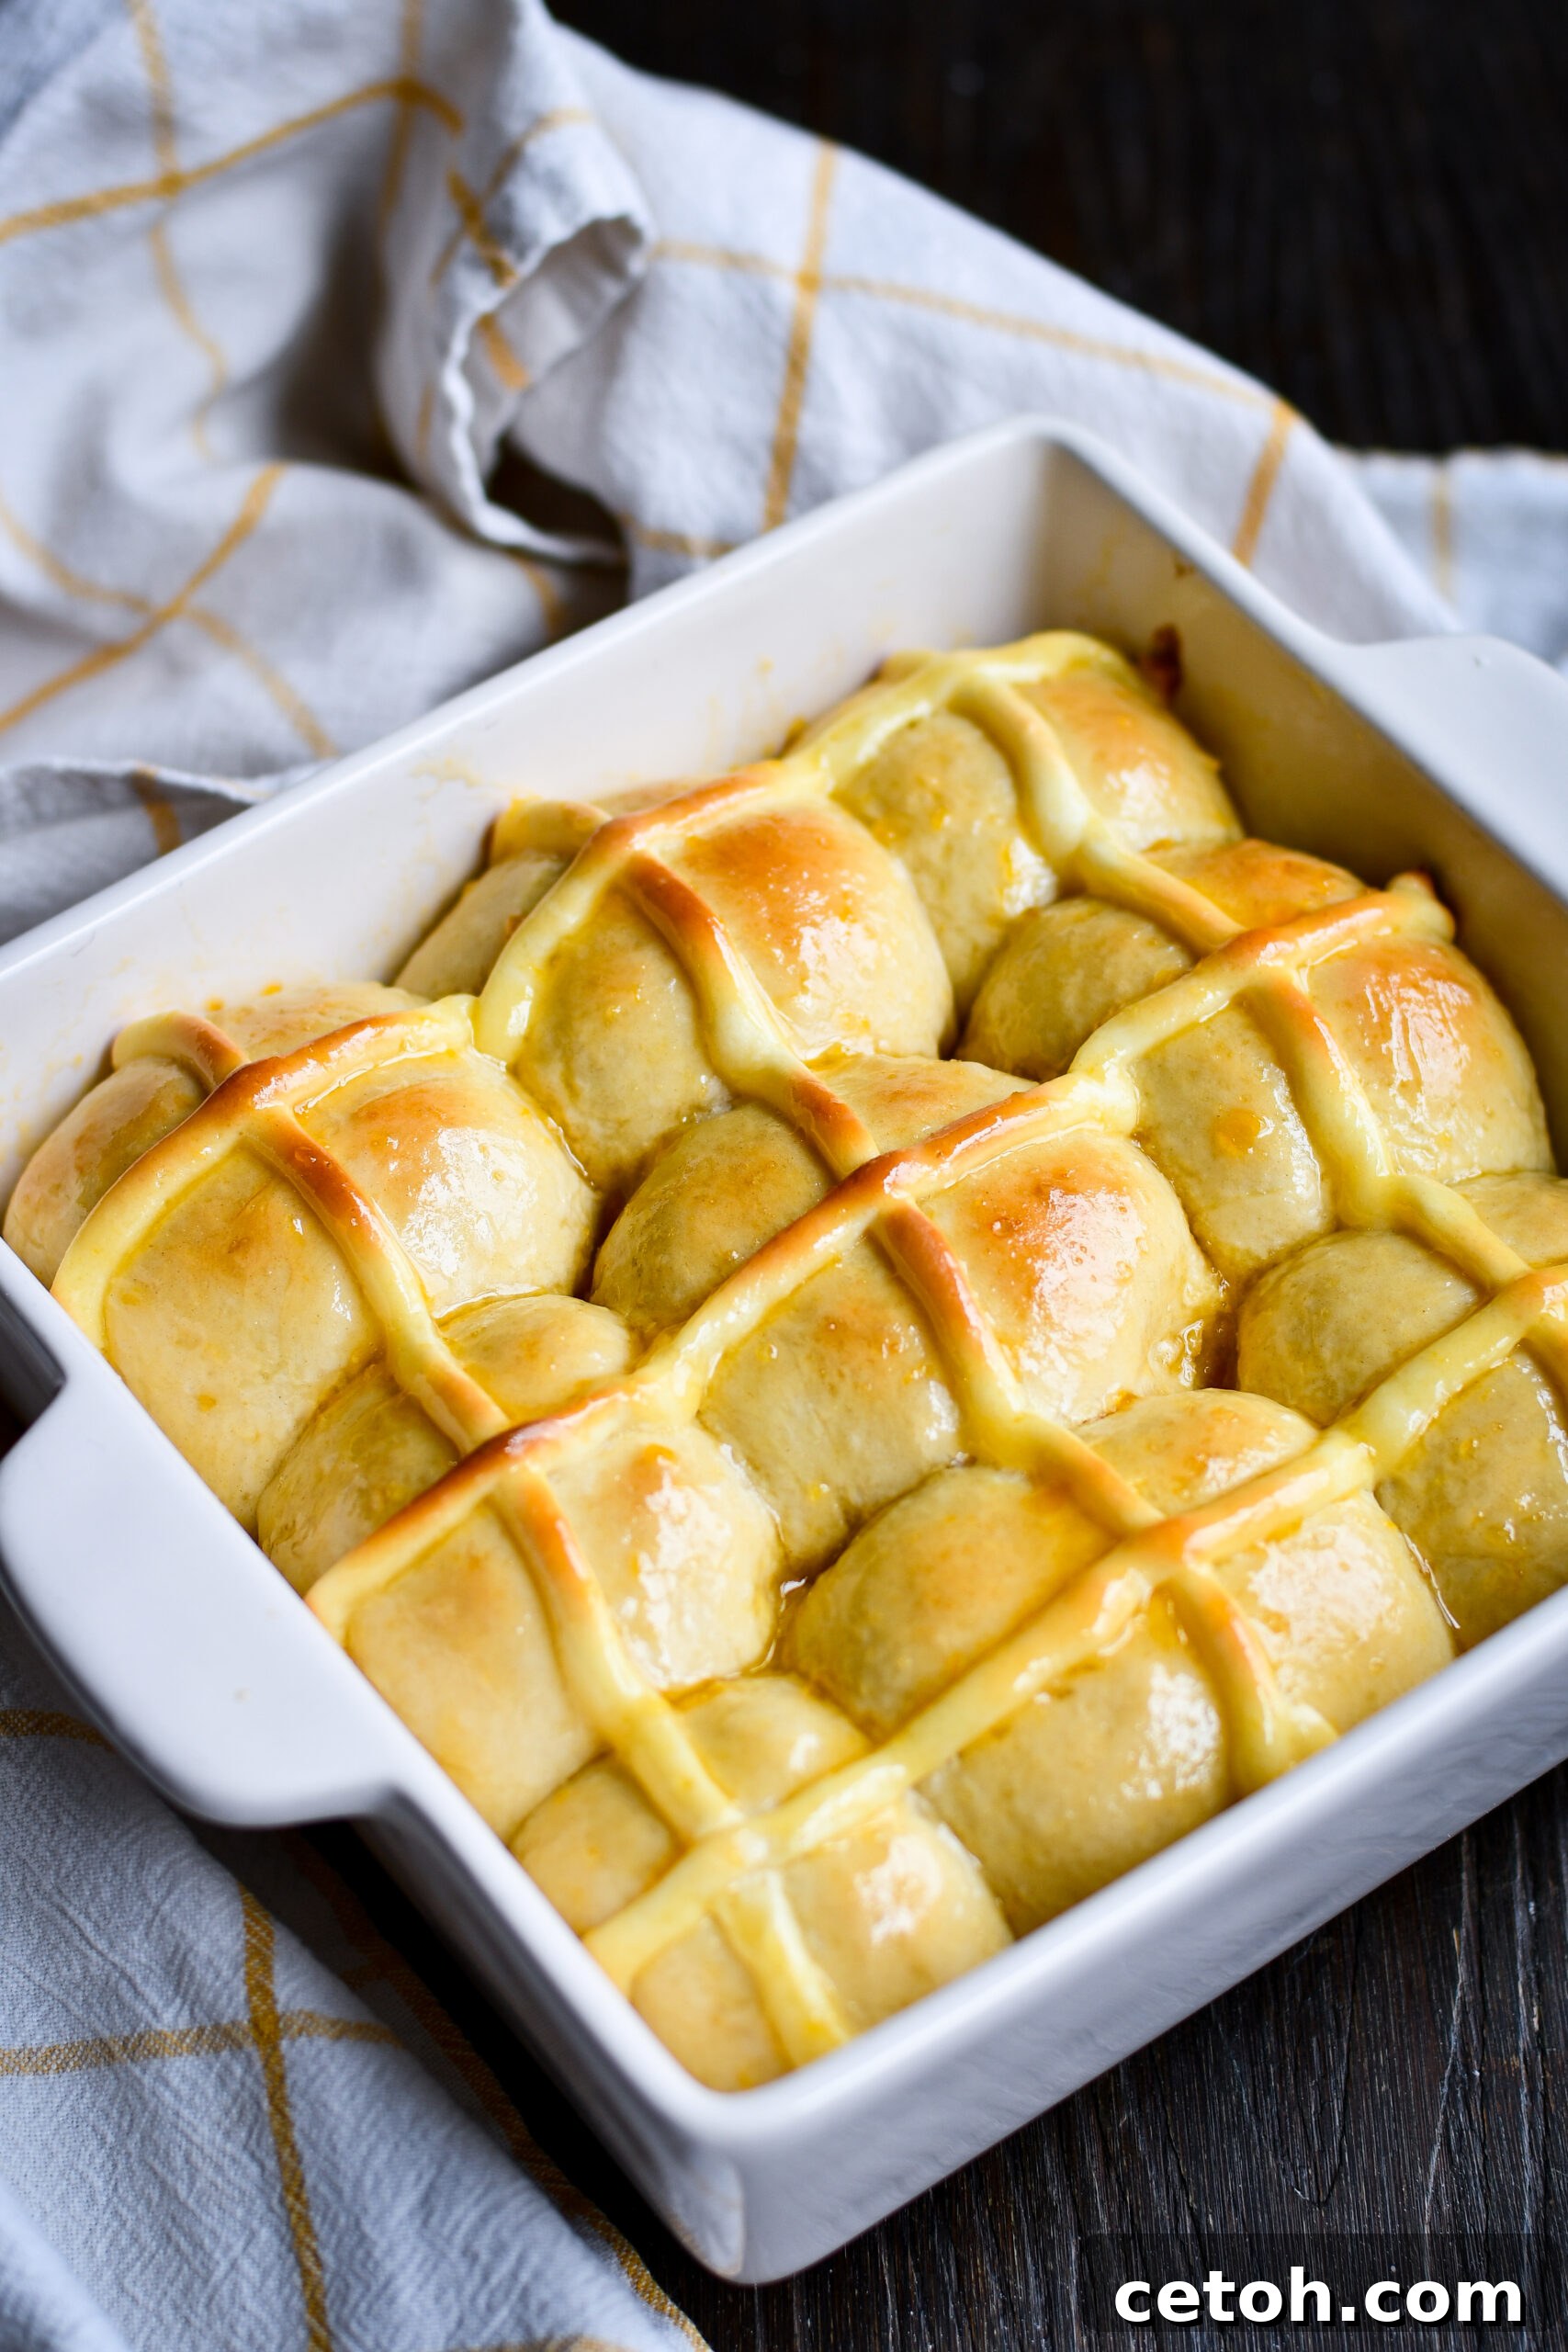
Easy Homemade Hot Cross Buns Recipe: A Raisin-Free Delight with Cheesecake Cross
There’s nothing quite like the aroma of freshly baked bread filling your kitchen, and these Easy Homemade Hot Cross Buns are no exception. Soft, beautifully spiced with warming cinnamon and nutmeg, and irresistibly sweet, they are an absolute must-bake, especially for Easter celebrations. But this isn’t just any hot cross bun recipe. We’ve taken a beloved classic and elevated it, crafting a version that caters to every palate – particularly those who aren’t fans of traditional dried fruits.
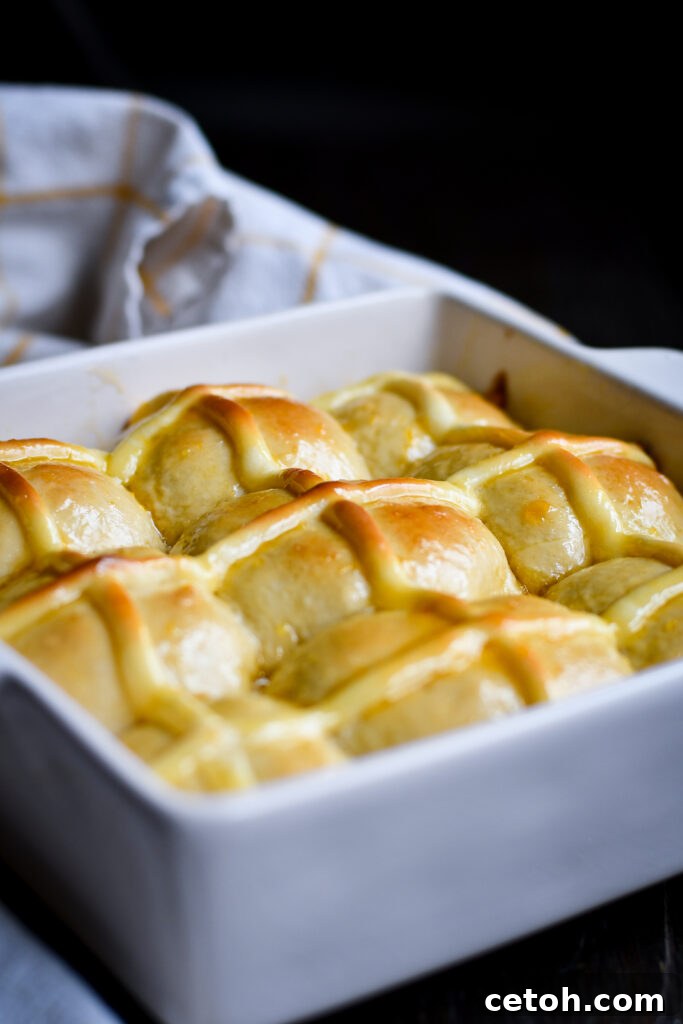
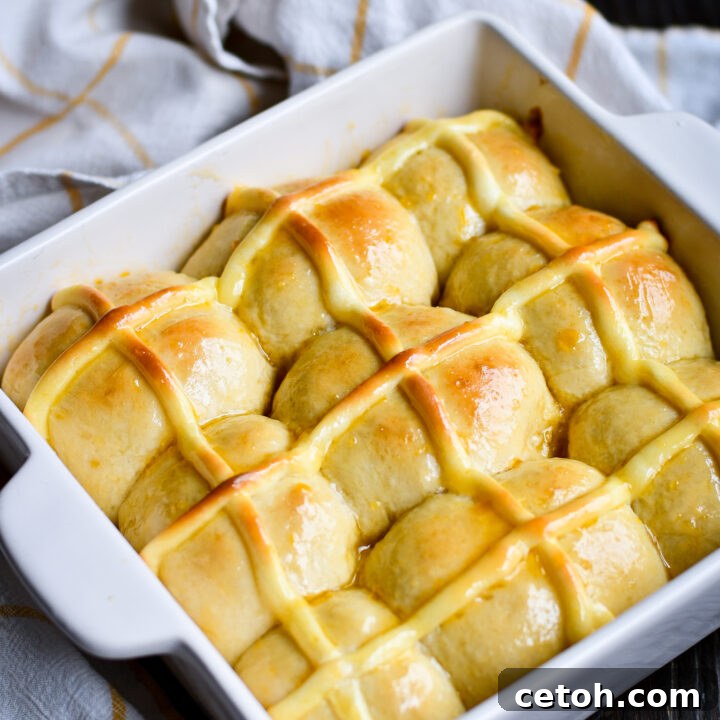
Our unique recipe focuses on the pure, comforting flavor of a cinnamon-infused dough. We skip the raisins and other dried fruits entirely, ensuring that every bite is a celebration of soft bread and fragrant spice. The magic doesn’t stop there. Instead of a simple flour-and-water cross, these buns feature a luscious, cheesecake-like pastry cream cross that bakes right into the rolls, adding a rich, creamy contrast that makes them truly special. A final flourish of sweet, glossy apricot glaze provides the perfect touch of shine and an extra layer of sweetness, making these buns a showstopper for any occasion.
Whether you’re hosting an Easter brunch, looking for a cozy homemade treat to enjoy with your morning coffee, or simply want to try a new take on a traditional favorite, these hot cross buns without raisins are guaranteed to impress. Get ready to bake a batch of pure comfort and joy!
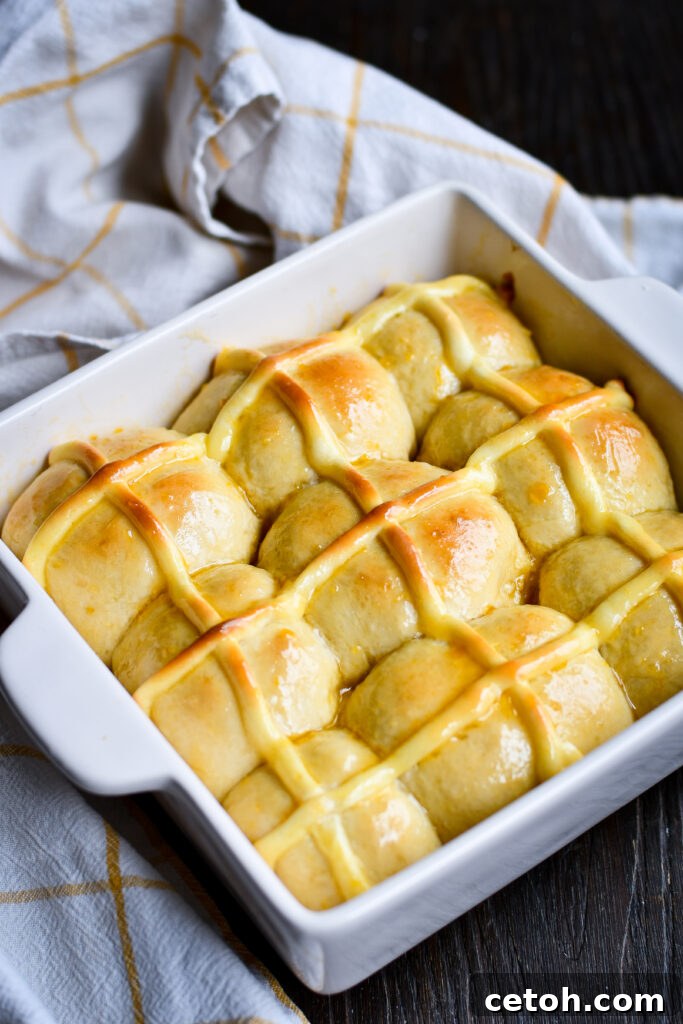
Easy Hot Cross Buns (No Raisins!) | Experience the ultimate Easter treat with these soft & fluffy homemade hot cross buns, featuring warm cinnamon, a delightful apricot glaze, and a creamy cheesecake-style pastry cream cross baked right in. Perfect for any sweet craving!
Why You’ll Love This Raisin-Free Hot Cross Buns Recipe
- No Raisins! If dried fruit isn’t your thing, this recipe is designed specifically for you, allowing the warm spice flavor to truly shine without any unwanted chewiness.
- Cheesecake-Style Cross: A creamy, rich cross made with cream cheese and sugar adds an unexpected layer of indulgence and sets these buns apart from traditional versions.
- Incredibly Soft & Fluffy: Crafted with careful attention to dough hydration and kneading, these buns boast an irresistibly tender texture that melts in your mouth.
- Perfect for Easter & Beyond: A festive and delicious addition to your Easter brunch table, they’re also wonderful for any spring celebration or simply as a comforting treat.
- Simple to Make: With clear, step-by-step instructions and helpful tips, even beginner bakers can achieve bakery-quality results with confidence.
- Warm & Comforting Flavors: The blend of cinnamon and nutmeg creates a cozy, inviting aroma and taste that is perfect for chilly mornings or a comforting afternoon snack.
Hot Cross Buns (No Raisins): Ingredient Overview and Smart Substitutions
Crafting the perfect hot cross bun begins with understanding each ingredient’s role. Here’s a detailed look at what you’ll need and how you can adapt the recipe to your pantry or dietary preferences for optimal results.
Dough Ingredients: The Foundation of Flavor and Texture
- 1 cup warm water (approx. 110°F / 43°C): This precise temperature is crucial for properly activating the yeast. Water that is too hot can kill the yeast, preventing your buns from rising, while water that is too cold may not activate it sufficiently. Always use a kitchen thermometer for accuracy, or ensure it feels comfortably warm to the touch, similar to a baby’s bathwater.
- 1 tbsp active dry yeast: This is the leavening agent that gives our buns their signature soft, airy, and fluffy texture. For best results, always check the expiry date on your yeast packet. If using instant yeast, you can often mix it directly with the flour, but proofing it first (as instructed in this recipe) is a foolproof way to ensure it’s alive and ready to work.
- 1 tbsp granulated sugar: Beyond just adding sweetness, sugar provides vital “food” for the yeast, helping it to activate, multiply, and produce the carbon dioxide needed for rising. It also contributes to the beautiful golden-brown crust and a subtle sweetness that balances the spices. While white granulated sugar is standard, a light-colored honey or maple syrup can be substituted, though it might require slight adjustments to liquid and can alter the dough’s browning.
- 2 cups flour: The choice of flour significantly impacts the final texture of your buns.
- Bread flour: This is preferred for its higher protein content (typically 12-14%), which develops more gluten during kneading. This results in a chewier, more elastic crumb that holds its shape well and gives the buns their delightful softness and structure.
- All-purpose flour: A widely available and perfectly acceptable alternative (typically 10-12% protein). It will still yield delicious, soft buns, though they might be slightly less chewy than those made with bread flour. Avoid using whole wheat flour, as its higher fiber content and lower gluten potential can make the buns noticeably denser and heavier.
- 1 tsp ground cinnamon: The defining spice of hot cross buns, imparting a warm, fragrant, and inviting aroma and flavor that is simply irresistible.
- Ceylon cinnamon: Often referred to as “true cinnamon,” it offers a milder, sweeter, and more complex flavor profile with delicate floral notes.
- Saigon cinnamon (Cassia cinnamon): Known for its stronger, more pungent, and aromatic taste, providing a more robust spice presence. Choose based on your preference for spice intensity.
- 1/8 tsp ground nutmeg: Adds a layer of warm depth, subtle earthiness, and a hint of sweetness that beautifully complements the cinnamon. Freshly grated nutmeg always provides the best and most vibrant flavor, but pre-ground nutmeg will work perfectly fine. If you don’t have nutmeg, a tiny pinch of allspice or even a very small amount of ground cloves can be used as a substitute, though the overall spice profile will differ slightly.
- 1/2 tsp salt: A vital ingredient that often goes unnoticed but is crucial for several reasons. It enhances and balances the overall sweetness, intensifies the other flavors, controls the rate of yeast activity (preventing over-proofing), and strengthens the gluten structure in the dough, contributing to its elasticity. Use fine sea salt or kosher salt, adjusting quantities if using a different type of salt (e.g., table salt is denser, so use slightly less for the same salinity).
- 1 tbsp oil: This fat plays a key role in making the dough soft and tender, preventing the buns from drying out too quickly and ensuring a pleasant mouthfeel.
- Vegetable oil or canola oil: These are neutral in flavor and readily available, making them excellent choices.
- Melted unsalted butter: For a richer, more luxurious flavor profile, melted butter is a fantastic option. Ensure it’s cooled slightly before adding it to the dough mixture to avoid affecting the yeast.
- Coconut oil: Can be used, but be aware that unrefined coconut oil might impart a slight coconut flavor, which may or may not be desired.
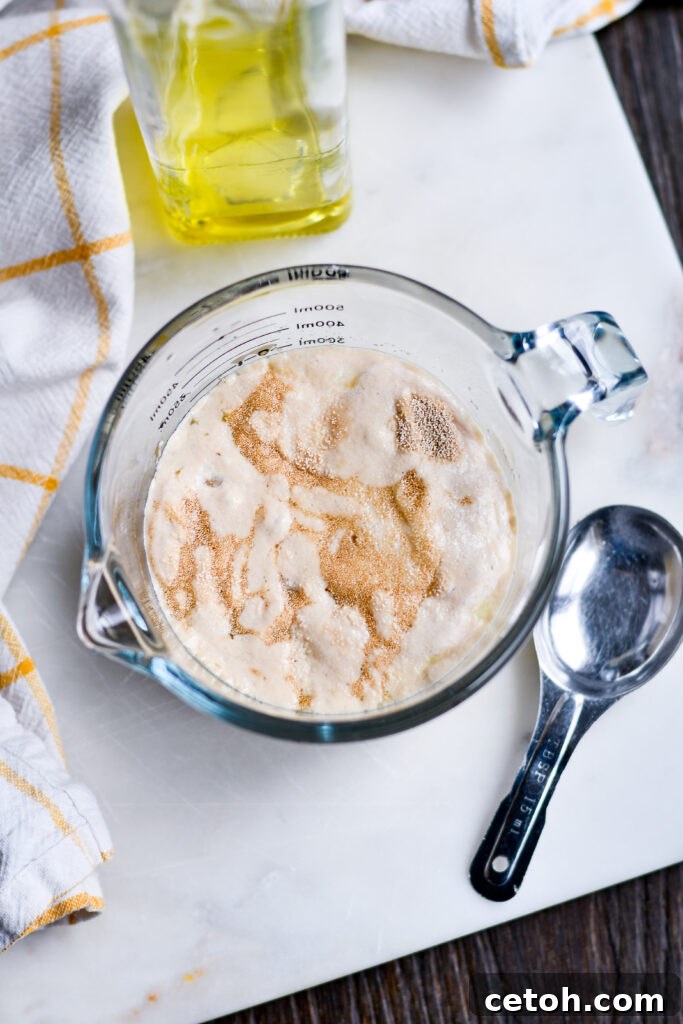
Proofing Yeast for Perfect Hot Cross Buns | Achieving light, fluffy hot cross buns begins with properly proofed yeast! Observe how active yeast transforms into a bubbly, foamy mixture when combined with warm water and sugar—this visual cue guarantees a perfect rise for your soft, spiced buns.
Cross Ingredients: The Creamy, Indulgent Centerpiece
- 2 ounces cream cheese, softened: This is the star ingredient of our unique cheesecake-style cross, providing a delightful tangy richness and a wonderfully creamy texture that contrasts beautifully with the spiced dough. Full-fat cream cheese is highly recommended for the best flavor, stability, and luxurious consistency. For those seeking a dairy-free option, certain brands of cream cheese alternatives (such as Kite Hill or Violife) can be used, though the final texture and tanginess might be slightly different.
- 2 tbsp granulated sugar: Sweetens the cream cheese mixture, perfectly balancing its inherent tanginess and contributing to the overall dessert-like quality of the cross. Powdered sugar (confectioners’ sugar) can also be used for an even smoother consistency, but you might need to adjust the flour quantity slightly to maintain the desired thickness. While brown sugar would add a deeper, molasses note, stick to granulated sugar for that clean, classic “cheesecake” flavor profile.
- 1 egg yolk: The egg yolk serves multiple purposes in the cross mixture: it adds richness, helps to emulsify and bind the ingredients together, and ensures that the cross sets beautifully and firmly during baking. If you need an egg-free alternative, 1 tablespoon of thick Greek yogurt or sour cream can be used in its place, but note that the binding properties may not be as strong, and the texture might be slightly softer.
- 2-3 tbsp all-purpose flour: This flour is essential for thickening the cream cheese mixture to the ideal pipeable consistency. It ensures the cross holds its shape well on the buns and doesn’t melt excessively during baking. Start with 2 tablespoons and gradually add more if needed, mixing until the mixture is thick enough to pipe neatly and maintains its form. Cornstarch (about 1 tablespoon) could be used as an alternative thickener, but it might result in a slightly different, more gelatinous or translucent texture.
Glaze: The Sweet & Shiny Finish
- Apricot jam: This is traditionally brushed over hot cross buns to create a beautiful, glossy finish that makes them visually appealing and adds a delightful layer of fruity sweetness. The tartness of apricot complements the warm spices wonderfully.
- Alternatives: Orange marmalade can be used for a pleasant citrusy kick, adding another dimension of flavor. Honey is another excellent option for a more natural, less fruit-specific sweetness, and it also provides a lovely shine.
- Consistency: If your chosen jam is too thick to brush smoothly, warm it gently in a small saucepan over low heat or in a microwave-safe bowl with a splash of water (about 1-2 teaspoons) until it becomes easily brushable and liquid enough to spread evenly.
Step-by-Step Method for Perfect Hot Cross Buns: Your Baking Guide
Follow these detailed steps carefully to create the most delicious and impressive hot cross buns from scratch. Precision and patience are key for excellent results and a truly rewarding baking experience!
Step 1: Proof the Yeast – Ensuring a Lively Dough
- In a small bowl or a liquid measuring cup, combine 1 cup of warm water (aim for precisely 110°F or 43°C, as tested with a reliable kitchen thermometer). Add 1 tablespoon of active dry yeast and 1 tablespoon of granulated sugar. The sugar will feed the yeast, and the warm water will activate it.
- Gently stir the mixture with a spoon or whisk until the sugar dissolves and the yeast granules are mostly incorporated. Let this sit undisturbed for a dedicated period of 5–10 minutes. You’ll know your yeast is healthy, active, and ready when the mixture becomes visibly foamy and bubbly on the surface. This indicates that the yeast is actively consuming the sugar and producing carbon dioxide, which will make your buns rise.
- TIP for Success: If, after 10 minutes, your yeast mixture shows no signs of foaming or bubbling (i.e., it looks flat and lifeless), it’s highly probable that your yeast is either expired or the water temperature was incorrect (too hot kills the yeast, too cold keeps it dormant). To avoid flat, dense buns, it is best to discard this mixture and start over with fresh yeast and carefully measured water temperature.
Step 2: Make the Dough – Bringing Ingredients Together
- In a large mixing bowl, whisk together all your dry dough ingredients: 2 cups of bread flour, 1 teaspoon of ground cinnamon, 1/8 teaspoon of ground nutmeg, and 1/2 teaspoon of salt. Whisk them together thoroughly for about 30 seconds to ensure the spices and salt are evenly distributed throughout the flour. This prevents pockets of unseasoned dough.
- Pour the proofed yeast mixture and 1 tablespoon of oil into the bowl with the whisked dry ingredients. Stir everything together with a sturdy wooden spoon or a dough whisk until a shaggy, sticky dough forms. At this stage, it won’t look smooth or uniform, but all the flour should be hydrated and no dry streaks should remain.
- TIP for Success: While bread flour is generally preferred for a chewier texture due to its higher protein content and gluten development, all-purpose flour works perfectly well and will result in delightfully soft buns. Don’t hesitate to use it if that’s what you have on hand.
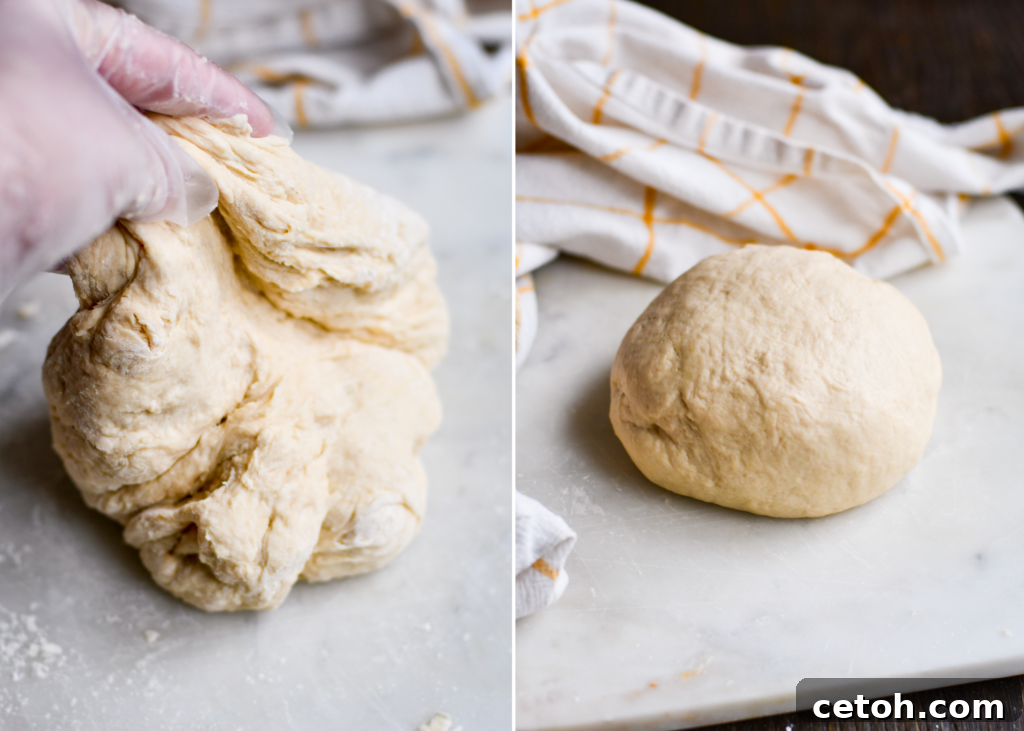
How to Knead Dough for Soft & Fluffy Hot Cross Buns | Mastering the art of kneading is fundamental for achieving light, airy hot cross buns! Observe your dough during (left) and after kneading (right)—it should transition from shaggy to smooth, elastic, and slightly tacky. These visual cues and tips will guide you to the perfect texture for your homemade buns!
Step 3: Knead the Dough – Developing Structure and Elasticity
- Turn the sticky dough out onto a lightly floured surface (a clean countertop or large cutting board works well). Begin kneading the dough vigorously. The classic kneading technique involves pushing the dough away from you with the heels of your hands, then folding it back over itself, and rotating the dough slightly. Continue this process for a dedicated period of 8–10 minutes. The dough will start off quite sticky and shaggy but will gradually transform, becoming noticeably smoother, more elastic, and less sticky (though it should still feel slightly tacky to the touch). This intensive kneading develops the gluten strands, which are essential for creating the structure that traps the carbon dioxide produced by the yeast, ultimately leading to light and airy buns.
- TIP for Success: If the dough becomes excessively sticky and difficult to handle during kneading, dust your hands and the work surface very lightly with additional all-purpose flour. Be very cautious not to incorporate too much extra flour, as this is a common mistake that can make your finished buns dense, dry, and heavy. A dough that is still slightly tacky is desirable for softness.
Step 4: Shape the Buns – Preparing for the Rise
- Once your dough is beautifully kneaded and has a smooth, elastic texture, divide it into 9 equal pieces. The easiest way to achieve uniform portions is to roll the dough into a thick log and then cut it into even sections. For precision, you can use a kitchen scale to ensure each piece weighs the same.
- Take each individual piece of dough and roll it gently between your palms on an unfloured surface to form a smooth, tight ball. This technique creates tension on the surface of the dough, which helps the buns rise uniformly and achieve a beautiful round shape.
- Arrange the neatly shaped dough balls in a 9×9 inch baking dish (or a similar size such as an 8×8 inch square or a 9×13 inch rectangular dish, depending on how many buns you make and how close you want them to be). Leave a little space between each bun; they will expand during their final proofing and baking, naturally touching to create those desirable soft, pull-apart sides.
Step 5: Prepare & Pipe the Crosses – Adding the Signature Element
- In a small mixing bowl, prepare the luscious, creamy cheesecake cross mixture. Combine 2 ounces of softened cream cheese, 2 tablespoons of granulated sugar, and 1 egg yolk. Mix these ingredients thoroughly with a spoon or small whisk until the mixture is completely smooth, lump-free, and well combined.
- Gradually add 2–3 tablespoons of all-purpose flour to the cream cheese mixture, mixing after each addition until it reaches a thick, pipeable consistency. The mixture should be firm enough to hold its shape when piped but still flow smoothly without being too stiff. If it’s too thin, add a little more flour; if too thick, a tiny splash of milk or cream cheese (if you have extra) can loosen it.
- Transfer the prepared cheesecake cross mixture to a piping bag fitted with a small round tip (or, for a simple alternative, snip off a tiny corner from a sturdy plastic freezer bag). Carefully pipe distinct crosses onto the top of each bun. Aim for a clear cross pattern that will be visible and impressive after baking.
Step 6: Bake the Buns – Golden Perfection
- Preheat your oven to 375°F (190°C). It’s essential that your oven is fully preheated before placing the buns inside, as this ensures consistent baking, proper rise, and even browning.
- Place the baking dish with the prepared buns into the preheated oven. Bake for approximately 18–20 minutes, or until the buns are beautifully light golden brown on top. The cheesecake crosses will also firm up and take on a slightly golden hue. To confirm doneness, gently tap one of the buns on the bottom; it should sound hollow.
Step 7: Glaze & Serve – The Finishing Touch
- While the buns are still warm, immediately after removing them from the oven, gently melt about 3 tablespoons of apricot jam. You can do this in a small saucepan over low heat or in a microwave-safe bowl for about 15-30 seconds until it’s liquid and easily brushable.
- Using a clean pastry brush, liberally brush the warm, melted apricot jam over the tops of all the baked buns. This step is crucial as it creates a gorgeous, glossy, and sticky finish while adding a final layer of sweet, fruity flavor that perfectly complements the spiced buns.
- TIP for Success: If the apricot jam appears too thick to brush smoothly, thin it with a small splash of hot water (about 1-2 teaspoons) until it reaches the desired brushable consistency.
- Allow the buns to cool slightly in the baking dish before carefully removing them and serving them warm. They are absolutely at their best when enjoyed fresh from the oven!
Hot Cross Buns Recipe – No Raisins & Extra Delicious! | Discover the ultimate hot cross buns recipe, designed for those who prefer to skip dried fruit! Featuring a fluffy cinnamon dough, a rich cheesecake cross, and a sweet apricot glaze, these buns are an extra special treat for Easter or any time of year.
Expert Tips for the Best Homemade Hot Cross Buns
Achieving bakery-quality hot cross buns at home is easier than you think with these expert tips:
- Don’t Rush the Proofing: Yeast needs warmth and adequate time to work its magic. A proper first rise (bulk fermentation) and second rise (proof) are critical for light, airy, and fluffy buns. If your kitchen is cool, find a warm spot (like near a sunny window, in a slightly warm, turned-off oven with the light on, or near a warm appliance).
- Measure Flour Correctly: For baking, especially with yeast doughs, accuracy in measuring flour is paramount. It’s always best to weigh your flour using a kitchen scale for the most precise results. If measuring by volume, spoon the flour into your measuring cup and then level it off with a straight edge; never scoop directly from the bag, as this compacts the flour and can add up to 25% more flour than intended, leading to a dense dough.
- Avoid Over-Flouring During Kneading: A slightly tacky dough is perfectly normal and even desirable for soft buns. Resist the urge to add too much extra flour while kneading, as incorporating too much will result in dry, stiff, and heavy buns. Only dust your hands and work surface with just enough flour to prevent excessive sticking.
- Evenly Sized Buns: Dividing the dough into equal pieces ensures consistent baking times, uniform rising, and a professional, aesthetically pleasing appearance. For precision, use a kitchen scale to measure each piece of dough before shaping them into balls.
- Softened Cream Cheese for the Cross: For the cheesecake cross mixture, ensure your cream cheese is at room temperature. This makes it significantly easier to mix into a smooth, pipeable consistency without any lumps, resulting in a perfectly creamy cross.
- Don’t Skip the Glaze: The apricot glaze isn’t just for looks; it adds crucial moisture, a beautiful glossy sheen, and a delicate fruity flavor that elevates the overall taste and texture of the buns. It’s the perfect finishing touch.
- Know Your Oven: Oven temperatures can vary. If you find your buns baking too quickly or too slowly, consider using an oven thermometer to verify your oven’s accuracy.
Serving Suggestions for Your Homemade Hot Cross Buns
These delightful hot cross buns are wonderfully delicious on their own, but here are a few ways to enjoy them and make them even more special:
- Classic with Butter: The simplest and often most satisfying way. Slice them in half and spread with a generous pat of softened unsalted butter. The butter melts into the warm, spiced dough for pure bliss.
- Cream Cheese Spread: To lean into the “cheesecake” theme of the cross, serve them with an extra dollop of plain, lightly sweetened, or even a vanilla-flavored cream cheese spread.
- With Coffee or Tea: They make an exquisite accompaniment to your morning coffee, a comforting afternoon tea, or as a cozy evening treat. The warm spices pair beautifully with hot beverages.
- Easter Brunch Essential: Elevate your Easter table by featuring these unique hot cross buns as a centerpiece dessert, or serve them alongside savory brunch dishes for a balanced spread.
- Alongside Fresh Fruit: A light, refreshing pairing that complements the sweetness of the buns. Serve them with a bowl of fresh berries, sliced peaches, or melon for a delightful contrast.
- Make Them Into French Toast: For an indulgent breakfast, slice day-old hot cross buns, dip them in an egg and milk mixture, and griddle until golden brown. Serve with syrup!
Storage and Make-Ahead Options for Convenience
Planning ahead or managing leftovers is easy with these storage tips:
- Storing Baked Buns: Once completely cooled, store your baked hot cross buns in an airtight container at room temperature for up to 2-3 days. To extend their freshness further, you can refrigerate them for up to 5 days.
- Freezing Baked Buns: For longer storage, hot cross buns freeze exceptionally well. Place unglazed, completely cooled buns in a freezer-safe bag or airtight container, ensuring as much air is removed as possible to prevent freezer burn. They can be frozen for up to 3 months. When ready to enjoy, thaw them at room temperature, then warm, and glaze just before serving for best results.
- Make-Ahead Dough (Overnight Proof): This recipe is fantastic for making ahead. You can prepare the dough, knead it, and shape the buns the night before you plan to bake. Arrange the shaped buns in your baking dish, cover tightly with plastic wrap (or a lid if your dish has one), and refrigerate overnight (for 8-12 hours). On baking day, remove them from the fridge about 30-45 minutes before baking to allow them to come to room temperature and gently finish their final proof. Then proceed with piping the crosses, preheating the oven, and baking as instructed.
- Reheating: To reheat individual buns, warm them in the microwave for approximately 15–20 seconds. For a slightly crisper exterior, you can warm them in a 325°F (160°C) oven for 8–10 minutes until warmed through.
Troubleshooting Common Hot Cross Bun Issues
Even experienced bakers encounter challenges. Here’s how to troubleshoot some common hot cross bun problems:
- Buns Didn’t Rise or Rose Poorly:
- Yeast Issue: The most common culprit. Your yeast might be expired, or the water temperature during proofing was incorrect (too hot kills it, too cold keeps it dormant). Always test your yeast first by proofing it as per Step 1.
- Not Enough Kneading: Gluten needs to be properly developed through kneading to create the elastic structure required to trap the gas produced by the yeast. Insufficient kneading leads to a weak dough.
- Too Much Flour: Excess flour makes a stiff, dense dough that struggles to rise effectively. Ensure accurate flour measurement.
- Cold Environment: The dough might not have been in a warm enough place to proof.
- Buns are Dry or Dense:
- Too Much Flour: This is a frequent cause. Over-flouring during mixing or kneading will result in dry, heavy buns.
- Over-baked: Baking for too long or at too high a temperature can strip the buns of their moisture. Keep an eye on the golden-brown color and bake time.
- Not Enough Fat: The oil in the dough is crucial for tenderness. Ensure you’ve added the correct amount.
- Cheesecake Crosses Smeared or Melted Excessively:
- Cross Mixture Too Thin: The most likely reason. Make sure you’ve added enough flour to the cream cheese mixture so it’s thick and pipeable and holds its shape before baking. It should be similar to a thick frosting.
- Buns Too Warm When Piping: While the buns should be shaped, piping onto scorching hot buns (if you’ve just briefly rested them) might cause slight melting of the mixture. Ensure they are at a stable room temperature.
- Oven Temperature Too High: An oven that is too hot can cause the cross to melt rather than set.
- Buns are Tough:
- Over-kneading: While kneading is important, over-kneading can sometimes make dough tough. Stick to the recommended 8-10 minutes.
- Too much flour: Again, excess flour increases gluten formation which can lead to toughness.
More Easter & Spring Recipes to Enjoy
- White Chocolate Macaroons
- Sriracha Deviled Eggs with Fried Green Onions Recipe
- No-Bake Chocolate Silk Pie | Easy, Creamy Chocolate Dessert
- Honey Butter Crescent Rolls Recipe
- Fresh Strawberry Pie Recipe
- French Coconut Pie
- Easy Homemade Hot Cross Buns Recipe
- Easy Asparagus Egg Salad Recipe
- Easter Haystack Cookies (Bird’s Nest Cookies) Recipe
Easy Homemade Hot Cross Buns Recipe
9
30 minutes
20 minutes
50 minutes
These hot cross buns are soft, spiced with cinnamon, glazed with apricot, and topped with a creamy cheesecake-style cross. Perfect for Easter brunch or a springtime treat!
Ingredients
For the Dough:
- 1 cup warm water (about 110°F)
- 1 tablespoon yeast (instant or active dry)
- 1 tablespoon sugar
- 2 cups bread flour (or all-purpose flour)
- 1 teaspoon cinnamon
- 1/8 teaspoon nutmeg
- 1/2 teaspoon salt
- 1 tablespoon oil (vegetable, canola, or melted butter)
For the Cheesecake Cross:
- 2 ounces cream cheese, softened
- 2 tablespoons sugar
- 1 egg yolk
- 2–3 tablespoons flour (adjust for a pipeable consistency)
For the Glaze:
- 3 tablespoons apricot jam (melted)
Instructions
- In a small bowl or measuring cup, combine 1 cup warm water, 1 tablespoon yeast, and 1 tablespoon sugar. Stir gently and let sit for 5–10 minutes until foamy and bubbly.
- In a large mixing bowl, whisk together 2 cups bread flour, 1 teaspoon cinnamon, 1/8 teaspoon nutmeg, and 1/2 teaspoon salt.
- Add the proofed yeast mixture and 1 tablespoon oil, stirring until a sticky dough forms.
- Turn the dough onto a lightly floured surface and knead for 8–10 minutes, until smooth and elastic.
- Divide the dough into 9 equal pieces. Roll each piece into a smooth ball and arrange them in a 9×9 baking dish, leaving a little space between each.
- In a small bowl, mix together 2 ounces softened cream cheese, 2 tablespoons sugar, 1 egg yolk, and 2–3 tablespoons flour until thick and pipeable.
- Transfer the mixture to a piping bag (or a plastic bag with the tip snipped off) and pipe crosses onto the buns.
- Preheat the oven to 375°F (190°C). Bake for 18–20 minutes, or until the buns are light golden brown on top.
- While the buns are warm, melt 3 tablespoons apricot jam and brush it over the tops for a glossy finish. Let cool slightly before serving.
Notes
- Flour Type: Bread flour creates a chewier texture, while all-purpose flour makes softer buns.
- Dough Consistency: The dough should be soft and slightly tacky. Avoid over-flouring, or the buns will be dry.
- Make-Ahead Option: The shaped buns can be covered and refrigerated overnight. Let them come to room temperature for 30–45 minutes before baking.
- Freezing: Freeze unglazed buns for up to 3 months. Reheat and glaze before serving.
- Reheating: Warm in the microwave for 15–20 seconds or in a 325°F oven for 8–10 minutes.
Nutrition Information:
Yield: 9
Serving Size: 1
Amount Per Serving:
Calories: 262Total Fat: 5gSaturated Fat: 2gTrans Fat: 0gUnsaturated Fat: 3gCholesterol: 27mgSodium: 144mgCarbohydrates: 47gFiber: 2gSugar: 7gProtein: 7g
Did you make this recipe?
Please leave a comment on the blog or share a photo on Instagram