
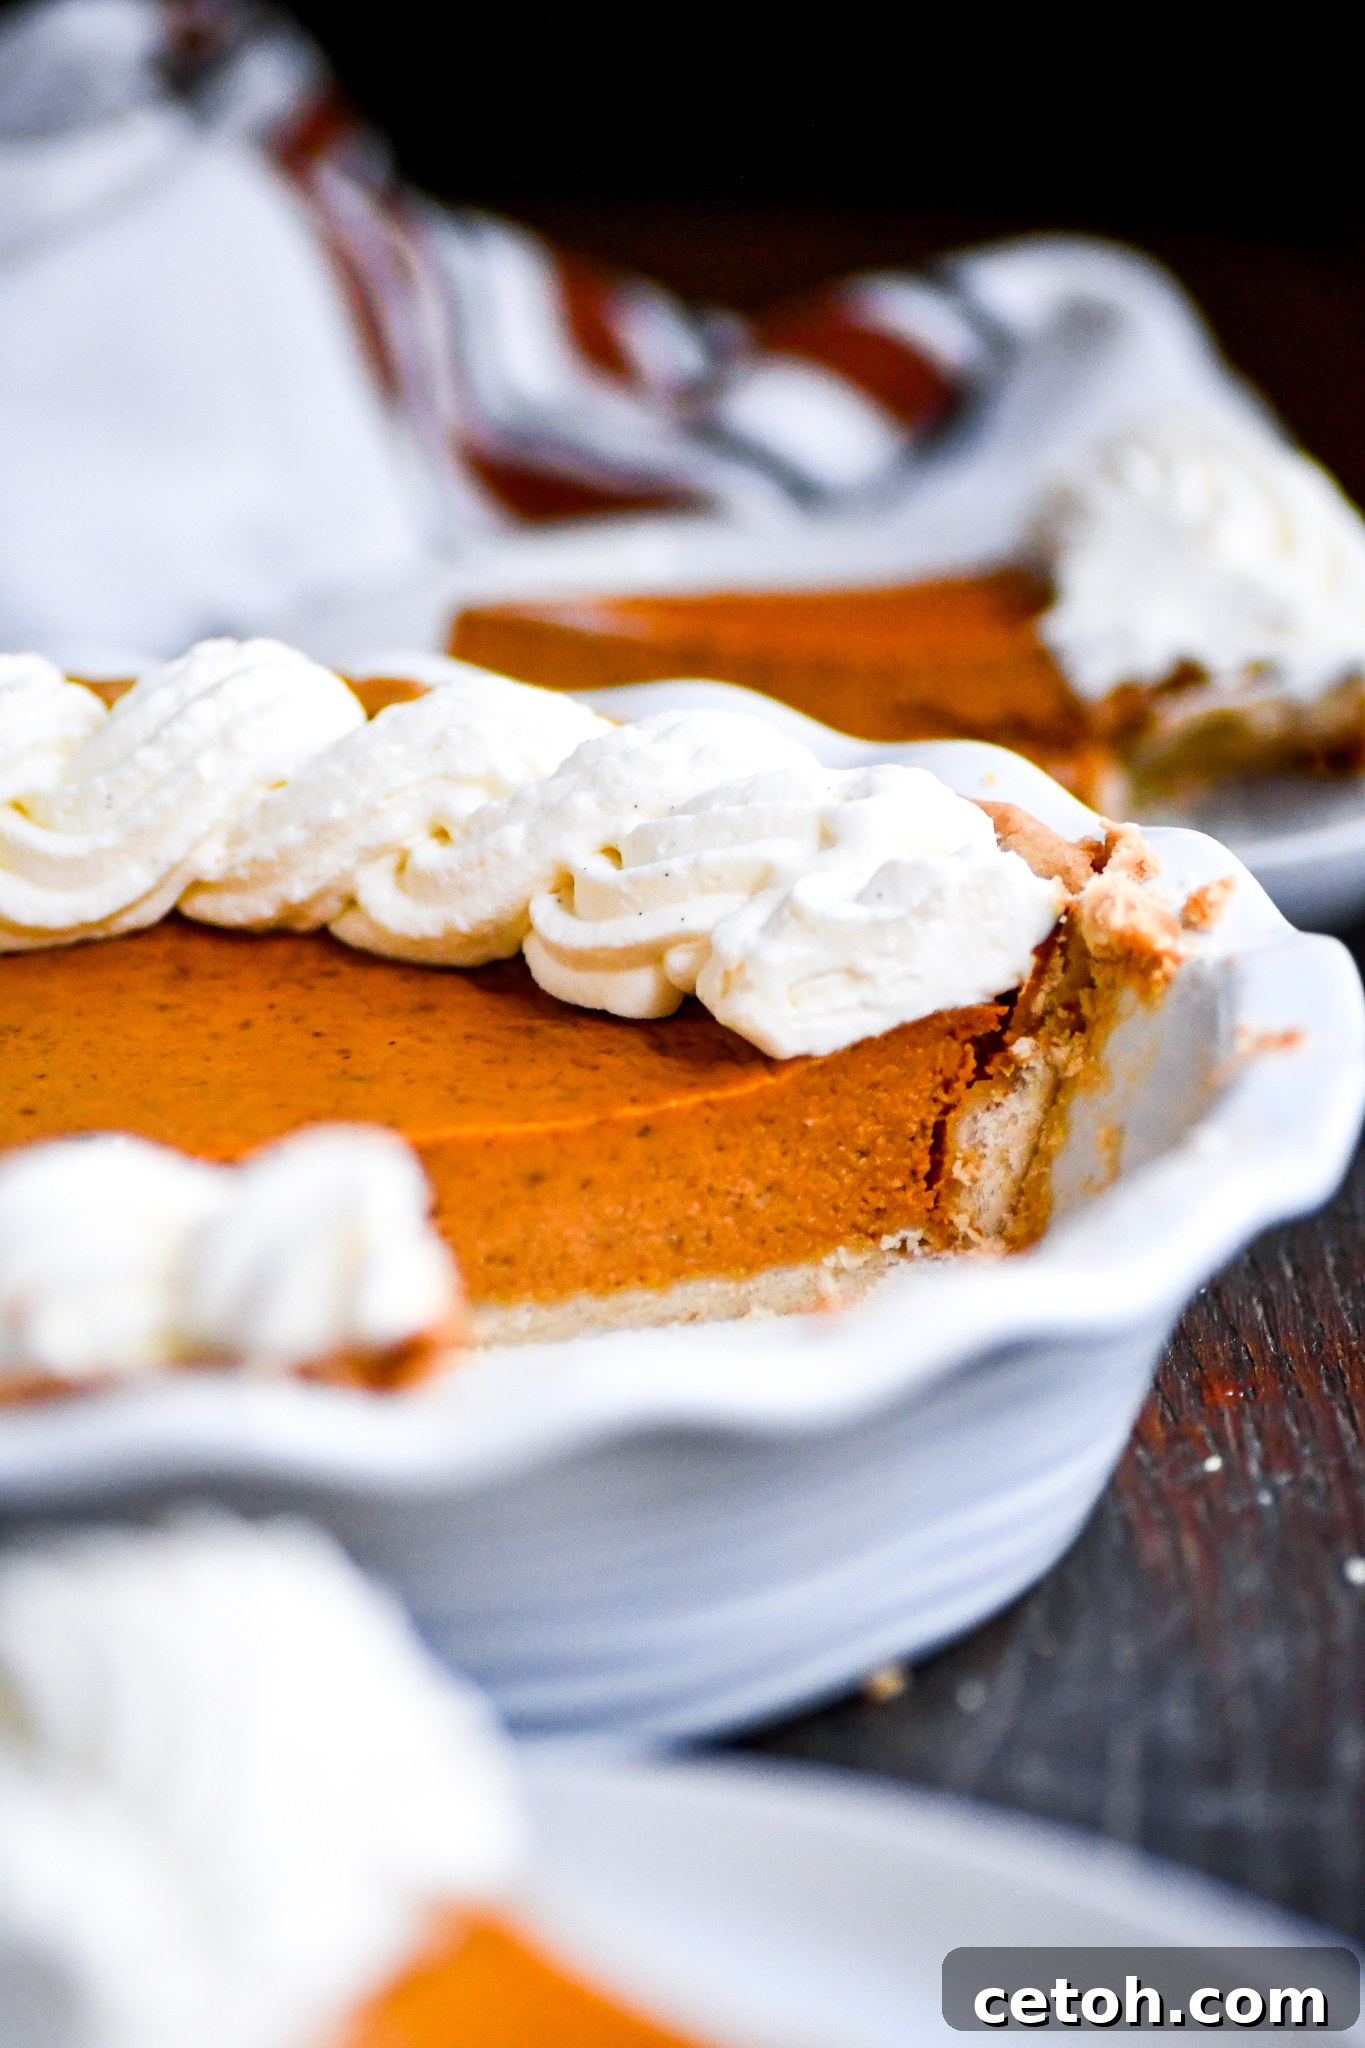
There’s nothing quite like the comforting aroma of a freshly baked pumpkin pie filling your home on a crisp autumn day. This easy pumpkin pie recipe is the quintessential classic fall dessert, delivering a silky-smooth texture, perfectly balanced spices, and an incredibly simple preparation process. It’s the very embodiment of seasonal warmth and nostalgia, a dish that feels right at home as the centerpiece of a Thanksgiving feast, yet is wonderfully straightforward enough for any cozy autumn weekend. Whether you crown each slice with a cloud of fresh, homemade whipped cream or a sparkling handful of crunchy sugared cranberries, this pie promises to bring all the enchanting fall vibes directly to your table.
For those who cherish nostalgic fall baking, you’ll also adore our recipes for Pumpkin Cinnamon Roll Cake and irresistible Pumpkin Chocolate Chip Muffins. These treats capture the same essence of comfort and spice that makes this pumpkin pie an enduring favorite.
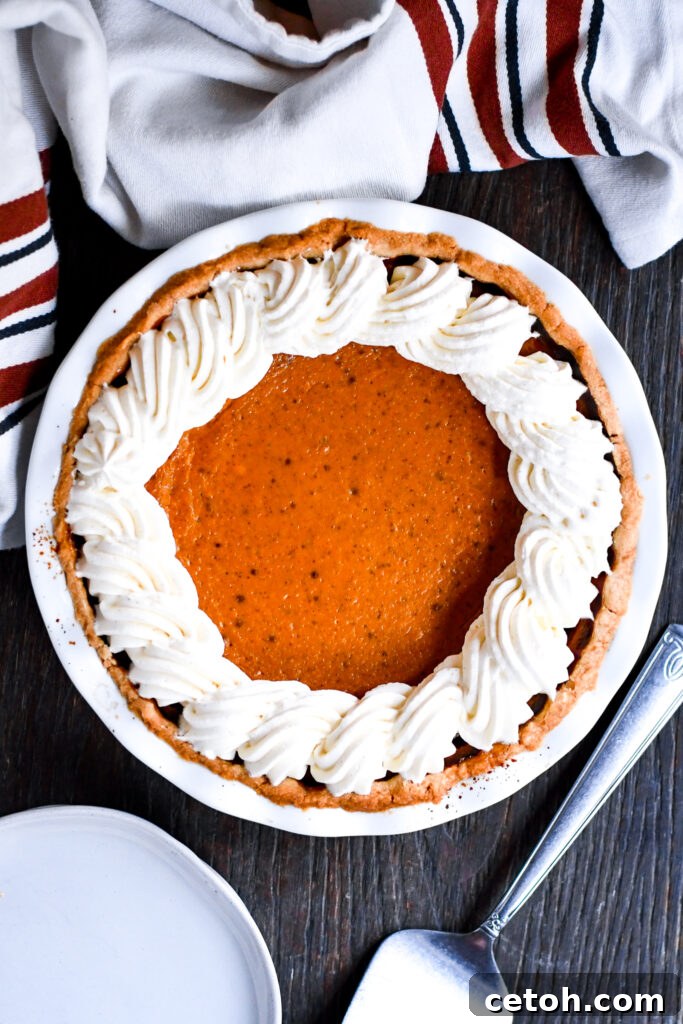
Best Easy Pumpkin Pie | This creamy, perfectly spiced pumpkin pie is the ultimate fall dessert! Simple ingredients, rich flavor, and a flaky homemade crust make this a must-make Thanksgiving recipe. Save it for your holiday baking!
Why This Will Be Your Go-To Pumpkin Pie Recipe
This isn’t just another pumpkin pie recipe; it’s the one you’ll turn to year after year, guaranteeing success and rave reviews. Here’s why this particular recipe stands out:
- Foolproof Filling, Bursting with Flavor: Say goodbye to bland, uninspiring pumpkin pies. Our recipe ensures a filling that’s not only incredibly smooth and creamy but also deeply infused with the warm, rich spices of autumn. Every bite is a delightful journey through cinnamon, ginger, nutmeg, and cloves.
- Utilizes Everyday Pantry Ingredients: You won’t need to hunt for exotic ingredients. This recipe relies on staples you likely already have on hand or can easily find at any grocery store, making preparation stress-free and accessible for all home bakers.
- Achieves a Perfect Set Every Single Time: One of the most common challenges with pumpkin pie is getting that ideal, smooth set without cracks or “weeping.” Our carefully calibrated recipe and baking method ensure a beautifully set pie, preventing those common mishaps for a picture-perfect result.
- The Ultimate Make-Ahead Holiday Dessert: Holidays are busy enough! This pumpkin pie is an excellent make-ahead option. Prepare it a day or two in advance, allowing it to chill and for the flavors to fully meld, freeing up valuable oven space and time on your special day.
- Incredibly Easy to Follow: Designed with both beginners and seasoned bakers in mind, the step-by-step instructions are clear, concise, and easy to execute, ensuring a delightful baking experience from start to finish.
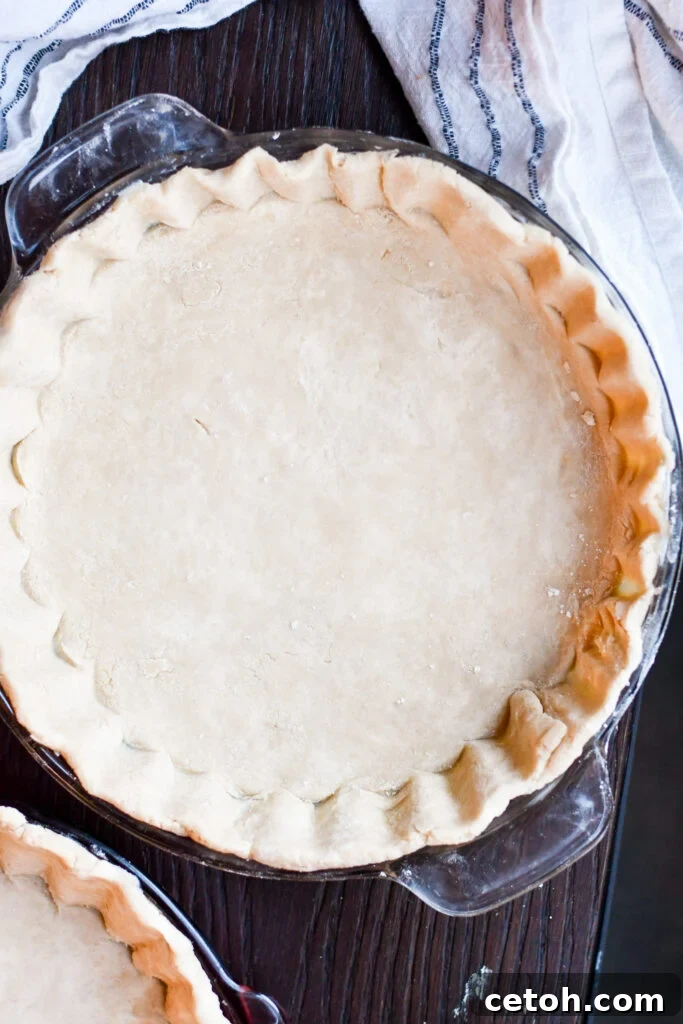
For any pie recipe, I wholeheartedly recommend using our All-Butter No-Chill Pie Crust for an unparalleled flaky texture.
Essential Ingredients & Smart Substitutions for the Perfect Pie
Crafting the perfect pumpkin pie begins with understanding each ingredient’s role. Here’s a detailed look at what you’ll need and how to make smart substitutions if necessary:
- Pie Crust: The foundation of any great pie. For an incredibly flaky, buttery crust that truly elevates the dessert, we highly recommend our All-Butter No-Chill Pie Crust. It’s surprisingly easy to make and yields superior results. However, for utmost convenience, a good quality store-bought crust will work perfectly well.
- Granulated Sugar: This provides the essential sweetness that balances the earthy richness of the pumpkin and helps tenderize the filling. You can adjust the amount slightly to your preference, but the recommended quantity ensures a harmonious flavor.
- Pumpkin Pie Spice: This blend is the heart of the pie’s autumn flavor. You can opt for a readily available store-bought mix or create your own custom blend for a truly unique taste. A classic homemade blend typically includes cinnamon, ground ginger, nutmeg, and cloves, often with a hint of allspice. Our Homemade Pumpkin Pie Spice recipe offers a warm, bold flavor boost that’s unmatched.
- Salt: Don’t underestimate the power of a tiny pinch of salt! It’s crucial for enhancing and bringing out the complex flavors of the pumpkin and spices, ensuring the pie isn’t just sweet but truly flavorful.
- Eggs: Eggs act as the binding agent, helping the filling to set into that signature creamy texture. Using room-temperature eggs is ideal as they incorporate more smoothly into the mixture, leading to a silkier, more uniform custard.
- Canned Pumpkin Purée: For consistent results and a firmer set, canned pumpkin purée is generally preferred over fresh. It has a lower water content, which helps prevent a watery pie. While homemade pumpkin purée can be used, be aware that it may require a slightly longer bake time to set properly. Ensure you’re using pure pumpkin purée, not pumpkin pie filling, which is pre-spiced and sweetened.
- Evaporated Milk: This is a key ingredient for the pie’s luscious, rich texture. Evaporated milk is cow’s milk from which about 60% of the water has been removed, resulting in a concentrated, creamy liquid that contributes significantly to the filling’s density and smoothness without adding excessive moisture. For a dairy-free alternative, full-fat coconut milk can be used, though it may impart a subtle coconut flavor.
- Whipped Cream: A dollop of fresh whipped cream is, in our opinion, the non-negotiable finishing touch that perfectly complements the spiced pumpkin. It adds a light, airy contrast to the rich filling.
For an elevated flavor profile that truly makes this pie sing, consider making your own spice blend. Our detailed guide to Homemade Pumpkin Pie Spice is easy to follow and guarantees a warm, bold flavor that will make your pumpkin pie unforgettable.
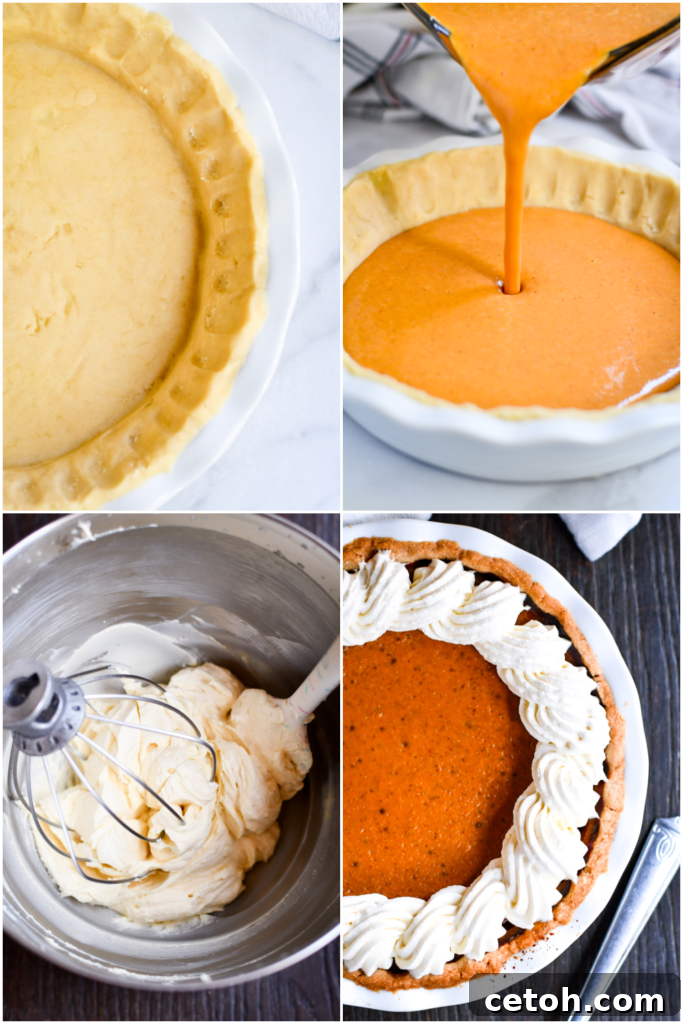
Classic Pumpkin Pie (No-Fail Recipe!) | Make the perfect pumpkin pie every time with this foolproof recipe—smooth, cozy, and full of warm fall spices. Ideal for Thanksgiving, Friendsgiving, or any crisp autumn day. Pin now for later!
Step-by-Step Instructions for Your Best Pumpkin Pie Yet
Baking a perfect pumpkin pie doesn’t have to be daunting. Follow these simple, clear steps to achieve a flawless, creamy, and beautifully spiced dessert every time.
1. Prepare Your Crust and Craft the Filling
Begin by preheating your oven to a precise 425°F (220°C). This initial high heat is crucial for setting the crust quickly and creating that lovely, slightly puffed edge. While the oven preheats, roll out your chosen pie crust and carefully transfer it into a standard 9-inch pie plate. Crimp the edges decoratively to your liking – a simple fluted edge or a more intricate braided design both look beautiful.
Next, in a large mixing bowl, combine the granulated sugar, pumpkin pie spice, and salt. Whisk these dry ingredients together thoroughly to ensure the spices are evenly distributed, preventing any pockets of intense flavor. Then, crack in your room-temperature eggs, add the canned pumpkin purée, and pour in the evaporated milk. Using a whisk or a rubber spatula, gently stir the mixture until it is completely smooth and wonderfully creamy. Be careful not to overmix, as excessive air can lead to cracks in your baked pie.
2. Assemble and Bake to Perfection
Carefully pour the luscious pumpkin filling into your prepared pie crust. Ensure it fills the crust evenly. Place the pie gently into your preheated oven. Bake at 425°F (220°C) for the initial 15 minutes. This high heat helps to set the crust and the outer edges of the filling quickly. After the initial 15 minutes, reduce the oven temperature to 350°F (175°C) without opening the oven door unnecessarily. Continue baking for an additional 40–50 minutes. The pie is perfectly done when the edges are set and firm, but the center still has a slight, gentle wobble when you carefully move the pie plate. A knife or toothpick inserted about an inch from the edge should come out clean.
3. Cool, Garnish, and Serve with Love
Once baked, resist the urge to cut into it immediately! The cooling process is just as vital as the baking for achieving that perfect, crack-free set. Carefully transfer the pie from the oven to a wire rack and allow it to cool completely at room temperature for at least 2 hours, or ideally longer. This slow cooling prevents the sudden temperature change that can cause cracks.
Once cooled, it’s time for the fun part: garnishing! Decorate your masterpiece with a generous swirl of fresh whipped cream, a scattering of toasted pecans, or a sprinkle of those festive sugared cranberries. For the best flavor and texture, refrigerate the pie until you’re ready to slice and serve. Chilling allows the flavors to deepen and the filling to fully firm up, making for cleaner slices.
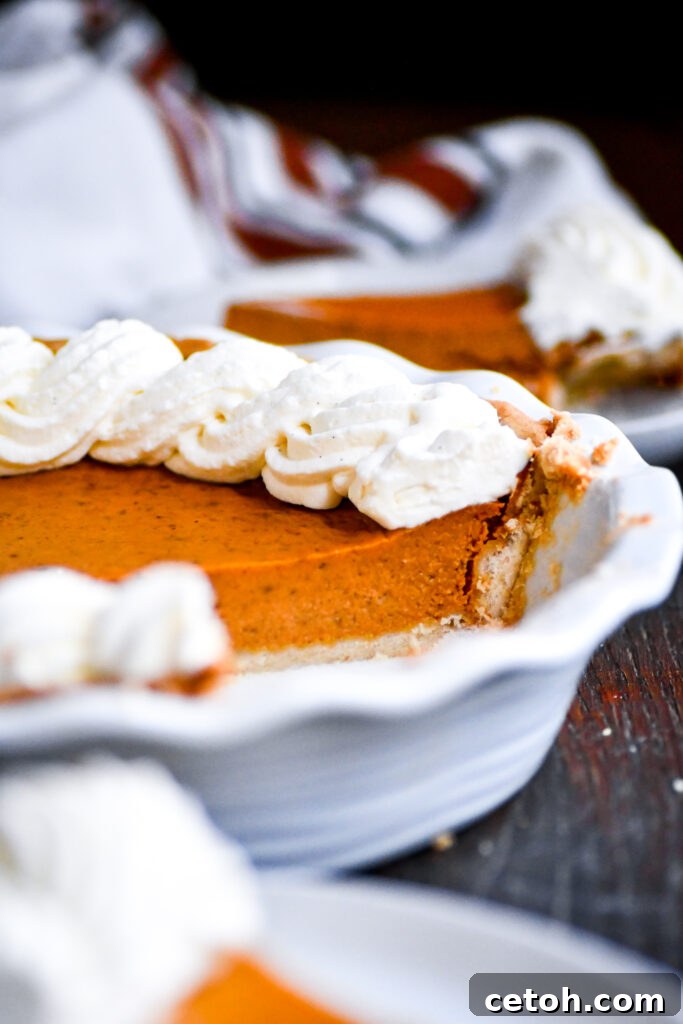
Homemade Pumpkin Pie for the Holidays | The easiest homemade pumpkin pie with a silky texture and rich spice flavor. Pair it with whipped cream for the perfect holiday dessert! A classic fall recipe everyone loves.
Expert Tips for Pumpkin Pie Perfection
Achieving a picture-perfect pumpkin pie is easier than you think with these insider tips:
- Embrace Room Temperature Ingredients: Always aim to use room temperature eggs and evaporated milk. Ingredients at a similar temperature blend more harmoniously, creating an ultra-smooth and lump-free filling that sets beautifully.
- Mindful Mixing is Key: When combining your filling ingredients, mix just until everything is incorporated and smooth. Overmixing can incorporate too much air, which can cause the pie to puff up excessively in the oven and then fall or crack as it cools.
- Protect Your Crust from Burning: Pie crusts tend to brown faster than the filling bakes. After the initial 15 minutes of high-heat baking, consider using a pie crust collar or wrapping the edges of your crust loosely with aluminum foil. This prevents the edges from over-browning or burning while the filling finishes setting.
- Recognize the “Perfect Jiggle”: The key to a perfectly set pie without cracks is knowing when to remove it from the oven. The pie is done when the edges are firm and set, but the very center (about a 2-inch circle) still has a slight, gentle jiggle when you softly shake the pie plate. It will continue to set as it cools.
- Cool Slowly and Gently: Sudden temperature changes are a common culprit for pie cracks. To prevent this, allow your pie to cool gradually. You can turn off the oven and prop the door open slightly, letting the pie cool in the diminishing heat for about an hour before transferring it to a wire rack at room temperature.
- Blind Bake for a Crisp Crust: While not strictly necessary for all recipes, blind baking (pre-baking) your pie crust for 10-15 minutes before adding the filling can help prevent a soggy bottom, especially if you prefer a very crisp crust.
Creative Variations to Customize Your Pumpkin Pie
While the classic pumpkin pie is undeniably delicious, don’t hesitate to get creative! These variations offer exciting twists on the traditional recipe:
- Dairy-Free Delight: Easily make this pie dairy-free by substituting the evaporated milk with full-fat canned coconut milk. The coconut milk adds a subtle, pleasant richness that complements the pumpkin beautifully.
- Maple Pumpkin Pie: For a touch of natural sweetness and a deeper fall flavor, replace half or even all of the granulated sugar with pure maple syrup. Reduce the evaporated milk slightly if the filling seems too thin, as maple syrup adds more liquid.
- Gingersnap Crust: Swap out the traditional pie crust for a spicy, crunchy gingersnap crust. Simply crush gingersnap cookies and combine them with melted butter, then press the mixture into your pie plate for a delightful flavor contrast.
- Pecan Pumpkin Pie: For an added layer of texture and nutty flavor, sprinkle a generous amount of chopped pecans over the top of the filling before baking. The pecans will toast beautifully in the oven, adding a lovely crunch.
- Pumpkin Cheesecake Pie: Take decadence to the next level by adding a creamy cheesecake layer beneath the pumpkin filling. This usually involves a simple mix of cream cheese, sugar, and an egg, poured into the crust first, then topped with the pumpkin mixture.
- Mini Pumpkin Pies: Perfect for individual servings or a dessert bar, bake the recipe in a muffin tin lined with pie crust cutouts. Adjust baking time accordingly (usually 20-30 minutes).
- Gluten-Free Option: Easily adapt this recipe by using your favorite store-bought gluten-free pie crust or by making it entirely crustless for a naturally gluten-free pumpkin custard.
- Caramel Pumpkin Pie: A drizzle of warm caramel sauce over each slice just before serving adds a luxurious sweetness and glossy finish. You can even sprinkle with a pinch of flaky sea salt to make it “salted caramel pumpkin pie.”
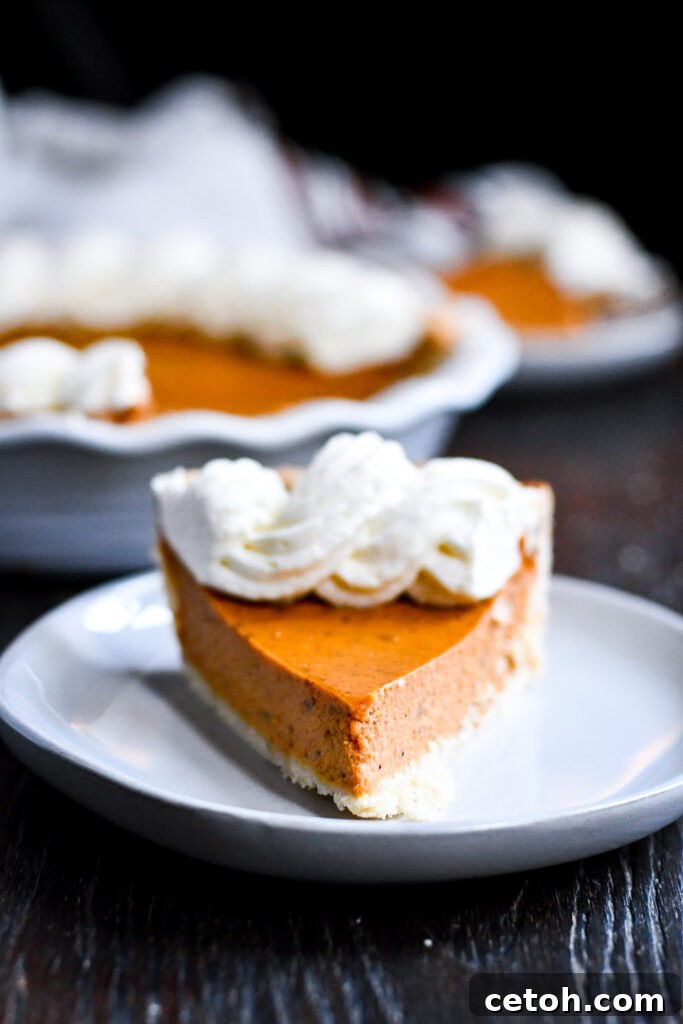
Best Easy Pumpkin Pie | Looking for a quick dessert? This easy pumpkin pie recipe comes together in minutes with a rich, creamy filling!
How to Store Leftovers and Make Ahead
Proper storage is key to enjoying your delicious pumpkin pie for days after baking. Here’s how to keep it fresh:
- Refrigerate: Once the pie has cooled completely at room temperature, cover it tightly with plastic wrap or aluminum foil to prevent it from drying out or absorbing refrigerator odors. It will stay fresh and delicious in the refrigerator for up to 3-4 days. For the best flavor and texture, let it come to room temperature for about 30 minutes before serving, or enjoy it chilled.
- Freeze: Pumpkin pie freezes exceptionally well, making it a fantastic make-ahead option for holiday planning. Once the pie is completely cool, wrap it thoroughly first in plastic wrap, then in a layer of heavy-duty aluminum foil. This double layer helps prevent freezer burn. You can freeze the pie for 1-2 months. To thaw, simply transfer it to the refrigerator overnight. It will be ready to serve the next day.
More Delicious Pie Recipes You’ll Love
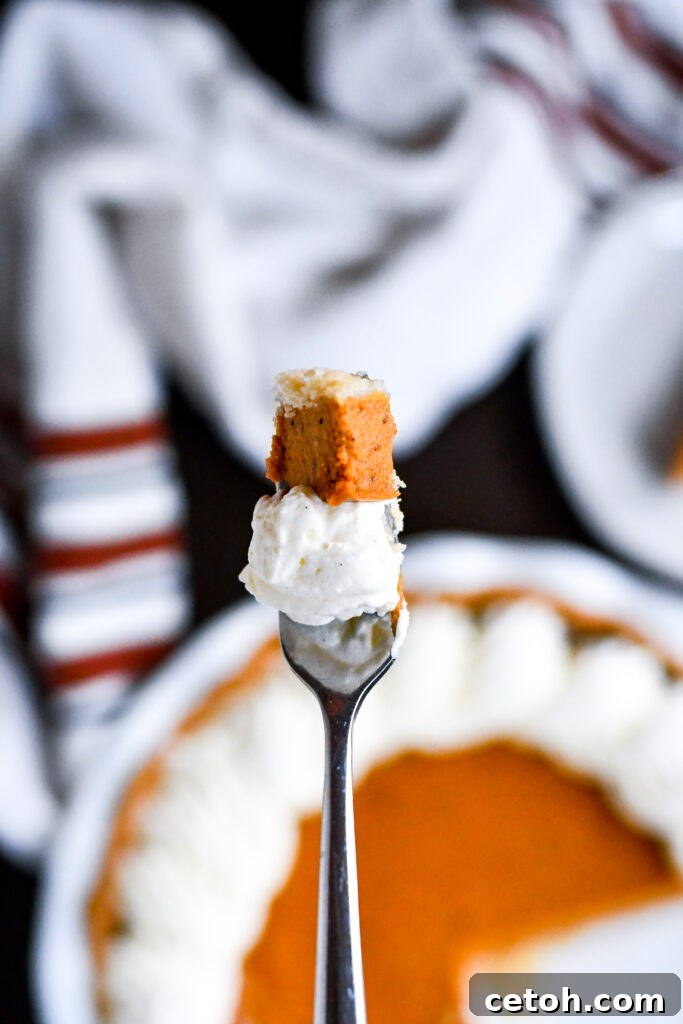
Creamy Pumpkin Pie | Homemade pumpkin pie has never been easier! This step-by-step guide will help you bake the perfect pie every time.
📌 Don’t forget to Pin this easy pumpkin pie recipe for later—your future fall self (and your taste buds!) will undoubtedly thank you for saving this perfect holiday dessert.
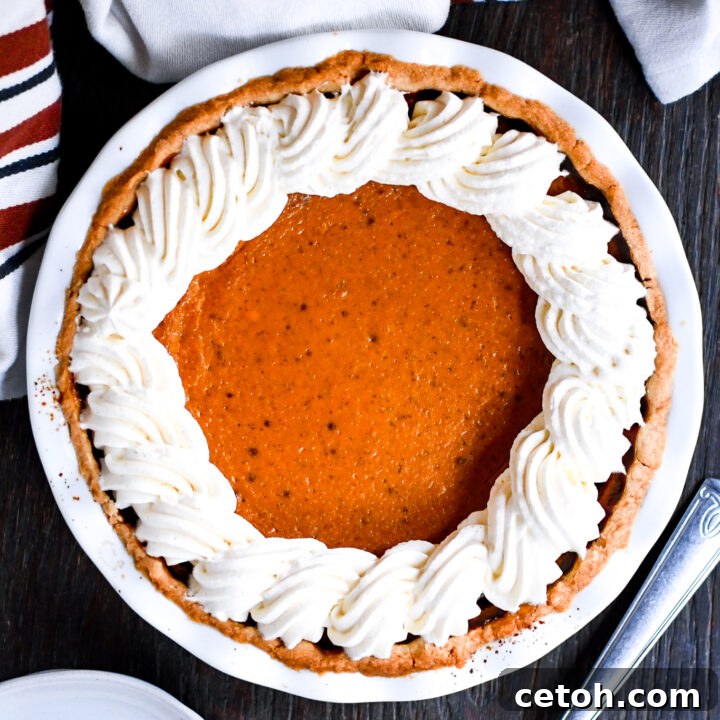
Easy Pumpkin Pie Recipe
8 servings
10 minutes
1 hour 5 minutes
1 hour 15 minutes
This nearly effortless pumpkin pie recipe promises a creamy, perfectly spiced dessert that everyone will adore!
Ingredients
- 1 unbaked 9-inch pie crust (homemade or store-bought)
- 3/4 cup granulated sugar
- 2 tsp pumpkin pie spice
- 1/2 teaspoon salt
- 2 large room temperature eggs
- 15 ounces canned pumpkin puree (not pumpkin pie filling)
- 12 ounces evaporated milk (one standard can)
Instructions
- Preheat your oven to 425ºF (220ºC).
- If using a homemade crust, prepare it according to the recipe and place it in a 9-inch pie plate. For store-bought, simply unroll and place in the pie plate. Crimp the edges as desired.
- In a large mixing bowl, whisk together the granulated sugar, pumpkin pie spice, and salt until well combined.
- Add the room-temperature eggs, canned pumpkin puree, and evaporated milk to the dry ingredients. Mix everything gently with a whisk or spatula until the filling is smooth and thoroughly blended. Be careful not to overmix.
- Carefully pour the pumpkin filling into the prepared pie crust.
- Bake at 425°F (220°C) for the first 15 minutes. This initial high heat helps the crust set and prevents a soggy bottom.
- After 15 minutes, reduce the oven temperature to 350°F (175°C). Continue baking for another 40-50 minutes, or until the edges of the pie are set and a gentle jiggle remains in the center (about 2 inches). A toothpick inserted near the edge should come out clean.
- To prevent cracking, turn off the heat and crack open the oven door. Allow the pie to cool gradually in the oven for about an hour. Then, transfer it to a wire rack to cool completely at room temperature for at least 2 hours before chilling.
- Serve immediately or, for best results and flavor development, refrigerate for at least 4 hours (or overnight) until thoroughly chilled and firm.
- Optional: Top with generous amounts of fresh whipped cream just before serving! Our recipe for Homemade Stabilized Whipped Cream is perfect for piping elegant borders.
Frequently Asked Questions & Notes
1. Can I use fresh pumpkin instead of canned?
Yes, you certainly can! If you prefer using fresh pumpkin, make sure to roast it until very tender, then puree it until perfectly smooth. It’s crucial to thoroughly drain any excess water from the fresh puree to avoid a watery filling, which might require a slightly longer bake time.
2. Do I need to blind bake the crust?
Blind baking (pre-baking the pie crust) isn’t always strictly necessary for pumpkin pie, but it is highly recommended if you desire a perfectly crisp bottom crust and want to prevent any sogginess. For the best results, blind bake your crust for 10-15 minutes before adding the filling. Remember to use a pie crust shield or aluminum foil around the edges to protect the crust from burning during the full bake time.
3. How do I know when my pumpkin pie is done?
Your pumpkin pie is done when the outer edges are set and firm, but the center (about a 2-inch circle) still has a slight, gentle jiggle when you carefully move the pie plate. A clean knife or toothpick inserted into the filling, about an inch or two from the edge, should come out mostly clean or with only a few moist crumbs. The pie will continue to firm up considerably as it cools.
4. Why did my pumpkin pie crack?
Cracks typically form when a pie is overbaked or cools too rapidly. To avoid this, bake your pie only until the center just barely jiggles, and then allow it to cool slowly. A great trick is to turn off the oven and prop the door open, letting the pie cool inside the oven for about an hour before moving it to a wire rack.
5. Can I make this pie ahead of time?
Absolutely! Pumpkin pie is an excellent make-ahead dessert. You can bake it 1-2 days in advance. Once it’s completely cooled, cover it tightly with plastic wrap and store it in the refrigerator. It will be perfectly ready for your holiday gathering or special meal.
6. How should I store leftover pumpkin pie?
After your pie has cooled completely, cover it securely with plastic wrap or aluminum foil and place it in the refrigerator. It will maintain its freshness and delicious flavor for up to 3-4 days.
7. Can I freeze pumpkin pie?
Yes, pumpkin pie freezes beautifully! To freeze, wrap the cooled pie tightly first in plastic wrap, then in a layer of heavy-duty aluminum foil. You can store it in the freezer for up to 1-2 months. When you’re ready to enjoy it, simply thaw the pie in the refrigerator overnight before serving.
8. What toppings go well with pumpkin pie?
Classic whipped cream is always a winner! However, you can also elevate your pie with a drizzle of warm caramel sauce, a sprinkle of chopped toasted pecans, a dusting of extra cinnamon, or even a few candied ginger pieces for a delightful kick.
9. Can I substitute the evaporated milk?
While evaporated milk is recommended for its rich texture, you can use other dairy alternatives. Half-and-half or heavy cream can be used for a similar richness, though they may slightly alter the final texture. For a dairy-free option, full-fat canned coconut milk works well, but be aware it might impart a subtle coconut flavor.
10. Why does my pie filling separate from the crust?
It’s quite common for a slight separation to occur between the filling and the crust as the pie cools and contracts. Don’t worry—this is a normal occurrence and will not affect the incredible taste or overall quality of your homemade pumpkin pie!
Nutrition Information:
Yield: 8
Serving Size: 1
Amount Per Serving:
Calories: 283
Total Fat: 11g
Saturated Fat: 5g
Trans Fat: 0g
Unsaturated Fat: 5g
Cholesterol: 14mg
Sodium: 302mg
Carbohydrates: 43g
Fiber: 2g
Sugar: 25g
Protein: 5g