
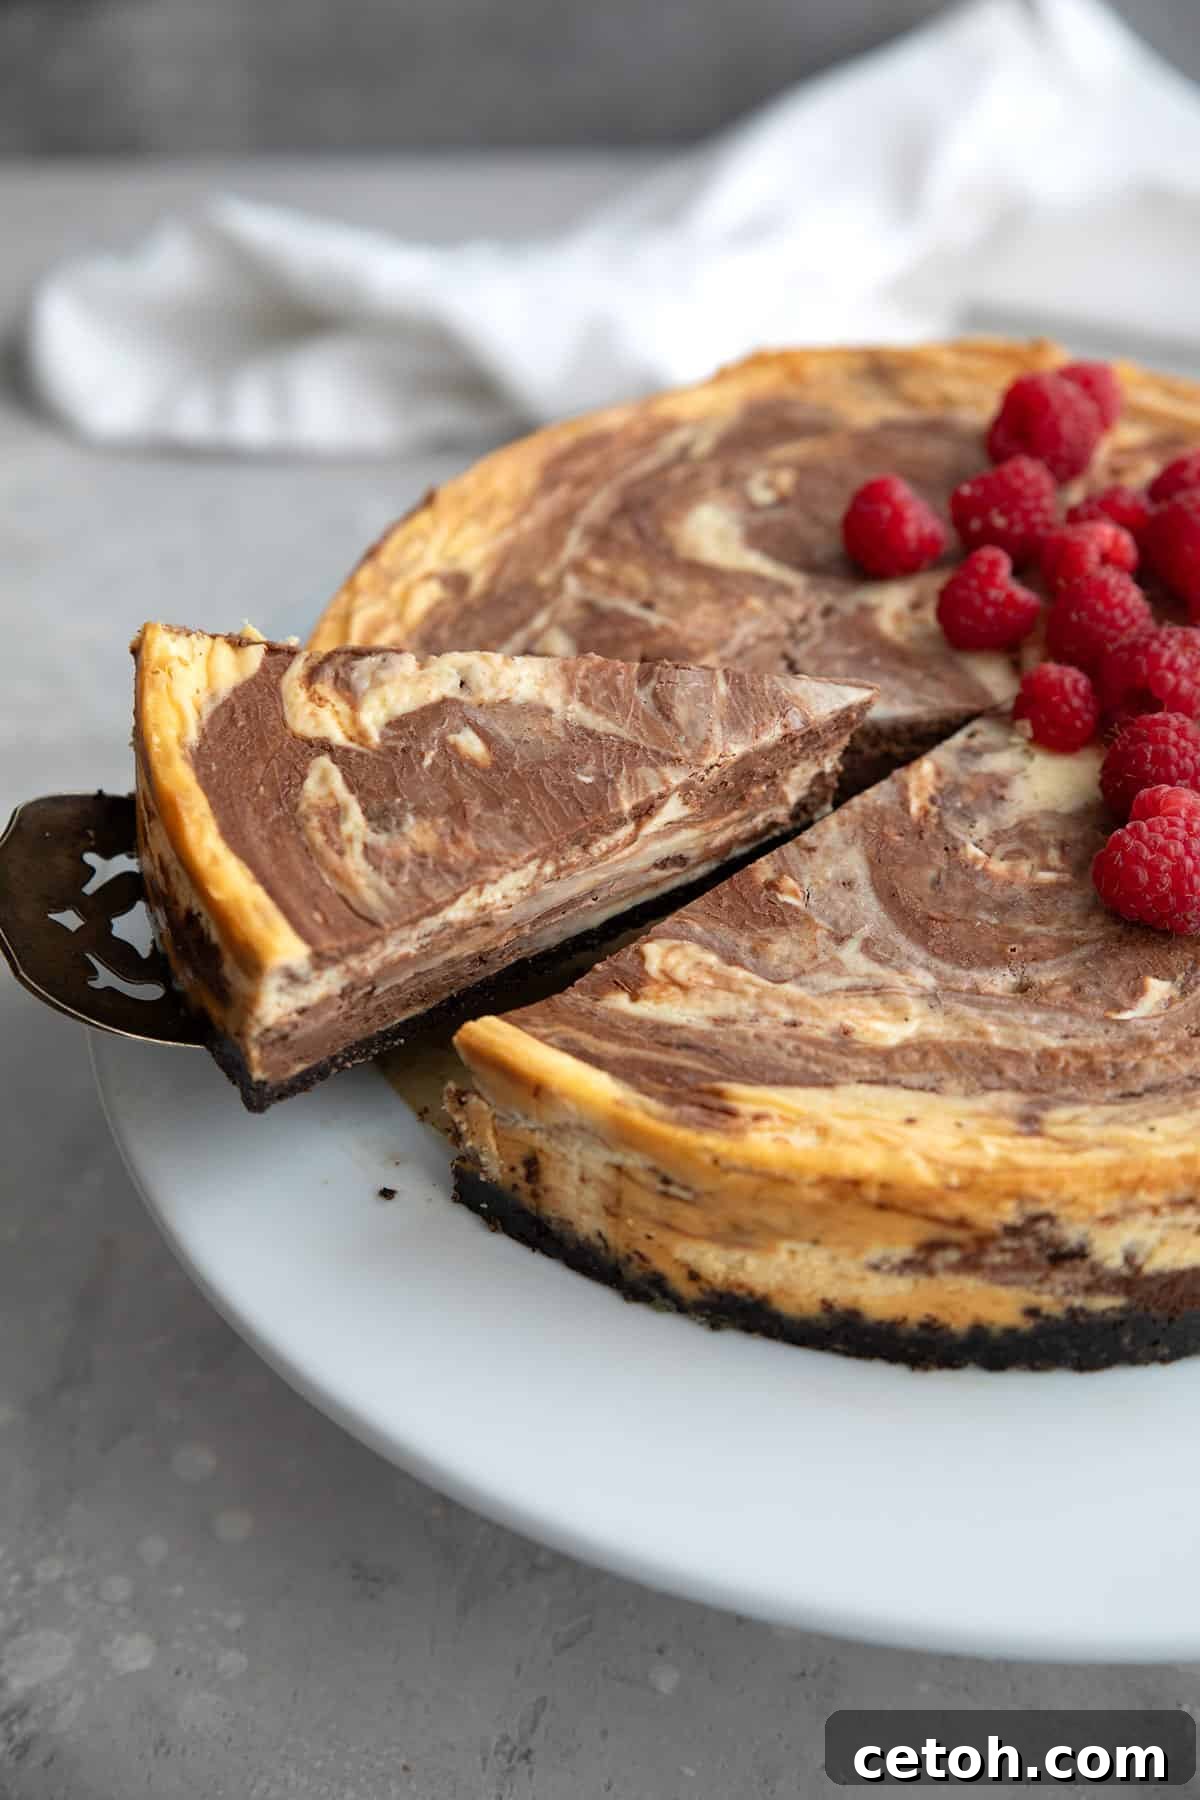
Are you one of those dessert lovers who finds themselves perpetually torn between the rich allure of chocolate and the comforting sweetness of vanilla? Imagine a world where you don’t have to choose. Our spectacular Keto Marble Cheesecake brings the best of both worlds together in a harmonious, visually stunning, and utterly delicious low-carb dessert that will undoubtedly impress. Prepare to create a masterpiece that looks like it came straight from a gourmet bakery, right in your own kitchen!
This isn’t just any cheesecake; it’s a culmination of the finest elements from my highly acclaimed New York Style Keto Cheesecake and my celebrated Keto Chocolate Cheesecake. The result is an extraordinary dessert with a velvety smooth texture, perfectly balanced flavors, and elegant swirls that make every slice feel like a special occasion. Whether you’re adhering to a ketogenic lifestyle or simply seeking a healthier yet indulgent treat, this marble cheesecake is your ultimate solution.
Crafting this marble cheesecake is a rewarding experience, and while it’s not overly complicated, paying close attention to a few key tips will ensure your success. From achieving that perfect swirl to baking without a troublesome water bath, this guide is designed to empower you to create the best keto marble cheesecake you’ve ever tasted.
Why This Keto Marble Cheesecake Will Be Your New Favorite
This extraordinary dessert isn’t just about satisfying a craving; it’s about elevating your low-carb baking to a new level. Here’s why this Keto Marble Cheesecake stands out:
- Eye-Catching Bakery-Style Swirl: Every slice reveals a stunning visual symphony of rich chocolate and creamy vanilla. The artful swirls aren’t just for show; they ensure you get a delightful blend of both flavors in every single bite, making this cheesecake a true centerpiece for any gathering. Your guests will marvel at its professional appearance, wondering if it came from a high-end patisserie.
- Perfect Balance of Chocolate and Vanilla: We’ve meticulously crafted the recipe to ensure neither flavor overpowers the other. The deep, intense notes of chocolate are beautifully complemented by the sweet, aromatic vanilla, creating a harmonious taste experience that will please even the most discerning palates. This classic combination is perfected in a keto-friendly format.
- Unique Nut-Free Chocolate Crust: For those with nut allergies or simply seeking a different texture, our crust is a game-changer. Made with nutrient-dense pumpkin seed meal, it offers a distinct, slightly earthy flavor and a satisfying crunch that beautifully contrasts with the smooth, creamy filling. It’s a thoughtful touch that makes this cheesecake accessible and enjoyable for more people.
- No Water Bath Required: Say goodbye to the fuss and potential disaster of a traditional water bath! Our innovative baking method, detailed in the instructions, ensures a perfectly baked, crack-free cheesecake without the added stress. This simplified approach makes the baking process much more enjoyable and accessible for home bakers.
- Conveniently Freezer-Friendly: Planning ahead has never been easier. This cheesecake freezes beautifully, allowing you to prepare it in advance for holidays, parties, or simply to have a delicious low-carb dessert on hand whenever a craving strikes. Simply thaw and enjoy, without compromising on taste or texture.
- Ideal for Holidays and Parties: With its elegant appearance and universally loved flavors, this Keto Marble Cheesecake is the perfect dessert for any celebration. Birthdays, anniversaries, Thanksgiving, Christmas, or a casual weekend gathering – it’s guaranteed to be a crowd-pleaser and a conversation starter, making every occasion feel extra special.
Mastering the Keto Marble Cheesecake: A Deep Dive into Ingredients
The success of any great recipe lies in its ingredients. For this Keto Marble Cheesecake, selecting the right components and understanding their roles is crucial for achieving that perfect low-carb indulgence. Here’s a closer look at what you’ll need:
- Pumpkin Seed Meal: This is our star ingredient for a delicious, nut-free crust. Pumpkin seed meal, essentially finely ground pumpkin seeds, provides a wonderful earthy flavor that complements chocolate beautifully. It’s a fantastic alternative to almond flour or other nut flours for those with allergies or simply looking for variety. You can easily make your own by blending raw pumpkin seeds into a fine meal in a food processor, or purchase it pre-made. For other options, sunflower seed flour also works well, as does traditional almond flour if nuts are not an issue.
- Dutch Process Cocoa Powder: For the most decadent chocolate flavor and a rich, dark color, Dutch process cocoa is highly recommended. Unlike natural cocoa powder, Dutch process cocoa has been treated with an alkali to reduce its acidity. This results in a smoother, mellower chocolate taste without bitterness, and a darker hue that makes your marble swirls truly pop. While natural cocoa can be used, the flavor profile and color will be slightly different.
- Sweetener (Granular & Powdered): The choice of sweetener significantly impacts the texture and baking process of your cheesecake. For the crust, an erythritol-based powdered sweetener is ideal as it helps achieve a crisp, firm base. For the creamy filling, you have more flexibility. As discussed in the “Sweetener Options” section below, a blend of erythritol and allulose often yields the best results, providing good texture without excessive recrystallization or browning. Ensure your sweeteners are powdered to prevent a grainy texture in the cheesecake filling.
- Sugar-Free Chocolate Chips: These are essential for creating the rich chocolate swirl. Opt for a high-quality brand that melts smoothly and has a good flavor, such as Lily’s. The better the chocolate, the better your cheesecake will taste. Check the ingredient list to ensure they are truly low-carb and don’t contain unwanted additives.
- Full-Fat Cream Cheese: For the silkiest, most luxurious cheesecake filling, full-fat cream cheese is non-negotiable. Ensure your cream cheese is completely softened to room temperature before mixing. This prevents lumps and ensures a smooth, uniform batter, which is vital for a crack-free cheesecake and beautifully blended swirls.
- Heavy Whipping Cream: A touch of heavy whipping cream adds an extra layer of richness and creaminess to the filling. It also plays a crucial role in adjusting the consistency of the chocolate batter, ensuring it’s thin enough to swirl elegantly with the vanilla portion. Using it at room temperature will help it incorporate seamlessly into the batter.
- Pantry Staples: Don’t forget the essentials! Unsalted butter for both the crust and melting with the chocolate chips, large eggs (also at room temperature) for structure and richness, and pure vanilla extract to enhance the vanilla flavor and overall aroma of the cheesecake. Always use good quality vanilla for the best results.
How to Create This Culinary Masterpiece: Step-by-Step Instructions
Bringing this Keto Marble Cheesecake to life is a delightful process. Follow these detailed steps to ensure a flawless and delicious dessert, from the crunchy crust to the intricate swirls:
- Prepare the Nut-Free Crust: Begin by preheating your oven to 325ºF (160ºC). In a medium bowl, thoroughly whisk together the pumpkin seed meal, cocoa powder, and your chosen powdered sweetener until evenly combined. Then, stir in the melted butter, ensuring all the dry ingredients are moistened. Press this mixture firmly and evenly into the bottom of a 9-inch springform pan. Bake for 10 to 12 minutes, just until fragrant and slightly set. Remove from the oven and reduce the oven temperature to 300ºF (150ºC) for the cheesecake filling. This pre-baking step ensures a crisp crust that won’t become soggy.
- Melt the Chocolate Swirl: In a small, microwave-safe bowl, combine the sugar-free chocolate chips and the tablespoon of butter. Heat in 30-second intervals in the microwave, stirring well after each interval, until the mixture is completely melted and smooth. Alternatively, use a double boiler for gentle melting. Set the melted chocolate aside to cool slightly while you prepare the vanilla batter. It should be warm enough to be liquid, but not hot.
- Craft the Creamy Vanilla Batter: In a large mixing bowl, using an electric mixer, beat the softened cream cheese on medium speed for 1 to 2 minutes until it becomes exceptionally creamy and smooth, with no lumps. Gradually beat in the granular sweetener and vanilla extract until fully incorporated and the mixture is light and fluffy. Next, beat in 1/3 cup of the room-temperature heavy whipping cream, mixing until smooth. At this point, taste the batter and adjust the sweetness to your preference if needed.
- Gently Incorporate Eggs: Add the eggs one at a time, beating on low speed only until just barely incorporated. It’s crucial not to overmix the eggs, as this can introduce too much air, leading to cracks in your finished cheesecake. After each egg, scrape down the sides and bottom of the bowl and the beaters to ensure everything is evenly mixed.
- Divide and Flavor the Batter: Transfer approximately one-third of the prepared vanilla cream cheese mixture into a separate bowl. Stir the cooled, melted chocolate into this smaller portion until it’s uniformly combined, creating your chocolate cheesecake batter. The chocolate will naturally thicken the batter, so to achieve a similar consistency to the vanilla batter for easier swirling, beat in the remaining heavy cream (about 3 tablespoons) into the chocolate mixture until it lightens slightly and is smooth.
- Assemble and Swirl with Finesse: Spoon alternate dollops of the vanilla and chocolate batters onto the pre-baked crust in the springform pan. You’ll have slightly more vanilla batter, so make the chocolate dollops a little smaller to ensure an even distribution. Once all the batter is in the pan, use a knife or an offset spatula to gently swirl the two batters together. You can create elegant S-shapes or zig-zags, being careful not to overmix, as this will blend the colors too much rather than creating distinct marble patterns. Gently shake the pan a few times to settle the filling and smooth the top surface.
- Bake to Perfection: Place the cheesecake in the preheated 300ºF (150ºC) oven and bake for 10 minutes. Then, reduce the oven temperature further to 250ºF (120ºC) and continue baking for another 60 to 70 minutes. The cheesecake is ready when the edges are set, but the center still jiggles slightly when the pan is gently shaken. This slight jiggle is normal and indicates a perfectly creamy texture once cooled.
- Cool Slowly for Crack-Free Results: Once baking is complete, turn off the oven but leave the cheesecake inside. Prop the oven door open slightly with a wooden spoon or heatproof object. Let the cheesecake cool gradually in the cooling oven for at least one hour. This slow cooling prevents drastic temperature changes that can cause cracks. After an hour, remove the cheesecake from the oven and let it cool completely on a wire rack at room temperature. Once fully cooled, transfer it to the refrigerator and chill for at least 2 to 3 hours, or preferably overnight, to allow it to firm up and set completely.
Essential Tips for a Flawless Keto Marble Cheesecake
Creating a perfect cheesecake, especially one with elegant swirls, requires a few insider tricks. These tips will help you navigate common challenges and achieve a bakery-quality finish every time:
- Achieving Consistent Batter Texture: One of the most common hurdles in making a marble cheesecake is that the chocolate batter tends to be thicker than the vanilla batter due to the addition of solid chocolate. This disparity in consistency can make it difficult to swirl the two batters together smoothly and can even lead to uneven baking or cracks. My recipe tackles this by adding a bit of extra heavy cream to the chocolate batter. This simple step helps thin it out, making both batters comparable in consistency for effortlessly beautiful swirls and a perfectly even bake. Don’t skip this step!
- Crack-Free Baking Method: Traditional cheesecake recipes often call for a water bath to ensure even, gentle baking and prevent cracks. However, this method can be messy and intimidating. For this recipe, I’ve successfully employed a new, simpler technique: baking the cheesecake at a low temperature and allowing it to cool gradually inside the turned-off oven with the door slightly ajar. While it extends the overall cooling time, this method significantly reduces the risk of cracks by preventing rapid temperature changes, giving you a smooth, pristine top without the fuss of a water bath. I’ve found this approach to yield excellent results consistently.
- Room Temperature Ingredients Are Key: Ensure all your cold ingredients, especially cream cheese and eggs, are at true room temperature. This is vital for achieving a smooth, lump-free batter. Cold ingredients will resist blending, leading to a lumpy texture and requiring more mixing, which can incorporate too much air and cause cracks. Plan ahead and take them out of the fridge at least an hour or two before you start baking.
- Don’t Overmix the Batter: Once you’ve added the eggs, mix only until they are just incorporated. Overmixing introduces excess air into the batter, which expands during baking and then collapses during cooling, often resulting in cracks. A smooth, creamy batter is the goal, but aggressive mixing should be avoided.
- Securing Your Springform Pan: While this recipe doesn’t use a water bath, it’s still a good practice to wrap the bottom of your springform pan with heavy-duty aluminum foil. This acts as an extra layer of protection, preventing any potential leaks of butter from the crust or cheesecake batter during baking and keeping your oven clean.
If you genuinely prefer the water bath method, you can certainly adapt this recipe and follow the general instructions for a water bath as outlined in my Keto Coffee Cheesecake recipe.
Sweetener Options: A Deeper Look
Choosing the right sweetener for your keto cheesecake can significantly impact its final texture and taste. Low-carb sweeteners behave differently than sugar, and understanding their unique properties is crucial for perfect results. Here’s a detailed breakdown of erythritol and allulose, and why a combination is often ideal:
- Erythritol: This popular sugar alcohol provides excellent structure and gives your cheesecake a wonderfully firm texture, especially in the crust, contributing to a satisfying crispness. However, erythritol has its drawbacks. It is non-hygroscopic, meaning it doesn’t attract or retain moisture, which can sometimes lead to a slightly drier cake over time and a tendency to recrystallize after baking, resulting in a subtle gritty texture, particularly noticeable when the cheesecake is cold.
- Allulose: A “rare sugar,” allulose is known for its ability to mimic sugar’s properties more closely than other keto sweeteners. It is hygroscopic, which means it retains moisture, helping the cheesecake stay delightfully moist and tender after baking. This property can significantly improve the mouthfeel. On the downside, allulose can make cheesecakes quite soft, potentially affecting how well they set. It can also cause the cake to brown faster on the sides and top, requiring careful monitoring during baking.
The Best of Both Worlds: A Combination Approach
After extensive experimentation, I’ve found that combining erythritol and allulose offers the optimal balance for cheesecake filling. Using erythritol in the crust ensures that coveted crispness. For the filling, a 50/50 split of erythritol and allulose provides the ideal compromise:
- The erythritol contributes to a good, stable texture that sets well.
- The allulose prevents excessive dryness and significantly reduces the chance of recrystallization, resulting in a smoother, more luscious, and moist filling that holds its quality beautifully, even when chilled.
This blend minimizes the individual drawbacks of each sweetener while maximizing their benefits, giving you a perfectly textured, delicious, and moist keto marble cheesecake.
More Keto Cheesecake Recipes to Love!
If you’ve enjoyed this delightful Keto Marble Cheesecake, you’ll be thrilled to discover more low-carb cheesecake creations that offer incredible flavor without the guilt. Expand your keto dessert repertoire with these fantastic recipes:
- Keto Brownie Cheesecake: A rich, fudgy brownie base meets creamy cheesecake for an ultimate chocolate lover’s dream.
- Keto Burnt Basque Cheesecake: Experience the rustic charm and irresistible caramelized top of this unique and surprisingly simple cheesecake.
- No Bake Keto Strawberry Cheesecake: A refreshing, light, and fruity option that requires no oven, perfect for warmer days.
- Keto Samoa Cheesecake Bars: Capture the iconic flavors of your favorite cookie in a convenient and delicious cheesecake bar format.
- White Chocolate Peppermint Keto Cheesecake: A festive and elegant choice, perfect for the holiday season with its cool peppermint and sweet white chocolate notes.
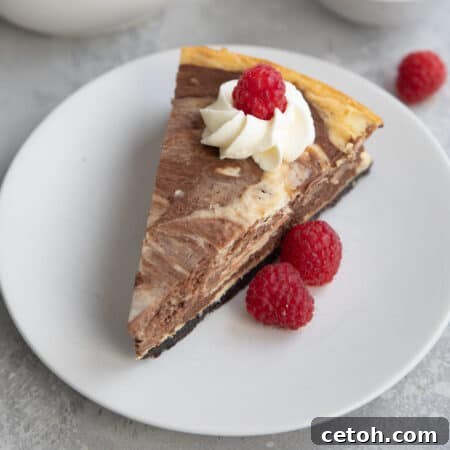
Keto Marble Cheesecake Recipe
16 slices
30 mins
2 hrs 10 mins
5 hrs 40 mins
Equipment
Ingredients
Crust
- 1 1/4 cups (80 g) pumpkin seed meal, or almond flour
- 3 tbsp (15.22 g) cocoa powder
- 1/4 cup (47.5 g) powdered sweetener
- 1/4 cup (56.75 g) butter, melted
Filling
- 4 ounces (113.4 g) sugar-free dark chocolate chips
- 1 tbsp (14.2 g) butter
- 24 ounces (680.39 g) cream cheese, softened
- 3/4 cup granular sweetener, erythritol or allulose, or a combination
- 1 tsp vanilla extract
- 1/2 cup (118.29 ml) heavy whipping cream, divided, room temperature
- 3 large eggs, room temperature
Instructions
Crust
-
Preheat the oven to 325ºF. In a medium bowl, whisk together the pumpkin seed meal, cocoa powder, and sweetener. Stir in the melted butter until well combined.
-
Press mixture firmly into the bottom of a 9-inch springform pan. Bake 10 to 12 minutes, and then remove and reduce the oven temperature to 300ºF.
Cheesecake Filling
-
In a small microwave-safe bowl, combine the chocolate chips and the butter. Heat in 30 second increments, stirring in between, until melted and smooth. Set aside to cool.
-
In a large bowl, beat the cream cheese on medium for 1 to 2 minutes, until super creamy. Beat in the sweetener and vanilla extract until well combined.
-
Then beat in 1/3 cup of the heavy whipping cream. Taste the mixture and adjust sweetness as desired.
-
Beat in the eggs one at a time until just barely incorporated, scraping the beaters, and the bottom and sides of the bowl in between.
-
Transfer about one-third of the mixture to another bowl and stir in the melted chocolate until well combined. Beat in the remaining heavy cream to help lighten the mixture (it will thicken considerably when you add the chocolate).
-
Alternate scoops of vanilla and chocolate batter, swirling with a knife or offset spatula as you go. You will have slightly more vanilla batter than chocolate batter so make the chocolate scoops a little smaller for more even distribution.
-
Shake the pan gently to even out the filling and smooth the top. Place in the oven and bake 10 minutes, then turn down the temperature to 250ºF and continue to bake for another 60 to 70 minutes, until the filling is mostly set but still jiggles a little in the center when the pan is shaken.
-
Turn off the oven and crack the door open with a wooden spoon. Allow the cheesecake to sit inside for another hour, then cool on a wire rack. Refrigerate 2 to 3 hours to firm up.
Notes
Nutrition
I’d love to know your thoughts, leave your rating below!
Frequently Asked Questions About Keto Marble Cheesecake
Absolutely, this Keto Marble Cheesecake freezes beautifully! You can freeze the entire cake for future enjoyment or cut it into individual slices for convenient portion control. To prevent freezer burn and maintain optimal freshness, ensure you wrap the cheesecake tightly in several layers of plastic wrap, followed by aluminum foil. Properly stored, it will maintain its delicious flavor and texture for at least 2 months. Simply thaw in the refrigerator overnight before serving.
I do not recommend using unsweetened chocolate for this particular recipe. Unsweetened chocolate has a very strong, bitter flavor that would require a significant increase in sweetener to balance, potentially altering the overall sweetness profile and texture of the cheesecake. Additionally, unsweetened chocolate tends to thicken batter considerably more than sugar-free chocolate chips, making it much more challenging to achieve that elegant, smooth swirl. This could also contribute to an increased risk of cracking during baking. For best results, stick to sugar-free chocolate chips as recommended.
Each serving of this delightful keto marble cheesecake recipe contains approximately 7.0g of total carbohydrates. With 2.0g of dietary fiber per serving, the net carbohydrate count comes down to just 5.0g per slice. This makes it an excellent choice for those following a ketogenic or low-carb diet, allowing you to indulge in a luxurious dessert without derailing your macros.
To keep your cheesecake fresh and delicious, store any leftovers in an airtight container in the refrigerator. This will protect it from absorbing other odors and prevent it from drying out. When stored correctly, your Keto Marble Cheesecake will stay fresh for up to 5 days, making it perfect for enjoying throughout the week or sharing with unexpected guests.
While the pumpkin seed meal crust is specially designed to be nut-free and complement the chocolate swirl, you can certainly experiment with other keto-friendly crusts. A simple almond flour crust (made with almond flour, sweetener, and butter) or a coconut flour crust would also work. Ensure that any alternative crust is pre-baked as per its specific recipe instructions to provide a stable foundation for the creamy filling.