

Irresistible Homemade Red Velvet Cookies: A No-Cake-Mix Recipe for Bakery-Style Perfection
Tired of red velvet cookie recipes that rely on bland cake mixes? This exceptional, easy-to-follow recipe for Homemade Red Velvet Cookies uses only simple, wholesome pantry ingredients to craft a truly unforgettable treat. Experience the perfect harmony of rich cocoa and comforting sweetness, all elevated by that signature hint of tang that defines authentic red velvet flavor. These vibrantly colored, soft, and chewy cookies are ideal for festive holidays, cherished special occasions, or any moment you desire a bakery-quality indulgence right in your own kitchen.
While we absolutely adore the classic combination of red velvet with creamy white chocolate chips, feel free to unleash your creativity! You could easily swap them for decadent milk chocolate chunks, sophisticated semi-sweet morsels, crunchy pecans, or even colorful M&Ms for an extra pop of fun and texture.
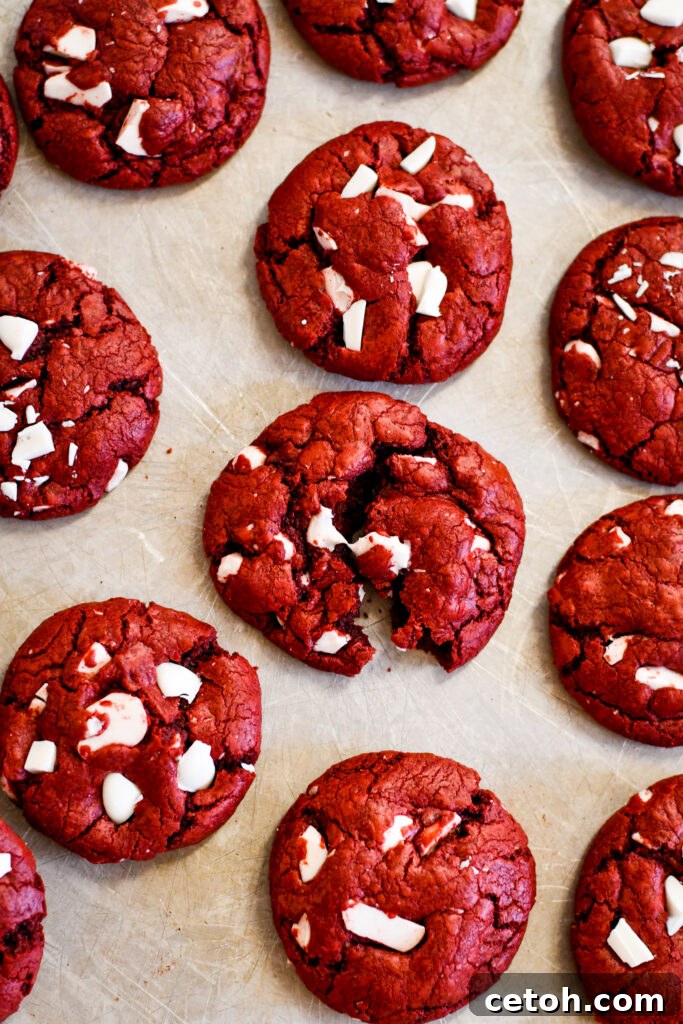
Homemade Red Velvet Cookies | Soft, chewy, and made from scratch! No cake mix needed for these easy, bakery-style cookies. A perfect treat for Valentine’s Day or any day you crave something special.
Unveiling the Essential Ingredients for Perfect Red Velvet Cookies
Crafting truly exceptional red velvet cookies begins with understanding the role each ingredient plays. This recipe focuses on quality, fundamental components that come together to create that iconic flavor and irresistible texture without relying on shortcuts like cake mix.
- Butter – The foundation of richness and moisture, butter is crucial for achieving that soft, tender, and chewy texture. We recommend using unsalted butter to control the overall saltiness of your cookies. If you’re sensitive to lactose, Green Valley Butter is an excellent choice that keeps these cookies lactose-free without compromising on flavor or texture. Ensure it’s slightly softened to room temperature for optimal creaming.
- Brown Sugar – This isn’t just for sweetness; brown sugar imparts a delightful molasses flavor that adds depth and warmth to the cookies. Its inherent moisture content also plays a vital role in keeping your cookies wonderfully soft and chewy even after baking. The slight acidity in brown sugar also subtly interacts with the other leavening agents.
- Granulated Sugar – Balancing the sweetness from the brown sugar, granulated sugar contributes to a slight crispness around the edges of the cookies while ensuring a tender interior. It also assists in creaming with the butter, creating air pockets that contribute to the cookie’s light structure.
- Egg – A single egg acts as a binder, bringing all the ingredients together and providing structure. It also adds moisture, richness, and aids in the emulsification of fats and liquids, contributing to a smooth, uniform dough and a perfectly chewy final product.
- All-Purpose Flour – The structural backbone of almost any cookie, all-purpose flour provides the necessary framework for the dough. Properly measured, it ensures the cookies hold their shape, offering a satisfying chewiness without becoming tough.
- Cocoa Powder – This is where the subtle chocolate flavor of red velvet comes from. Unlike a traditional chocolate cookie, red velvet calls for just enough cocoa powder to impart a nuanced, deep flavor that complements the tanginess. For true red velvet, opt for natural unsweetened cocoa powder, as its acidity better interacts with the baking soda and red food coloring.
- Baking Soda – A powerful leavening agent, baking soda reacts with acidic ingredients like cocoa powder, brown sugar, and most importantly, vinegar, to create carbon dioxide bubbles. These bubbles are essential for giving the cookies a light, tender crumb and a slight lift, preventing them from being too dense.
- Salt – Often overlooked, a small amount of salt is critical for enhancing all the other flavors in the cookie. It balances the sweetness, makes the chocolate more prominent, and ensures the overall taste is well-rounded and not flat.
- Vinegar – A cornerstone of classic red velvet, vinegar is essential for several reasons, which we’ll explore in detail below. It activates the baking soda, enhances the signature tang, and helps to deepen the red hue, making it a non-negotiable ingredient for authentic flavor and appearance.
- Vanilla Extract – Adding a layer of aromatic depth, vanilla extract enhances and rounds out the overall flavor profile of the cookies. Pure vanilla extract is always recommended for the best taste.
- Red Food Coloring – To achieve that vibrant, iconic red hue, red food coloring is a must. A good quality gel food coloring will give the most intense color without adding excess liquid to the dough.
- White Chocolate Chips – Our preferred mix-in for their creamy contrast to the slightly tangy red velvet base. For those with dietary restrictions, King David Vegan white chips are an excellent dairy-free option that maintains the indulgent quality of the cookies.
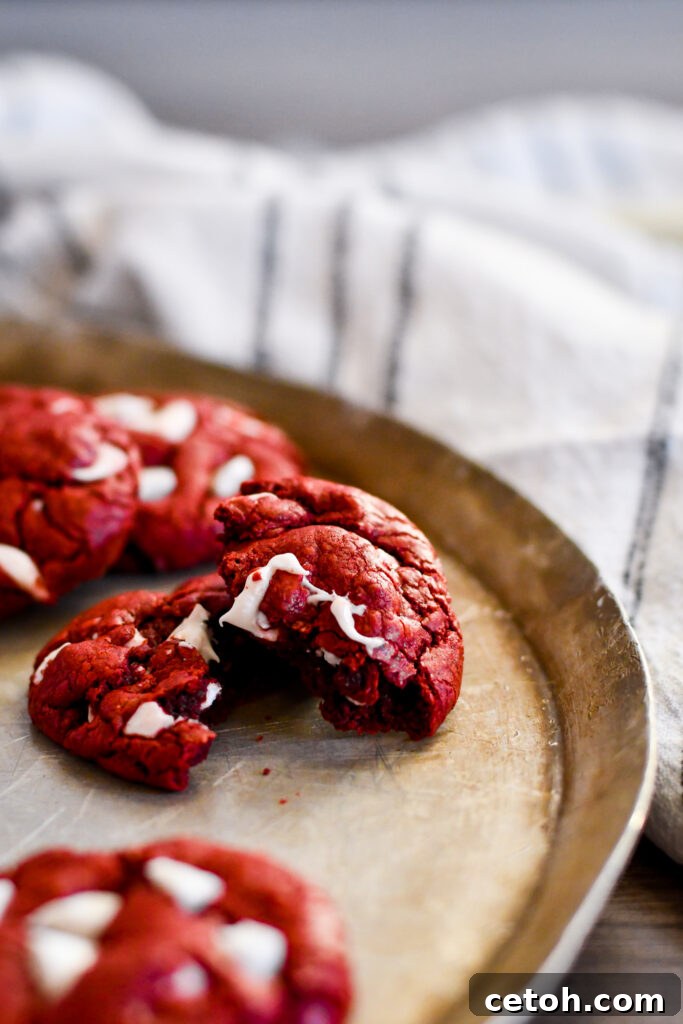
Easy Homemade Red Velvet Cookies | Love red velvet? These homemade red velvet cookies are rich, soft, and packed with flavor—no cake mix required! A simple recipe that’s perfect for sharing with loved ones.
The Science Behind the Tang: Why Vinegar is Essential in Red Velvet
Vinegar might seem like an unusual addition to a cookie recipe, but it is, in fact, a cornerstone ingredient in traditional red velvet recipes. It serves a few critical purposes that contribute significantly to the characteristic texture, flavor, and even color of these beloved treats.
-
Activates the Baking Soda – This is perhaps the most crucial role of vinegar. As an acid, vinegar readily reacts with baking soda (sodium bicarbonate), a base. This reaction produces carbon dioxide gas, which creates tiny air bubbles within the cookie dough. These bubbles are what give the cookies their distinct soft, tender, and slightly airy texture, preventing them from becoming too dense or flat. Without this activation, the baking soda wouldn’t perform its leavening duties effectively.
-
Enhances the Classic Red Velvet Flavor – Authentic red velvet isn’t just a chocolate cake dyed red; it’s characterized by a subtle, distinctive tang. Historically, this tang came from the combination of natural cocoa powder (which is acidic) and buttermilk, often complemented by vinegar in cakes. In cookie form, where buttermilk isn’t typically used, vinegar steps in to provide that same desirable, delicate tang that distinguishes red velvet from other chocolate-based desserts. It’s a key part of the flavor profile, adding complexity and preventing the cookies from being overly sweet.
-
Deepens the Red Color – While modern red velvet recipes rely heavily on food coloring for their vibrant hue, vinegar still plays a supporting role. In older recipes, especially those predating widespread synthetic food dyes, the red color was a natural reaction between non-Dutched cocoa powder (which is acidic) and the acid in buttermilk or vinegar. The anthocyanin pigments in natural cocoa would turn a reddish-brown when exposed to acid. Even with food coloring, vinegar helps maintain the vibrancy and depth of the red, ensuring it doesn’t fade or become dull during baking. It helps to bring out the best in the red dye, making it more pronounced and visually appealing.
Even though it’s a relatively small amount in the recipe, vinegar makes an enormous difference in achieving the authentic texture, unique flavor, and vibrant color that define truly homemade red velvet cookies! Don’t be tempted to skip it.

Make Bakery-Style Red Velvet Cookies at Home! | No cake mix, just real homemade goodness! A delicious, festive treat for Christmas, Valentine’s Day, or any day – always a crowd-pleaser!
Mastering Red Velvet: Essential Tips for Baking Success
Achieving bakery-quality red velvet cookies at home is entirely within reach, especially when you follow a few key principles. These tips will help you create cookies that are consistently soft, chewy, and bursting with flavor every single time.
-
Use Room Temperature Ingredients – This is a golden rule in baking, especially for cookies. Ensure your butter, egg, and any other refrigerated ingredients are at room temperature before you begin mixing. Room temperature butter creams much more effectively with sugar, incorporating more air for a lighter, softer cookie. A room temperature egg emulsifies better with the butter mixture, resulting in a smoother, more uniform dough and a more consistent texture. If you’re short on time, you can quickly soften butter by cutting it into small pieces or microwaving it for short bursts (5-10 seconds), and warm an egg by placing it in a bowl of warm water for 5-10 minutes.
-
Don’t Skip the Vinegar – As discussed, vinegar is a fundamental component of authentic red velvet. Its acidic properties react with the baking soda to create that signature soft, tender texture and subtle tanginess. Even though it’s a small amount, typically just one tablespoon, it genuinely makes a significant difference in both the flavor and the final texture of your cookies. Omitting it would result in cookies that lack the characteristic red velvet depth and tenderness.
-
Chill the Dough (If Needed) – While this recipe is often forgiving, if your kitchen is warm or your dough feels overly soft or sticky after mixing, chilling it is a wise step. A quick chill in the refrigerator for 20–30 minutes can prevent your cookies from spreading too much on the baking sheet. Chilled dough retains its shape better during baking, leading to thicker, chewier cookies with perfectly defined edges, instead of thin, flat ones.
-
Measure Your Flour Correctly – Too much flour is a common culprit for dry, crumbly, or tough cookies. The most accurate way to measure flour is by weight using a kitchen scale. If you don’t have one, use the “spoon and level” method: lightly spoon flour into your measuring cup until it overflows, then level it off with the back of a knife. Never pack the flour into the cup or scoop directly from the bag, as this can add up to 25% more flour than needed.
-
Avoid Overmixing the Dough – Once you add the dry ingredients to the wet ingredients, mix only until just combined. Overmixing develops the gluten in the flour too much, which can lead to tough, dense cookies. A few streaks of flour remaining are perfectly fine; they’ll disappear during the gentle folding of the mix-ins or during the initial moments of baking.
-
Use Parchment Paper for Even Baking – Lining your baking sheets with parchment paper offers several benefits. It prevents sticking, making cleanup a breeze, and helps the cookies bake more evenly by insulating the bottom. It also ensures consistent results across multiple batches and contributes to those beautiful, slightly chewy edges and soft centers.
By diligently following these simple yet crucial tips, you’ll consistently achieve soft, chewy, bakery-style red velvet cookies that are a true delight to bake and even more so to eat!
Homemade Red Velvet Cookies (No Cake Mix) Recipe
Recipe Overview
The perfect combination of soft, chewy, and cocoa-rich flavor! No cake mix, just pure homemade goodness that everyone will love.
- Yield: 18 cookies
- Prep Time: 10 minutes
- Cook Time: 9 minutes
- Total Time: Approximately 19 minutes
Ingredients
- 1/2 cup butter, slightly softened
- 3/4 cup brown sugar, packed
- 1/4 cup granulated sugar
- 1 large egg
- 1 and 1/2 cups all-purpose flour
- 2 Tbsp. unsweetened cocoa powder
- 1 teaspoon baking soda
- 1/4 teaspoon salt
- 1 Tbsp. white vinegar
- 2 teaspoons vanilla extract
- 1 Tablespoon red gel food coloring (for vibrant color)
- 1/2 cup white chocolate chips (or your preferred mix-in)
Instructions
- Preheat Oven: Preheat your oven to 375ºF (190ºC). Line a baking sheet with parchment paper.
- Cream Wet Ingredients: In the bowl of a stand mixer fitted with the paddle attachment, beat the slightly softened butter and both sugars (brown and granulated) together on medium speed until light, fluffy, and thoroughly creamed, about 2-3 minutes. Scrape down the sides of the bowl as needed. Beat in the egg until well combined.
- Combine Dry Ingredients: In a separate medium bowl, whisk together the all-purpose flour, cocoa powder, baking soda, and salt until evenly distributed.
- Form the Dough: Gradually add the dry mixture to the stand mixer with the wet ingredients. Mix on low speed until just combined and a dough begins to form. Then, add the vinegar, vanilla extract, and red food coloring. Continue mixing on low speed until the color is evenly distributed and a cohesive red velvet dough is achieved. Be careful not to overmix.
- Shape and Coat: Scoop about 2 tablespoons of dough at a time. Roll each portion into a smooth ball between your palms. If desired, roll each dough ball in a shallow dish of granulated sugar to coat completely; this adds a lovely sparkle and a slight crispness to the exterior. Place the coated dough balls onto the prepared baking sheet, leaving about 2 inches between each cookie.
- Bake and Cool: Bake the cookies for 9 minutes. The edges should be set, but the centers may still look slightly soft (they will firm up as they cool). Do not overbake. Remove from the oven and let the cookies cool on the baking sheet for at least 5-10 minutes before transferring them to a wire rack to cool completely. This resting period on the hot baking sheet helps them finish baking without drying out.
Nutrition Information:
- Yield: 18 cookies
- Serving Size: 1 cookie
- Amount Per Serving (approximate):
- Calories: 130
- Total Fat: 7g
- Saturated Fat: 4g
- Trans Fat: 0g
- Unsaturated Fat: 2g
- Cholesterol: 25mg
- Sodium: 150mg
- Carbohydrates: 16g
- Fiber: 0g
- Sugar: 13g
- Protein: 1g
Did you make this recipe? We’d love to see your creations! Please leave a comment on the blog or share a photo on Instagram using #HomemadeRedVelvetCookies!
Baking Perfect Red Velvet Cookies: A Detailed Step-by-Step Guide
While the recipe instructions are concise, let’s walk through each stage with more detail to ensure your homemade red velvet cookies turn out flawlessly, delivering that soft, chewy, and tangy perfection every time.
Step 1: Preparation is Key
Before you even think about mixing, take a moment to prepare your workspace and ingredients. Preheat your oven to a precise 375ºF (190ºC). This ensures the oven is at the correct temperature when your cookies go in, which is crucial for even baking and proper spread. Line your baking sheets with parchment paper. This prevents sticking, promotes even browning, and makes cleanup incredibly easy. Most importantly, ensure your butter and egg are at room temperature. This isn’t just a suggestion; it’s vital for a smooth, cohesive dough. Room temperature butter creams beautifully with sugar, creating air pockets for a tender texture, and a room temperature egg emulsifies seamlessly with the fat, resulting in a consistent batter.
Step 2: Creaming the Wet Ingredients
In the bowl of your stand mixer, fitted with the paddle attachment, combine the softened butter with both the brown and granulated sugars. Beat them together on medium speed for about 2-3 minutes. You’re looking for a mixture that’s light in color, fluffy, and airy. This creaming process is essential as it incorporates air, which contributes to the cookies’ light texture. Don’t rush this step! Once creamed, crack in your room temperature egg and beat until it’s fully incorporated, ensuring there are no streaks of egg yolk remaining. Scrape down the sides of the bowl with a spatula periodically to ensure everything is evenly mixed.
Step 3: Combining the Dry Ingredients
While your wet ingredients are creaming, whisk together your dry components in a separate medium bowl. This includes the all-purpose flour, cocoa powder, baking soda, and salt. Whisking ensures these ingredients are thoroughly combined and evenly distributed. This prevents pockets of unmixed flour or leavening agents in your final dough, which could lead to inconsistent cookie texture or flavor.
Step 4: Forming the Iconic Red Velvet Dough
With your wet ingredients creamed and dry ingredients whisked, it’s time to bring them together. Gradually add the dry mixture to the stand mixer bowl with the wet ingredients. Mix on low speed until the ingredients are just combined and a soft dough begins to form. Be careful not to overmix at this stage, as excessive mixing can develop gluten, leading to tougher cookies. Once the flour is mostly incorporated, add the vinegar, vanilla extract, and the vibrant red food coloring. Continue mixing on low speed until the color is uniformly distributed throughout the dough, creating that unmistakable rich red hue, and a cohesive dough is formed. The dough should be soft but manageable, not sticky.
Step 5: Shaping and Preparing for Baking
Using a cookie scoop or measuring spoons, portion out approximately 2 tablespoons of dough for each cookie. Gently roll each portion into a smooth ball between your palms. For an extra touch of bakery charm and a pleasant texture contrast, you can roll each dough ball in granulated sugar. This creates a sparkling, slightly crisp exterior. Place the shaped dough balls onto your prepared baking sheet, ensuring there’s about 2 inches of space between each one to allow for proper spreading during baking. Avoid overcrowding the baking sheet.
Step 6: Baking and Cooling for Perfection
Carefully transfer your baking sheet to the preheated oven. Bake the cookies for precisely 9 minutes. It’s important not to overbake red velvet cookies, as this can make them dry. The edges should appear set, but the centers may still look slightly soft or puffy when you remove them from the oven. This is exactly what you want! The residual heat of the baking sheet will continue to cook them gently, ensuring a perfectly soft and chewy center. Let the cookies cool on the baking sheet for 5-10 minutes. This crucial resting period allows them to firm up without becoming brittle. After this initial cooling, carefully transfer them to a wire rack to cool completely. Enjoy them warm, or store them for later!
Frequently Asked Questions About Homemade Red Velvet Cookies
Can I make these cookies ahead of time?
Absolutely! You have a couple of options for making these red velvet cookies in advance. You can prepare the dough and store it in an airtight container in the refrigerator for up to 3-4 days. When you’re ready to bake, let the dough sit at room temperature for about 15-20 minutes to soften slightly, then scoop and bake as directed. Alternatively, you can scoop the dough balls, roll them in sugar, and freeze them on a baking sheet. Once solid, transfer them to a freezer-safe bag. You can bake them directly from frozen, adding an extra 2-4 minutes to the baking time.
How should I store red velvet cookies?
Once completely cooled, store your homemade red velvet cookies in an airtight container at room temperature for up to 3-5 days. To keep them extra soft, you can place a slice of bread in the container with them; the cookies will absorb moisture from the bread. For longer storage, you can freeze baked cookies in a freezer-safe bag or container for up to 3 months. Thaw them at room temperature when you’re ready to enjoy.
What kind of red food coloring is best for red velvet?
For the most vibrant and true red color without affecting the cookie’s texture, we highly recommend using a gel food coloring. Liquid food coloring can add too much moisture to the dough, potentially altering the texture. Brands like Americolor or Wilton offer excellent gel food colorings that provide intense color with just a small amount. Look for “Super Red” or “Red Red” shades for the best results.
Why are my red velvet cookies flat?
Several factors can lead to flat cookies. Ensuring your butter is not too soft (it should be soft enough to indent with a finger but not greasy or melted) is key, as over-softened butter causes excessive spreading. Measuring flour accurately (using the spoon and level method) is also crucial, as too little flour leads to a wet dough that spreads. If your dough feels particularly warm or soft after mixing, a quick chill in the refrigerator for 20-30 minutes can help prevent spreading. Lastly, ensure your baking soda is fresh and active, as expired leavening agents won’t provide the necessary lift.
Can I use natural cocoa powder or Dutch-processed cocoa powder?
For traditional red velvet, natural unsweetened cocoa powder is generally preferred. Its natural acidity reacts better with the baking soda and vinegar in the recipe to enhance the red color and contribute to the leavening. Dutch-processed cocoa powder has been treated to neutralize its acidity, which can affect the chemical reactions and the final color/texture if the recipe isn’t specifically formulated for it. While you can use Dutch-processed in a pinch, you might find the color less vibrant and the tanginess slightly muted.
Variations and Serving Suggestions for Your Red Velvet Cookies
Creative Mix-ins to Elevate Your Cookies
While white chocolate chips are a classic choice, don’t hesitate to experiment! Consider folding in dark chocolate chunks for a more intense cocoa experience, milk chocolate chips for a sweeter touch, or even chopped pecans or walnuts for added crunch and nutty flavor. For a festive twist, try adding festive sprinkles or small candies. Cream cheese frosting swirls (added after baking) can also mimic the traditional red velvet cake flavor.
Serving Ideas for Any Occasion
These homemade red velvet cookies are versatile and perfect for a variety of occasions. Serve them as a festive treat for holiday gatherings, a romantic dessert for Valentine’s Day, or a delightful addition to any party platter. They pair wonderfully with a glass of cold milk, a warm cup of coffee, or even a scoop of vanilla bean ice cream for an extra indulgent dessert. Don’t forget to share them – they make excellent gifts for friends, family, and neighbors!
With this comprehensive guide and recipe, you’re now equipped to bake the most delicious, soft, and perfectly tangy homemade red velvet cookies without any cake mix cheats. Get ready to impress your taste buds and those of everyone you share them with!
More Delicious Cookie Recipes to Explore
If you loved making these red velvet cookies from scratch, you’re in for a treat! Discover more delightful cookie recipes from our collection, perfect for expanding your baking repertoire and satisfying any sweet craving.
Chocolate Chip Birthday Cookies
This Chocolate Chip Birthday Cookies recipe is packed with gooey chocolate chips and sprinkles and baked to perfection. Easy to make and utterly irresistible, they’re the perfect treat for any special occasion, bringing joy with every bite!
Muddy Buddy Crumbl Cookies Copycat Recipe | Craving those famous Crumbl Cookies but need a dairy-free option? Make your own at home with our irresistibly delicious Muddy Buddy Crumbl Cookies copycat recipe!
White Chocolate Toffee Snickerdoodle Cookies Recipe | Traditional snickerdoodle cookies get a gourmet upgrade in this recipe, featuring decadent white chocolate chips, crunchy toffee bits, and a delightfully chewy rather than cake-y texture.