
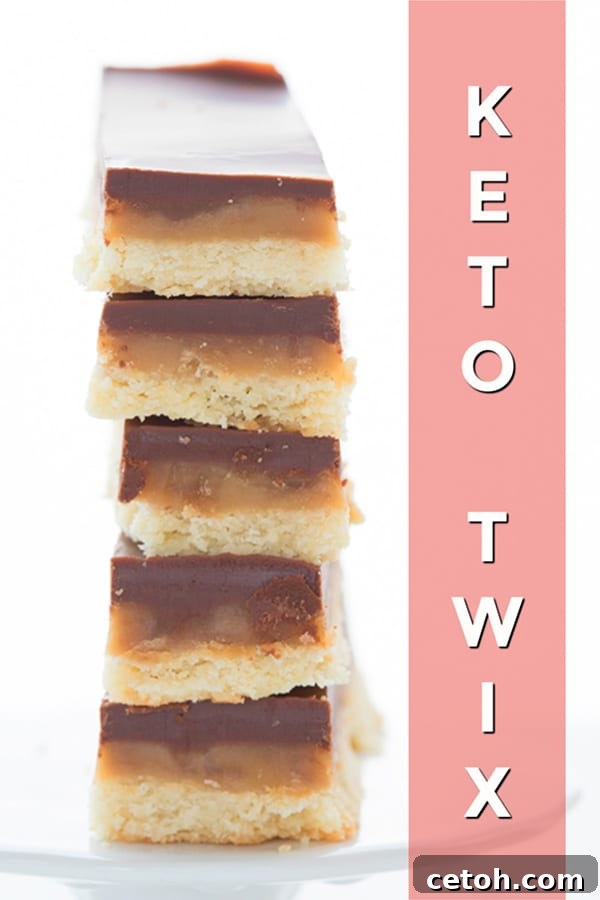
Ultimate Homemade Keto Twix Bars: Indulge in Guilt-Free Low Carb Goodness
Satisfy your sweet cravings the keto way with these incredible homemade Keto Twix Bars! Imagine a buttery, tender shortbread crust, generously topped with a rich, perfectly gooey sugar-free caramel, all enrobed in a layer of smooth, creamy milk chocolate. This delicious low-carb creation is designed to deliver all the classic flavor and texture of your favorite candy bar, without the sugar or excessive carbs. Get ready to transform your kitchen into a keto candy factory and enjoy a truly guilt-free indulgence!
Making your own keto candy bars at home is an incredibly rewarding experience. It gives you complete control over ingredients, ensuring everything aligns with your low-carb lifestyle. This particular Keto Twix Bar recipe first debuted back in 2014, but as the ketogenic world has evolved with better ingredients and techniques, it was high time for a significant update. This enhanced version brings even more authentic flavor and superior texture, making it the best keto Twix you’ll ever taste.
The Irresistible Charm of Milk Chocolate in Keto Twix Bars
When it comes to chocolate, people often fall into two camps: milk chocolate enthusiasts or dark chocolate devotees. Personally, I find myself delightfully ambidextrous when it comes to chocolate – my preference often shifts with my mood or the specific dessert. While I deeply appreciate the antioxidant richness and complex bitterness of a high-quality dark chocolate, certain keto desserts simply demand the creamy sweetness of milk chocolate.
These homemade Keto Twix Bars are a prime example. To truly capture that nostalgic “Twix-ness,” the familiar, comforting sweetness of milk chocolate is non-negotiable. Swapping it for dark chocolate, no matter how good, would fundamentally alter the experience and stray too far from the beloved original. The creamy milk chocolate shell provides the perfect counterpoint to the buttery shortbread and the deep, rich caramel, creating a harmonious symphony of flavors and textures that defines the iconic candy bar.
Embracing the joy of crafting your own keto-friendly versions of classic treats is more than just a culinary adventure; it’s a powerful strategy for maintaining your low-carb lifestyle. By recreating your old “junk food” favorites into healthier alternatives, you’re less likely to succumb to temptation from conventional, sugar-laden options. This approach allows you to indulge your cravings without the guilt, providing deep satisfaction and helping you stay on track with your health and wellness goals.
Perhaps the classic Twix bar wasn’t your go-to treat. No worries! The world of homemade keto candy is vast and exciting. You can explore a plethora of keto candy recipes, from peanut butter cups to snickers-inspired bars, ensuring you’ll find a delightful low-carb alternative to satisfy any sweet tooth.
The Evolution of Excellence: Updated Keto Twix Bars and Caramel
Revisiting this cherished recipe for Keto Twix Bars was a delightful process. What truly needed a transformative update, however, was the caramel filling. When this recipe was first developed years ago, the landscape of keto-friendly sweeteners was quite different. Achieving that deep, complex brown sugar caramel flavor often required compromises, sometimes even involving small amounts of coconut sugar.
Fast forward to today, and we have an incredible array of sugar-free brown sugar replacements. My personal game-changer for caramel has been the dynamic duo of Swerve Brown and BochaSweet. This specific combination doesn’t just deliver a rich, deep, and incredibly authentic caramel flavor; it also ensures the caramel remains beautifully soft and resistant to recrystallization – a common challenge with many sugar-free caramel recipes. This innovation in sweeteners allows for a truly superior caramel experience that was simply not possible when the recipe was first conceived.
For the filling of these homemade Keto Twix Bars, the caramel needed to be thicker and more stable than a pouring sauce. To achieve this perfect consistency, I adapted a method similar to what I use for my renowned Keto Turtles. This technique involves careful cooking and the addition of a specific thickener, resulting in a caramel that holds its shape beautifully while still maintaining that melt-in-your-mouth texture. The result is a caramel layer that is firm enough to bite into, yet yields with a luscious, sweet chew – absolutely perfect for these copycat candy bars!
Mastering Your Homemade Keto Twix: Essential Tips for Success
Crafting these delectable Keto Twix Bars is an enjoyable process, and with a few key tips, you can ensure a perfect outcome every time. Pay close attention to these details for each layer to achieve that authentic Twix experience.
For the Perfectly Tender Shortbread Crust:
- Parchment Paper is Your Best Friend: Always line your baking pan with parchment paper, leaving a slight overhang on the sides. This isn’t just for easy cleanup; it’s crucial for lifting the entire slab of bars out of the pan in one piece, allowing for clean, precise cutting later. Without it, the delicate crust might break or stick.
- Choose Your Flour Wisely: Fine blanched almond flour is the absolute best choice for creating a tender, crumbly keto shortbread crust that melts in your mouth. Its low-carb profile and texture are ideal. If you require a nut-free alternative, sunflower seed flour can be used, though the flavor profile will be slightly different. Absolutely avoid substituting with coconut flour in this recipe; its high absorbency means it behaves very differently and will result in a dry, crumbly, and unpalatable crust.
- Press Firmly and Evenly: Once your crust mixture is ready, press it very firmly and uniformly into the bottom of the prepared pan using your fingers. For an even more professional, smooth surface, take a flat-bottomed glass or a small measuring cup and press down across the entire crust. This ensures a consistent thickness, which is vital for even baking and a sturdy foundation for your caramel.
- Cool Completely for Crispness: After baking until a beautiful golden brown, remove the crust from the oven and let it cool completely. This step is not optional! The cooling process allows the shortbread to crisp up and firm properly. If you add the warm caramel to a warm or even slightly warm crust, it will soften the crust, resulting in a soggy bottom layer. Patience here truly pays off.
For the Luscious Sugar-Free Caramel Filling:
- The Secret is in the Sweetener Blend: Achieving the perfect, non-crystallizing, deeply flavored sugar-free caramel largely depends on the specific blend of sweeteners. Using a combination like Swerve Brown and BochaSweet is highly recommended for its superior taste and texture.
- Swerve Brown Alternative: While Swerve Brown offers a fantastic brown sugar flavor, if it’s unavailable, you can substitute with Golden Lakanto. Be aware that Golden Lakanto might not provide the same deep brown color or as rich a molasses-like flavor, but it will work. For a true brown sugar substitute, if all else fails, you can try using 1/2 cup granular erythritol combined with 1 teaspoon of unsulphured molasses. This small amount of molasses will only add approximately 0.5g of net carbs per serving to the final bar, a negligible amount for an authentic flavor boost.
- BochaSweet Alternative: If BochaSweet is not accessible, xylitol or allulose are viable alternatives. Remember that xylitol is toxic to dogs, so exercise caution if you have pets. Allulose behaves very similarly to sugar and works wonderfully in caramel.
- Two-Stage Boiling for Perfect Thickness: Boiling the caramel in two distinct stages is a crucial technique for achieving optimal thickness and consistency. In the initial stage, you dissolve the sweeteners and butter. After adding the cream and thickener, the second boil allows the caramel to truly come together and thicken adequately. You’ll know it’s ready when the bubbles on the surface move noticeably slower, indicating a more viscous, cooked caramel.
- Cool Before Pouring: Just like with the crust, patience is key here. Do not pour the hot caramel directly onto your cooled crust. Allow the caramel sauce to cool for about 10 minutes after cooking. It should thicken slightly but still be pourable. Pouring it too hot can soften the crust you worked so hard to crisp.
- Freeze for a Firm Set: After you’ve poured the caramel over the cooled crust and spread it evenly, place the entire pan in the freezer. Freezing for 1 to 2 hours is essential to firm up the caramel layer sufficiently. This solid base will prevent the caramel from squishing or blending with the chocolate when you add your topping, ensuring clean, distinct layers.
For the Smooth, Creamy Chocolate Topping:
- Gentle Heat is Imperative: This final step is relatively straightforward, but requires attention. Always melt your sugar-free milk chocolate using a double-boiler method. Sugar-free milk chocolate, like its traditional counterpart, is more prone to seizing (becoming thick, lumpy, and unworkable) than dark chocolate. The gentle, indirect heat of a double boiler is the best way to prevent this and ensure a silky-smooth melted chocolate.
- Stay Attentive and Stir: Remain by your chocolate as it melts and stir it frequently. As soon as the chocolate is mostly melted and smooth, remove it immediately from the heat. Overheating, even slightly, can cause it to seize or become grainy.
Perfecting the Cut and Storing Your Keto Twix Bars
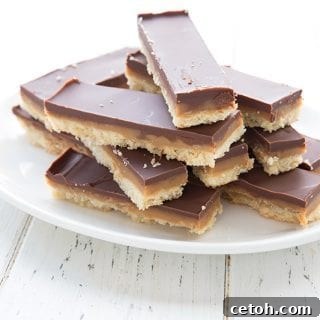
Once your homemade Keto Twix Bars are fully set, it’s time for the gratifying task of cutting them into individual portions. You have the creative freedom to cut these bars however you like, customizing them to your preference or for presentation. For an authentic resemblance to the real deal, cutting them into long, thin bars is a fun option. However, keep in mind that this shape can make them a bit more delicate and prone to breaking. If you prefer a sturdier, easier-to-handle treat, cutting them into 16 even squares works beautifully, and rest assured, they taste just as delicious!
To ensure clean, precise slices that showcase those beautiful layers, a good sharp knife is highly recommended. If your bars have just come out of the refrigerator or freezer, the chocolate topping can be quite firm. A pro tip for exceptionally clean cuts is to gently heat your knife blade before each slice. You can achieve this by running it under hot water and wiping it dry, or, if you have a gas stove, carefully holding the blade over a low flame for a few seconds. A warm blade will glide through the chocolate and caramel with ease, preventing cracks and smudges.
Storing your delicious Keto Twix Bars is simple. For short-term enjoyment, keep them in an airtight, covered container at room temperature on your counter for up to 5 days. If you prefer them firmer or wish to extend their shelf life, store them in the refrigerator, where they will last for up to 10 days. For longer storage, these bars freeze exceptionally well. Wrap individual bars tightly in parchment paper and then plastic wrap, or place them in a freezer-safe container, and they will keep for up to 2-3 months. Simply thaw in the refrigerator or at room temperature for a quick, satisfying keto treat anytime.
Now that you’re equipped with all the knowledge and tips, go ahead and create a batch of these truly delicious Keto Twix Bars. Your taste buds (and your keto journey) will thank you later!
Keto Twix Bars
16 servings
30 mins
30 mins
1 hr
Ingredients
Crust
- 1 1/2 cups almond flour
- 1/4 cup powdered Swerve Sweetener
- 1/8 tsp salt
- 4 1/2 tbsp butter, melted
Caramel Filling
- 1/2 cup Swerve Brown
- 5 tbsp butter
- 1/4 cup BochaSweet, (can sub allulose or xylitol)
- 1/2 cup heavy cream
- 1/2 tsp vanilla extract
- 1/4 tsp glucomannan, or xanthan gum
- 1/4 tsp salt
Topping
- 4 oz sugar-free milk chocolate, chopped
Instructions
Crust
-
Preheat oven to 325F and line a 9×9 inch pan with parchment paper, allowing some overhang for easy removal.
-
In a medium bowl, whisk together the almond flour, sweetener, and salt. Stir in the melted butter until the dough begins to clump together.
-
Press mixture firmly into the bottom of the prepared baking pan and bake 15 to 18 minutes, until golden brown. Remove and let cool completely.
Caramel Filling
-
In a medium saucepan over medium heat, combine the Swerve, butter, and BochaSweet. Bring to a boil and cook 3 to 5 minutes, until bubbling and the sweeteners have dissolved.
-
Remove from heat and add the cream and vanilla. The mixture will bubble vigorously. Sprinkle the surface with the glucomannan and whisk vigorously to combine. Whisk in the salt.
-
Bring the mixture back to a boil, and cook another 2 to 3 minutes, until bubbling thickly.
-
Remove from heat and let caramel cool about 10 minutes, until thickened but still pourable. Pour over the cooled crust, making sure to spread to the edges.
-
Place the pan in the freezer 1 to 2 hours to set the caramel.
Topping
-
Set a heatproof bowl over a pan of barely simmering water. Do not allow the bottom of the bowl to touch the water. Add the milk chocolate and stir until melted.
-
Pour the chocolate over the caramel and spread to edges with a knife or offset spatula.
-
Refrigerate 30 minutes to set the chocolate before cutting into bars. You can cut long thin “Twix” bars or squares, your choice!
Nutrition
Calories: 171kcal |
Carbohydrates: 5.1g |
Protein: 2.8g |
Fat: 15.9g |
Fiber: 3.3g