
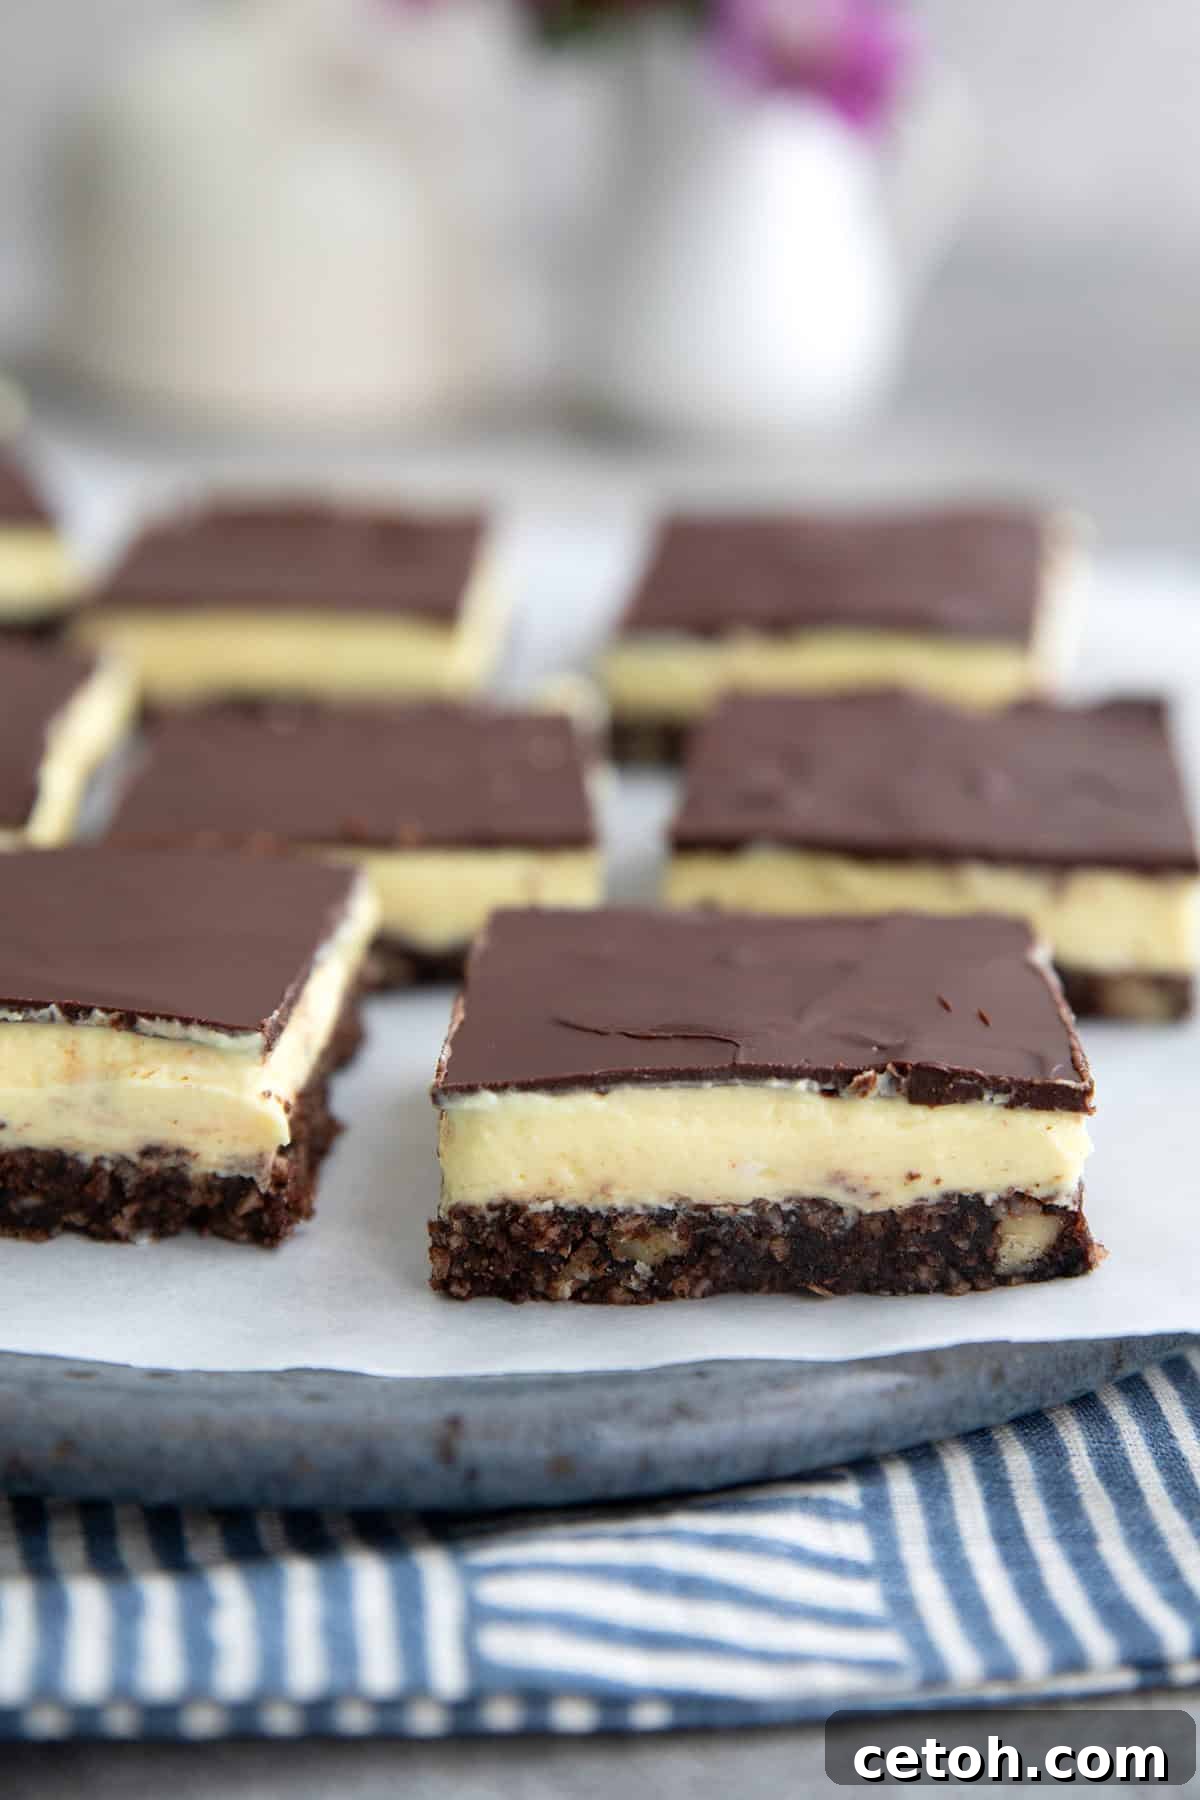
Embark on a culinary journey to Canada with a beloved classic, reimagined for your low-carb lifestyle! My Keto Nanaimo Bars are not just any dessert; they are widely celebrated as the ultimate sugar-free rendition of this iconic treat. As a child, these bars were my absolute favorite, and that deep-rooted love fueled my dedication to recreate them with uncompromising taste and texture. I’ve poured countless hours into perfecting this recipe, ensuring every bite is as close to the original as possible, without derailing your ketogenic goals. The result? A standout among my most popular no-bake keto desserts, rivaling even my incredibly sought-after keto peanut butter bars—a true testament to their deliciousness.
Discover the Magic of Nanaimo Bars: A Canadian Delight
If the name “Nanaimo Bar” leaves you pondering its mysterious nature, you’re not alone. This delightful confection, though a staple in Canada, is gradually charming palates across the United States and beyond. So, what exactly makes a Nanaimo Bar? Imagine a symphony of three distinct layers: a rich, dense chocolate crumb crust forming the foundation, followed by a lusciously sweet vanilla custard layer that strikes a perfect balance between a creamy frosting and a silky pudding. Capping it all is a decadent, smooth chocolate ganache topping. One bite of my low-carb Nanaimo bars, and you’ll understand why this no-bake wonder inspires such devotion.
Curious about how to pronounce this intriguing name? Let’s break it down: “Na-Nigh-Mo.” This culinary marvel hails from Nanaimo, a charming city nestled on Vancouver Island in British Columbia. The city’s name itself is an Anglicized version of a First Nations word, signifying “big, strong tribe”—a fitting origin for a dessert that boasts such robust and satisfying flavors.
What Our Readers Are Saying
“These are by far one of the best desserts I’ve ever tasted, keto or not! We absolutely adore them, especially the versatile crust, which I now use for all sorts of keto treats. While there are a few steps involved, the exquisite final product is undeniably worth every bit of effort!” — Zhenya
Why You’ll Fall in Love with This Keto Nanaimo Bars Recipe
Prepare to be enchanted by this keto-friendly twist on a Canadian classic. My Nanaimo Bars aren’t just a dessert; they’re an experience designed to delight your senses while keeping your carb count in check. Here’s why this recipe deserves a permanent spot in your keto repertoire:
- Authentic Three-Layer Indulgence: Experience the true essence of Nanaimo bars with the same signature layers as the traditional version. We start with a rich, tender chocolate coconut base, crowned by a smooth, creamy vanilla custard filling, and finished with a glossy, decadent chocolate topping. Each layer is meticulously crafted to deliver an unforgettable taste and texture sensation.
- Wholesome, Healthier Ingredients: Unlike many conventional recipes that rely on instant pudding mixes or custard powders filled with questionable additives and starches, our recipe champions high-quality, keto-friendly staples. We use real eggs, heavy cream, and natural sweeteners to create a filling that is both delicious and clean, ensuring you enjoy a guilt-free treat.
- Perfect for Meal Prep & Entertaining: These no-bake Keto Nanaimo Bars are wonderfully freezer-friendly. Prepare a batch in advance for holiday gatherings, potlucks, or simply to have a stash of delicious low-carb treats readily available. They thaw beautifully, making last-minute cravings or guest arrivals a breeze to manage.
- Customizable to Your Dietary Needs: We understand that dietary preferences vary. This recipe is thoughtfully designed to be easily adaptable. With simple substitutions, you can effortlessly transform these bars into a dairy-free or nut-free delight, ensuring everyone can enjoy a slice of Canadian nostalgia.
- A Taste of Canadian Nostalgia (Without the Carbs!): For my fellow Canadians on a ketogenic journey, this recipe is a dream come true. Revisit the cherished flavors of your childhood Nanaimo bars without compromising your macros. It’s a nostalgic trip that fits perfectly into your healthy lifestyle.
- Guaranteed Crowd-Pleaser: Don’t just take my word for it—these bars are universally loved! I’ve proudly served them to both devoted keto followers and those who simply appreciate a fantastic dessert. Time and again, they receive rave reviews, proving that healthy can indeed be incredibly delicious and satisfying for everyone.
Essential Ingredient Notes for Your Keto Nanaimo Bars
Crafting the perfect Keto Nanaimo Bar means understanding the role of each ingredient. Here’s a closer look at the components that make these bars so irresistibly delicious and keto-compliant:
- Heavy Whipping Cream: This is a cornerstone for creating the luxurious, rich texture of our vanilla cream filling. Its high-fat content is essential for a keto-friendly dessert and provides a wonderfully indulgent mouthfeel.
- Almond or Hemp Milk: To slightly lighten the density of the filling while maintaining creaminess, I’ve incorporated a touch of nut milk. This subtle addition helps achieve the ideal consistency without sacrificing flavor. Feel free to use all heavy cream if you prefer an even richer filling.
- Powdered Sweetener: For both the chocolate crust and the creamy filling, powdered sweetener is key. It dissolves seamlessly, preventing any gritty texture that granulated sweeteners can sometimes leave behind, ensuring a perfectly smooth and integrated sweetness throughout.
- Cream Cheese: While traditional Nanaimo bars don’t typically include cream cheese, its addition here is a brilliant keto hack. It allows us to achieve a thicker, more substantial vanilla filling without relying on excessive amounts of sweetener or non-keto thickeners, contributing to a delightful tang and richness.
- Cocoa Powder: I highly recommend using Dutch process cocoa powder for its deep, dark, and intensely rich chocolate flavor. It gives the crust a robust chocolate profile that is essential for authentic Nanaimo bar taste.
- Almond Flour: This low-carb hero steps in to replace the graham cracker crumbs traditionally found in the crust. Almond flour provides a tender, slightly nutty base that binds beautifully and offers a perfect counterpoint to the creamy layers.
- Shredded Coconut (Unsweetened): A classic component of the Nanaimo bar crust, unsweetened shredded coconut adds fantastic texture and a subtle tropical note. If coconut isn’t to your liking, you can easily substitute it with additional almond flour.
- Chopped Nuts (Pecans or Walnuts): Nanaimo bars are almost always characterized by the satisfying crunch of nuts in their base. Pecans or walnuts offer a wonderful earthy flavor and texture contrast to the soft layers above.
- Sugar-Free Chocolate: For the glossy top layer, choose a high-quality sugar-free dark chocolate, such as Lily’s brand. It’s important to note that this is different from *unsweetened chocolate*, which contains no sweetener. You want a chocolate that still offers a hint of sweetness for the topping.
- Kitchen Staples: Don’t forget the foundational ingredients that bring everything together: unsalted butter for richness and binding, large eggs for structure and emulsion, pure vanilla extract for aromatic depth, and a pinch of salt to enhance all the flavors.
Recipe Overview: Crafting Your Perfect Keto Nanaimo Bars
Don’t be intimidated by the seemingly extensive ingredient list or the detailed instructions. These Keto Nanaimo Bars are surprisingly straightforward to make, require no baking whatsoever, and are undoubtedly worth every moment of effort. Each step builds upon the last, culminating in a delicious Canadian classic you can enjoy guilt-free.
- The Homemade Pastry Cream Foundation: Traditional Nanaimo bars often use custard powder for their unique vanilla filling, but these typically contain cornstarch, which isn’t keto-friendly. My solution? We create a genuine vanilla custard from scratch, also known as pastry cream, which forms the luscious base for our filling. This process is very similar to making a rich keto pudding on the stovetop. It involves gently heating cream and milk, then tempering egg yolks before combining and thickening them. This homemade approach ensures a pure, smooth, and deeply flavorful vanilla component.
- The Decadent Chocolate Coconut Crust: Next, we prepare the foundational layer. The ingredients for this no-bake crust—butter, cocoa, sweetener, egg, vanilla, almond flour, coconut, and nuts—are gently cooked together in a saucepan for just a few minutes. This crucial step helps them bind perfectly, creating a cohesive, fudge-like mixture. Once combined, the mixture is pressed firmly and evenly into a square baking pan. It then goes into the refrigerator for a period of chilling, allowing the crust to set and firm up beautifully, ready to support the creamy layers to come.
- Crafting the Smooth Vanilla Filling: While your chocolate crust chills, you’ll focus on the star of the show: the creamy vanilla filling. In a separate bowl, softened cream cheese and butter are beaten together until wonderfully smooth and airy. Then, the completely cooled pastry cream (prepared in the first step) is gently folded in until just combined. It’s important not to over-beat at this stage to maintain the filling’s luxurious texture and prevent separation. A measure of additional powdered sweetener is then added to perfect that classic Nanaimo bar sweetness. This dreamy filling is then spread evenly over the chilled crust.
- The Perfect Chocolate Topping: The grand finale involves creating the rich, glossy chocolate topping. Sugar-free dark chocolate and butter are melted together until smooth and shiny. This melted chocolate ganache is then carefully spread over the chilled vanilla filling, creating a beautiful, even layer. Once applied, the bars are returned to the refrigerator to allow the chocolate topping to set firm and glossy, completing your magnificent Keto Nanaimo Bars.
Expert Tips for Keto Nanaimo Bar Success
Achieving the perfect Keto Nanaimo Bar is simpler than you think with these expert tips and insights gained from years of keto baking. Early in my low-carb journey, I experimented with sugar-free pudding mixes as a shortcut, but I’ve since moved away from such convenience products due to their often questionable ingredients. My refined approach for this recipe focuses on whole, high-quality ingredients.
My successful solution for the creamy vanilla layer involves creating an authentic vanilla custard (pastry cream) and then blending it with cream cheese and butter. This method delivers the precise flavor and luscious consistency of traditional Nanaimo bars, while keeping it perfectly keto-friendly. Making pastry cream might sound daunting, but it’s remarkably easy. The key is constant attention: keep a close eye on the mixture as it cooks, stirring continuously to prevent it from thickening too quickly or curdling. It’s best to prepare the pastry cream first, as indicated in the recipe, allowing ample time for it to cool completely before incorporating it into the filling.
One common challenge with Nanaimo bars is cracking the chocolate topping when cutting. To achieve clean, beautiful slices, I highly recommend warming your knife. A quick pass over a gas stove flame or a dip in a glass of hot water (wiping it dry immediately) makes all the difference, allowing the knife to glide effortlessly through the chocolate layer.
Customization Options for Everyone
Dairy-Free Option: If you’re sensitive to dairy, you can still enjoy these delightful bars. For the pastry cream, substitute the heavy cream with full-fat coconut cream and use your favorite dairy-free butter alternative. In the chocolate crust and topping, coconut oil or another reliable butter substitute will work beautifully. When using coconut oil for the crust, reduce the amount slightly (to about 6 tablespoons), as it can be greasier than butter.
Nut-Free Option: For those with nut allergies, simply replace the almond flour in the crust with sunflower seed flour. For the pastry cream, opt for hemp milk or another suitable nut-free milk alternative.
Flavor Variations: Feel free to experiment with extracts! A hint of peppermint extract in the chocolate topping or a touch of rum extract in the vanilla filling can add an exciting twist to the classic flavors.
Choosing the Right Sweetener
The type of sweetener you choose can significantly impact the final texture of your Nanaimo bars. For the chocolate crust, most powdered keto-friendly sweeteners will work well. However, the vanilla filling is a bit more sensitive. I’ve tested this recipe with both erythritol and allulose. While both are technically viable, allulose can make the filling noticeably softer, requiring a longer setting time and potentially resulting in a slightly squishier bar that’s harder to cut cleanly.
Therefore, I strongly recommend using powdered erythritol for the vanilla filling to ensure optimal firmness and sliceability. If you wish to further reduce the overall sweetener content, a small amount of concentrated sweetener like stevia extract or monk fruit extract can be used in conjunction with erythritol, but always taste and adjust to your preference.
Frequently Asked Questions About Keto Nanaimo Bars
Here are some common questions to help you master and enjoy your Keto Nanaimo Bars:
Each serving of this Keto Nanaimo Bar recipe contains approximately 6.8g of total carbohydrates and a generous 3.3g of fiber. This results in a remarkably low 3.5g net carbs per bar, making it an ideal treat for those managing their carbohydrate intake.
For optimal freshness, store your Nanaimo Bars in an airtight container at room temperature for up to 4 days, or in the refrigerator for up to a week. They are also incredibly freezer-friendly and can be frozen for up to 3 months. To enjoy from frozen, simply let them thaw at room temperature for about 15-20 minutes or in the refrigerator overnight.
Absolutely! Keto Nanaimo Bars are a fantastic make-ahead dessert. Their freezer-friendly nature means you can prepare them weeks in advance of an event, ensuring you have a stress-free dessert option ready to impress your guests.
You’ll need a medium saucepan for the pastry cream and crust, a whisk, a medium bowl, an 8×8 or 9×9 inch square baking pan, and a rubber spatula for spreading. An electric mixer can also be helpful for beating the cream cheese and butter for the filling.
Explore More Keto No-Bake Desserts
If you love the convenience and deliciousness of these Keto Nanaimo Bars, you’ll be thrilled to discover our other fantastic no-bake keto dessert recipes. Perfect for satisfying your sweet tooth without turning on the oven, these treats are sure to become new favorites:
- Keto No-Bake Cookies: Classic cookies, reinvented for keto.
- Easy Keto Peach Cheesecake: A fruity and creamy delight without the bake.
- Keto Cheesecake Bites: Perfect portion-controlled indulgence.
- Keto Strawberry Cheesecake Popsicles: A refreshing, cool, and creamy treat.
- Keto Raspberry Mousse Tart: Elegant and light, bursting with berry flavor.
Keto Nanaimo Bars Recipe
These are the original Keto Nanaimo Bars! Just like the classic Canadian treat, they feature a rich chocolate topping, a creamy vanilla custard filling, and a tender coconut chocolate crust. So perfectly sweet and satisfying, you won’t believe this no-bake keto dessert can still fit into your keto lifestyle.
Pin Recipe
Share on Facebook
Rate this Recipe
Ingredients
Pastry Cream
- 1/3 cup (78.86 ml) whipping cream
- 3 tbsp (45.65 g) almond or hemp milk
- 2 large egg yolks
- 1/4 cup (47.5 g) powdered sweetener
- Pinch salt
- 1 1/2 tbsp (21.3 g) butter, cut into two pieces
- 1 1/2 tsp vanilla extract
Crust
- 1/2 cup (113.5 g) butter
- 1/3 cup unsweetened cocoa powder
- 1/4 cup (47.5 g) powdered sweetener
- 1 large egg, beaten
- 1 tsp vanilla extract
- 1 cup (112 g) almond flour
- 3/4 cup (69.75 g) unsweetened shredded coconut
- 1/2 cup (54.5 g) chopped pecans or walnuts
Vanilla Filling
- 4 ounces (113.4 g) cream cheese, softened
- 1/4 cup (56.75 g) butter, softened
- Pastry cream (from above), cooled
- 6 tbsp (60.87 g) powdered sweetener
Chocolate Topping
- 3 ounces (85.05 g) sugar-free dark chocolate, such as Lily’s, chopped
- 2 tbsp (28.4 g) butter
Instructions
Pastry Cream:
- In a medium saucepan over medium heat, bring the whipping cream and almond milk to a simmer. In a medium bowl, whisk the egg yolks with the sweetener and salt until well combined.
- Slowly whisk about half of the hot cream into the yolks to temper, then stir the yolk/cream mixture back into the remaining cream in the saucepan and cook until thick and glossy, about 3 to 4 minutes, whisking continuously.
- Remove from heat and whisk in the butter and vanilla. Let cool completely to room temperature.
Crust:
- In a medium saucepan over low heat, melt the butter. Stir in the cocoa powder and the sweetener, and then slowly whisk in the beaten egg.
- Cook, stirring constantly, until the mixture thickens. Remove from heat and stir in the vanilla, almond flour, shredded coconut, and nuts. Press the crust evenly into a 9×9 or 8×8 square pan and refrigerate until firm.
Vanilla Filling
- Beat the softened cream cheese and butter until smooth and creamy. Beat in the cooled pastry cream until well combined, then beat in the powdered sweetener until thoroughly incorporated. Spread the filling evenly over the chilled crust and refrigerate until firm, at least one hour.
Chocolate Topping
- Combine the chopped chocolate and butter in a heatproof bowl set over a pan of barely simmering water (a double boiler). Stir until melted and smooth. Spread the melted chocolate evenly over the chilled vanilla filling and let set in the refrigerator until firm.
Notes
Storage Information: Store the bars in a covered container in the fridge for up to a week. They can also be frozen for several months. To enjoy from frozen, let them thaw at room temperature for 15-20 minutes or in the refrigerator overnight.
Pro Tip for Cutting: Chocolate toppings can crack when cutting into bars. To achieve clean, neat slices, warm your knife before each cut. You can do this by running it under hot water and wiping it dry, or briefly heating it over a gas flame. This helps the knife slice smoothly through the chocolate.
Nutrition
Calories: 266 kcal |
Carbohydrates: 6.8g |
Protein: 4g |
Fat: 25.3g |
Saturated Fat: 13.8g |
Fiber: 3.3g
I’d love to know your thoughts, leave your rating below!