
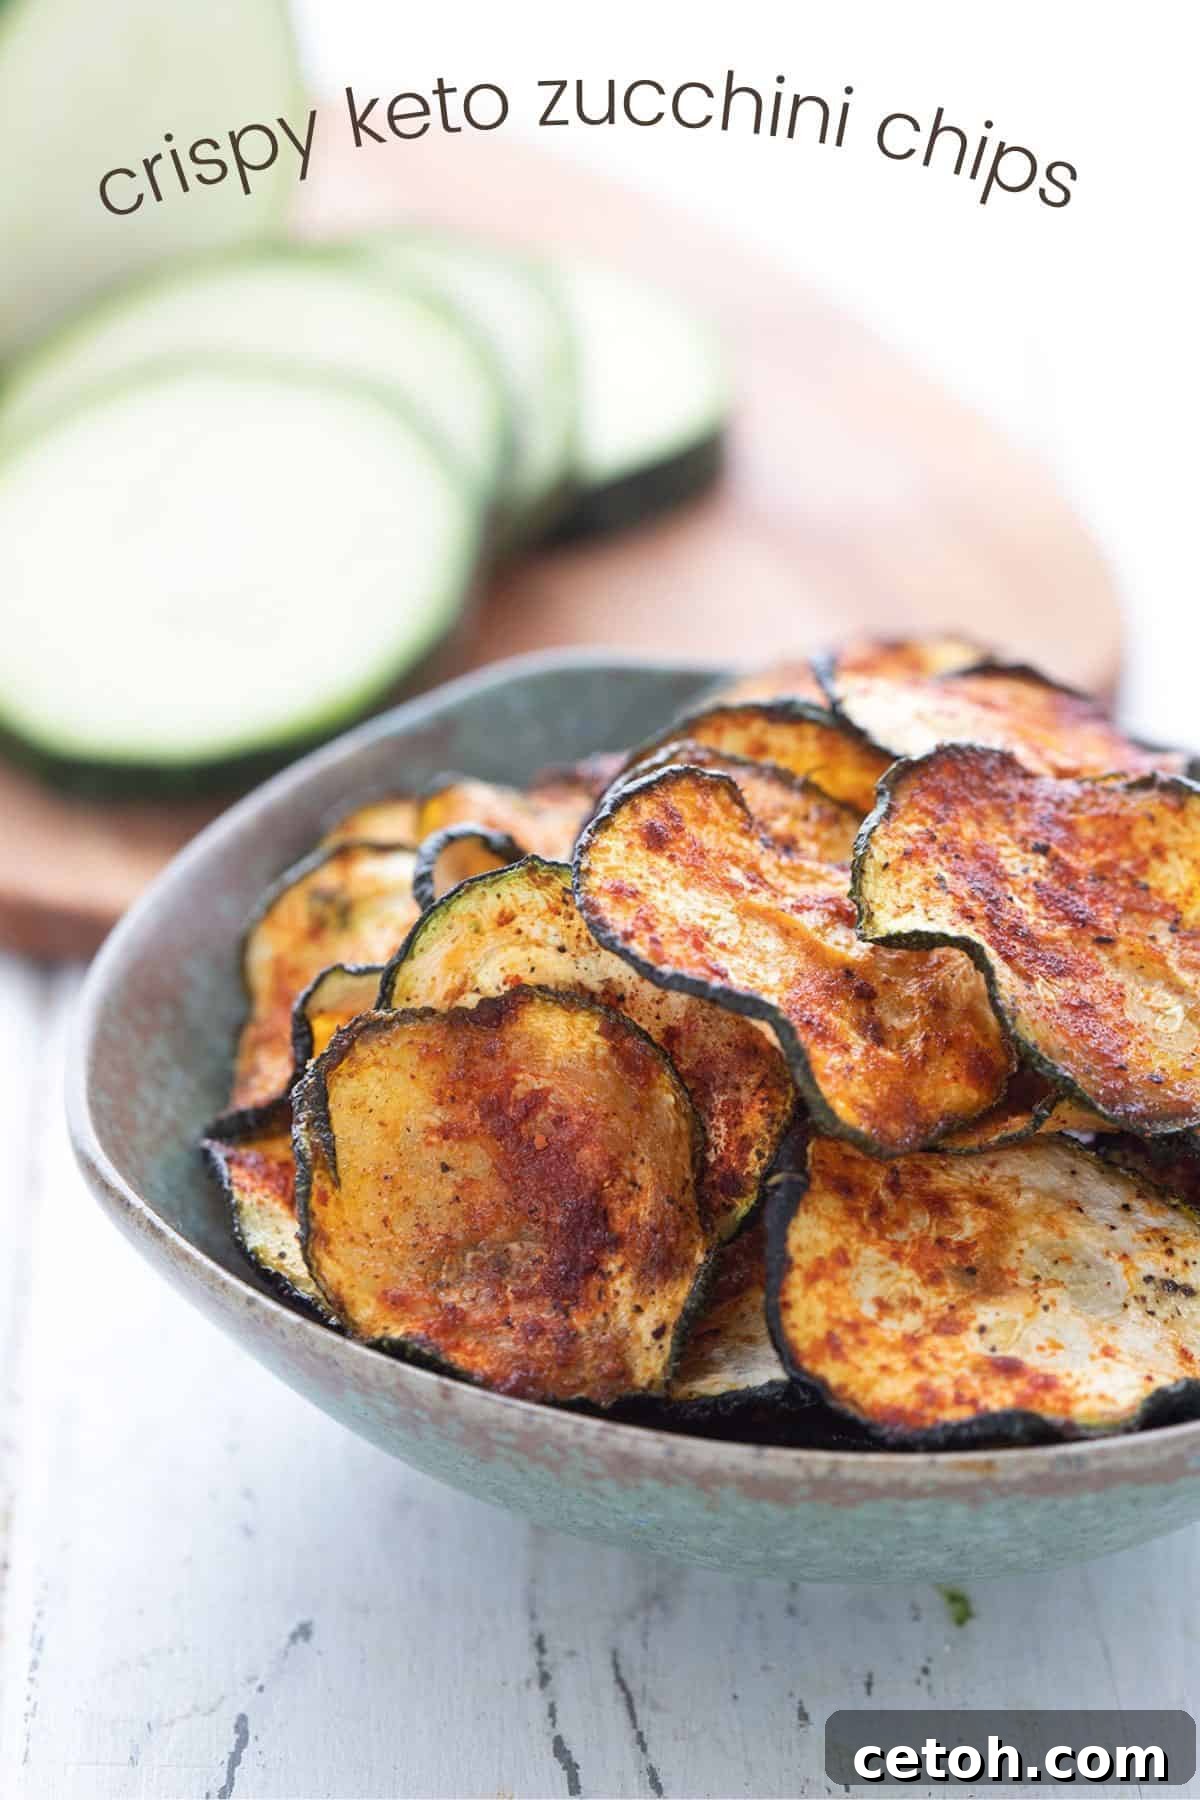
Craving a crispy, savory snack that won’t derail your health goals? Look no further! These crispy zucchini chips are a game-changer, offering a delightful crunch and satisfying flavor while being perfectly keto-friendly. Whether you prefer baking, air frying, or dehydrating, this comprehensive guide will show you how to transform humble zucchini into your new favorite healthy snack. Get ready to elevate your low-carb snacking experience!
Why Zucchini Chips Are Your New Go-To Healthy Snack
In the world of healthy eating and especially within a ketogenic diet, finding truly satisfying and crunchy snacks can often feel like a quest. This is where zucchini chips shine! They perfectly address that craving for something salty and crispy without the guilt or the carb count of traditional potato chips. Imagine biting into a chip that offers that familiar satisfying snap, but is made entirely from a wholesome vegetable.
Beyond their incredible texture, zucchini chips are incredibly versatile in flavor. A touch of smoked paprika can evoke the nostalgic taste of classic ketchup potato chips, offering a fun twist. But the possibilities are endless – from a simple salt and pepper seasoning to more elaborate spice blends, you can customize them to your exact liking.
Zucchini itself is a wonderfully underestimated low-carb vegetable. It’s incredibly versatile, adding moisture to baked goods like keto zucchini bread and serving as an excellent pasta alternative in dishes like zucchini lasagna. But when sliced thinly and crisped to perfection, zucchini truly shines as a chip. It’s a fantastic way to enjoy a vegetable, even for those who might typically shy away from them, offering a nutrient-dense alternative to processed snacks.
Mastering the Art of Crispy Zucchini Chips: Your Cooking Options
Achieving truly crispy zucchini chips boils down to one key factor: removing as much moisture as possible before and during cooking. I’ve been perfecting this recipe since 2012, testing various methods to ensure maximum crunch. The good news is, you have several effective ways to achieve delicious results, depending on your kitchen equipment and preference for speed versus batch size:
- Oven Baked: My personal favorite for larger batches and consistent results.
- Air Fryer: The fastest method, ideal for smaller, quick servings.
- Dehydrator: Perfect for the ultimate crispness and longer shelf life, though it requires patience.
Each method has its unique advantages and considerations. While the air fryer boasts speed, it’s often limited by the small cooking space, requiring you to cook in multiple batches. The dehydrator, conversely, offers an unmatched level of crispness and a hands-off approach but is the most time-consuming. Baking in the oven provides a great balance, allowing you to prepare more chips at once while still offering excellent control over the crisping process.
The Crucial Pre-Prep Step: Drawing Out Moisture
Regardless of your chosen cooking method, the secret to genuinely crispy zucchini chips lies in the initial moisture removal. Zucchini is naturally high in water content, and if you skip this step, your chips will likely turn out soggy rather than crisp. By salting the zucchini slices and allowing them to drain, you kickstart the dehydration process, dramatically reducing their cooking time and ensuring a superior, satisfying crunch.
Detailed Guide: Oven Baked Zucchini Chips
Baking is a reliable method for making crispy zucchini chips, especially when you want to prepare a decent quantity. The key is thin slicing and effective moisture removal. Here’s a step-by-step breakdown:
What You’ll Need:
- A mandoline slicer or food processor with a slicing disk
- 1 large or 2 medium zucchinis (approximately 350g / 12 oz total)
- Oil or oil spray (avocado or coconut oil recommended)
- Seasonings of your choice (e.g., smoked paprika, salt, pepper)
- Parchment paper
- Colander or sieve
- Clean tea towels
Method:
- Slice the Zucchini Super Thin: This is perhaps the most critical step. Aim for slices no more than 1/8th of an inch thick. Achieving this consistently with a knife can be challenging, so I highly recommend using a mandoline slicer for uniform, paper-thin slices. If you have a food processor with an adjustable slicing disk, that works wonderfully too.
- Salt and Drain for Moisture Release: Arrange a single layer of your thinly sliced zucchini in a colander set over the sink or a bowl. Lightly sprinkle with salt (about 1/4 tsp total, divided). Add another layer of zucchini, then more salt, continuing until all slices are used. Let this sit for at least 1 hour. You’ll notice water pooling in the bowl beneath, a clear sign the salt is doing its job. This process draws out excess moisture, which is vital for crispiness.
- Thoroughly Pat Dry: After draining, lay the zucchini slices out in a single layer on a clean tea towel. Use another tea towel or paper towels to firmly pat them as dry as possible. This step cannot be rushed; the drier the slices, the crispier your chips will be.
- Prepare Baking Sheets & Arrange Slices: Preheat your oven to a low temperature, around 225°F (107°C). Line two large baking sheets with parchment paper. Parchment paper is crucial here, as silicone baking mats tend to trap moisture, preventing the chips from drying out properly. Arrange the zucchini slices in a single layer on the prepared sheets, ensuring they don’t overlap. Give them a little space for air circulation.
- Lightly Oil & Season: Lightly spray the tops of the zucchini slices with avocado or coconut oil spray, or gently brush them with a small amount of liquid oil. Then, sprinkle your chosen seasonings evenly over the slices. Remember that the flavors will concentrate as the chips shrink, so season lightly initially, and you can always add more salt after baking if needed.
- Bake Until Golden and Crisp: Bake for 70 to 90 minutes, or until the chips are thoroughly dry, lightly browned, and audibly crisp. Baking time will vary based on your oven, the thickness of your slices, and how well you dried them. For even cooking, rotate the baking sheets halfway through. If some chips become crispier before others, carefully remove them and allow the rest to continue baking.
- Serve and Store: Once cooled, these crispy zucchini chips are best served immediately. If you have leftovers, store them in an airtight container at room temperature for up to 3 days. If they lose their crispness, a quick 5-10 minute re-bake in a warm oven (around 250°F / 120°C) will bring back their crunch.
Air Fryer Zucchini Chips: Quick & Convenient
The air fryer is your best friend when you need a speedy batch of crispy zucchini chips. While it’s faster, you’ll typically need to work in smaller batches due to the basket size.
- Preparation: Follow the same crucial steps for slicing, salting, and thoroughly patting dry the zucchini slices as outlined in the baked method above. Lightly oil and season them.
- Air Fryer Setting: Preheat your air fryer to 350°F (175°C).
- Arrangement: Arrange the seasoned zucchini slices in a single layer in the air fryer basket. Do not overcrowd, as this will prevent even crisping.
- Cooking Time: Air fry for about 8-12 minutes, shaking the basket gently halfway through, until the chips are golden brown and crisp. Keep a close eye on them, as air fryers can vary in intensity and chips can burn quickly.
Dehydrator Zucchini Chips: The Ultimate Crunch and Shelf-Life
For the absolute crispiest chips and a longer storage life, a food dehydrator is unmatched. This method takes the longest, but it’s largely hands-off.
- Preparation: Just like with the other methods, start by thinly slicing, salting, and meticulously patting dry your zucchini. Then, lightly oil and season the slices.
- Dehydrator Setting: Set your food dehydrator to 135°F (57°C).
- Arrangement: Place the zucchini slices in a single layer on the dehydrator trays. Ensure good airflow around each slice.
- Dehydration Time: Dehydrate for a long period, typically anywhere from 8 to 12 hours, or until the chips are completely dry and brittle. The exact time will depend on your dehydrator model, the thickness of the slices, and the ambient humidity. Check periodically for doneness.
Unleashing Flavor: Creative Seasoning Ideas for Zucchini Chips
While the texture is paramount, the seasoning is where you can truly make these zucchini chips your own. Don’t be afraid to experiment! Here are some tried-and-true and adventurous flavor suggestions:
- Smoked Paprika: As mentioned, this is a personal favorite for its smoky, slightly sweet notes that brilliantly mimic the flavor profile of Canadian ketchup potato chips. It adds a beautiful color too!
- Classic Savory Blends:
- Ranch: A blend of dill, chives, garlic powder, onion powder, and a hint of buttermilk powder creates that unmistakable tangy, herby flavor.
- Dill Pickle: For a zesty kick, combine dill, garlic powder, onion powder, and a touch of citric acid or a squeeze of lemon juice (if applying before baking, use sparingly to avoid adding moisture).
- Sour Cream and Onion: This timeless combination delivers a creamy, pungent, and utterly satisfying taste. Look for keto-friendly seasoning shakers that include these flavors.
- Spicy Kick: Add a pinch of cayenne pepper, chili powder, or a dash of hot paprika for a fiery snack.
- Italian Herb Mix: Dried oregano, basil, thyme, and garlic powder can transport your taste buds straight to the Mediterranean.
- Cheesy Goodness: Nutritional yeast is a fantastic, dairy-free way to add a savory, cheesy flavor that’s perfect for keto.
- Everything Bagel Seasoning: A blend of sesame seeds, poppy seeds, dried garlic, dried onion, and salt offers a complex, satisfying crunch and flavor.
- Simple Perfection: Sometimes, just a good quality sea salt and freshly ground black pepper are all you need to highlight the natural flavor of the zucchini.
Remember to sprinkle seasonings lightly before cooking, as the flavors will become more concentrated as the zucchini shrinks. You can always add a bit more salt or a fresh dusting of herbs after the chips are done.
Tips for Perfection and Troubleshooting Crispy Zucchini Chips
- Consistent Slicing is Key: Uneven slices will cook at different rates, leading to some burnt and some soggy chips. A mandoline is truly invaluable here.
- Don’t Rush the Drying: The salting and patting dry steps are non-negotiable for crispy results. Give them enough time and effort.
- Avoid Overcrowding: Whether in the oven, air fryer, or dehydrator, always ensure slices are in a single layer with enough space for air to circulate. Overcrowding leads to steaming, not crisping.
- Monitor Closely: Especially in the oven and air fryer, chips can go from perfectly crisp to burnt very quickly. Check frequently, especially towards the end of the cooking time.
- Storage Matters: Humidity is the enemy of crispy chips. Always store cooled chips in an airtight container. If they lose their crunch, a quick re-crisping in a low oven or air fryer will usually revive them.
- Choose Fresh Zucchini: Fresher zucchini with less bruising will yield better results.
More Delicious Keto Chip Recipes to Explore
If you’re a fan of these zucchini chips, you’ll be thrilled to discover a whole world of low-carb, crispy alternatives. Here are some more fantastic ideas to keep your keto snack game strong:
- Keto Tortilla Chips
- Brussels Sprouts Chips
- Zesty Nacho Kale Chips
- Portobello Mushroom Chips
- Baked Cucumber Chips
- Air Fryer Pepperoni Chips
Conclusion
Crispy zucchini chips are more than just a snack; they’re a testament to how simple, wholesome ingredients can be transformed into something truly delicious and satisfying within a healthy lifestyle. They offer the perfect crunchy escape without compromising your dietary goals, making them an ideal staple for anyone on a keto or low-carb journey. With various cooking methods and endless seasoning possibilities, you’ll never get bored. So grab a zucchini, get slicing, and prepare to indulge in a guilt-free crunch that will quickly become a household favorite!

Baked Zucchini Chips Recipe
Servings: 2 servings (approximately 1/2 cup chips per serving)
Prep Time: 20 mins | Cook Time: 1 hr 30 mins | Total Time: 1 hr 50 mins
Crispy zucchini chips are a fabulous healthy keto snack. Learn how to make these easy zucchini chips in the oven, air fryer, or dehydrator. They will quickly become one of your favorite keto snacks!
Pin Recipe
Share on Facebook
Ingredients
- 1 large zucchini (approx. 350g)
- 1/2 tsp salt, divided
- Avocado oil spray (or 1 to 2 tsp liquid oil) (Buy on Amazon)
- 1 tsp smoked paprika (Buy on Amazon)
- 1/4 tsp ground pepper
- Additional salt to taste
Instructions
- Slice zucchini crosswise into 1/8 inch thick slices using a mandoline slicer or food processor.
- Place the zucchini in layers into a colander or sieve, sprinkling with a little salt with each layer (you will use about 1/4 tsp salt). Let drain for one hour.
- Preheat the oven to 225°F (107°C) and line two baking sheets with parchment paper.
- Lay the zucchini slices out on a tea towel and pat dry with another tea towel. Then lay them out on the prepared baking sheets, close together but not touching. Spray lightly with avocado oil spray or brush lightly with liquid oil.
- In a spice shaker, combine the paprika, pepper, and the remaining salt. Sprinkle over the tops of the zucchini.
- Bake for 70 to 90 minutes, until dry, browned, and crisp, rotating sheets halfway through baking. If some chips are crisp early, remove them from the pans and return the rest to the oven.
- Sprinkle with additional salt to taste. Serve immediately.
- Store in a covered container on the counter for up to 3 days. If they soften, simply re-crisp them in a warm oven.
Notes
Instructions for air fryer and dehydrator methods are detailed in the blog post above.
Nutrition
Serving: 1 serving = approximately 1/2 cup chips | Calories: 70 kcal | Carbohydrates: 5.6g | Protein: 2g | Fat: 4.7g | Fiber: 2g