
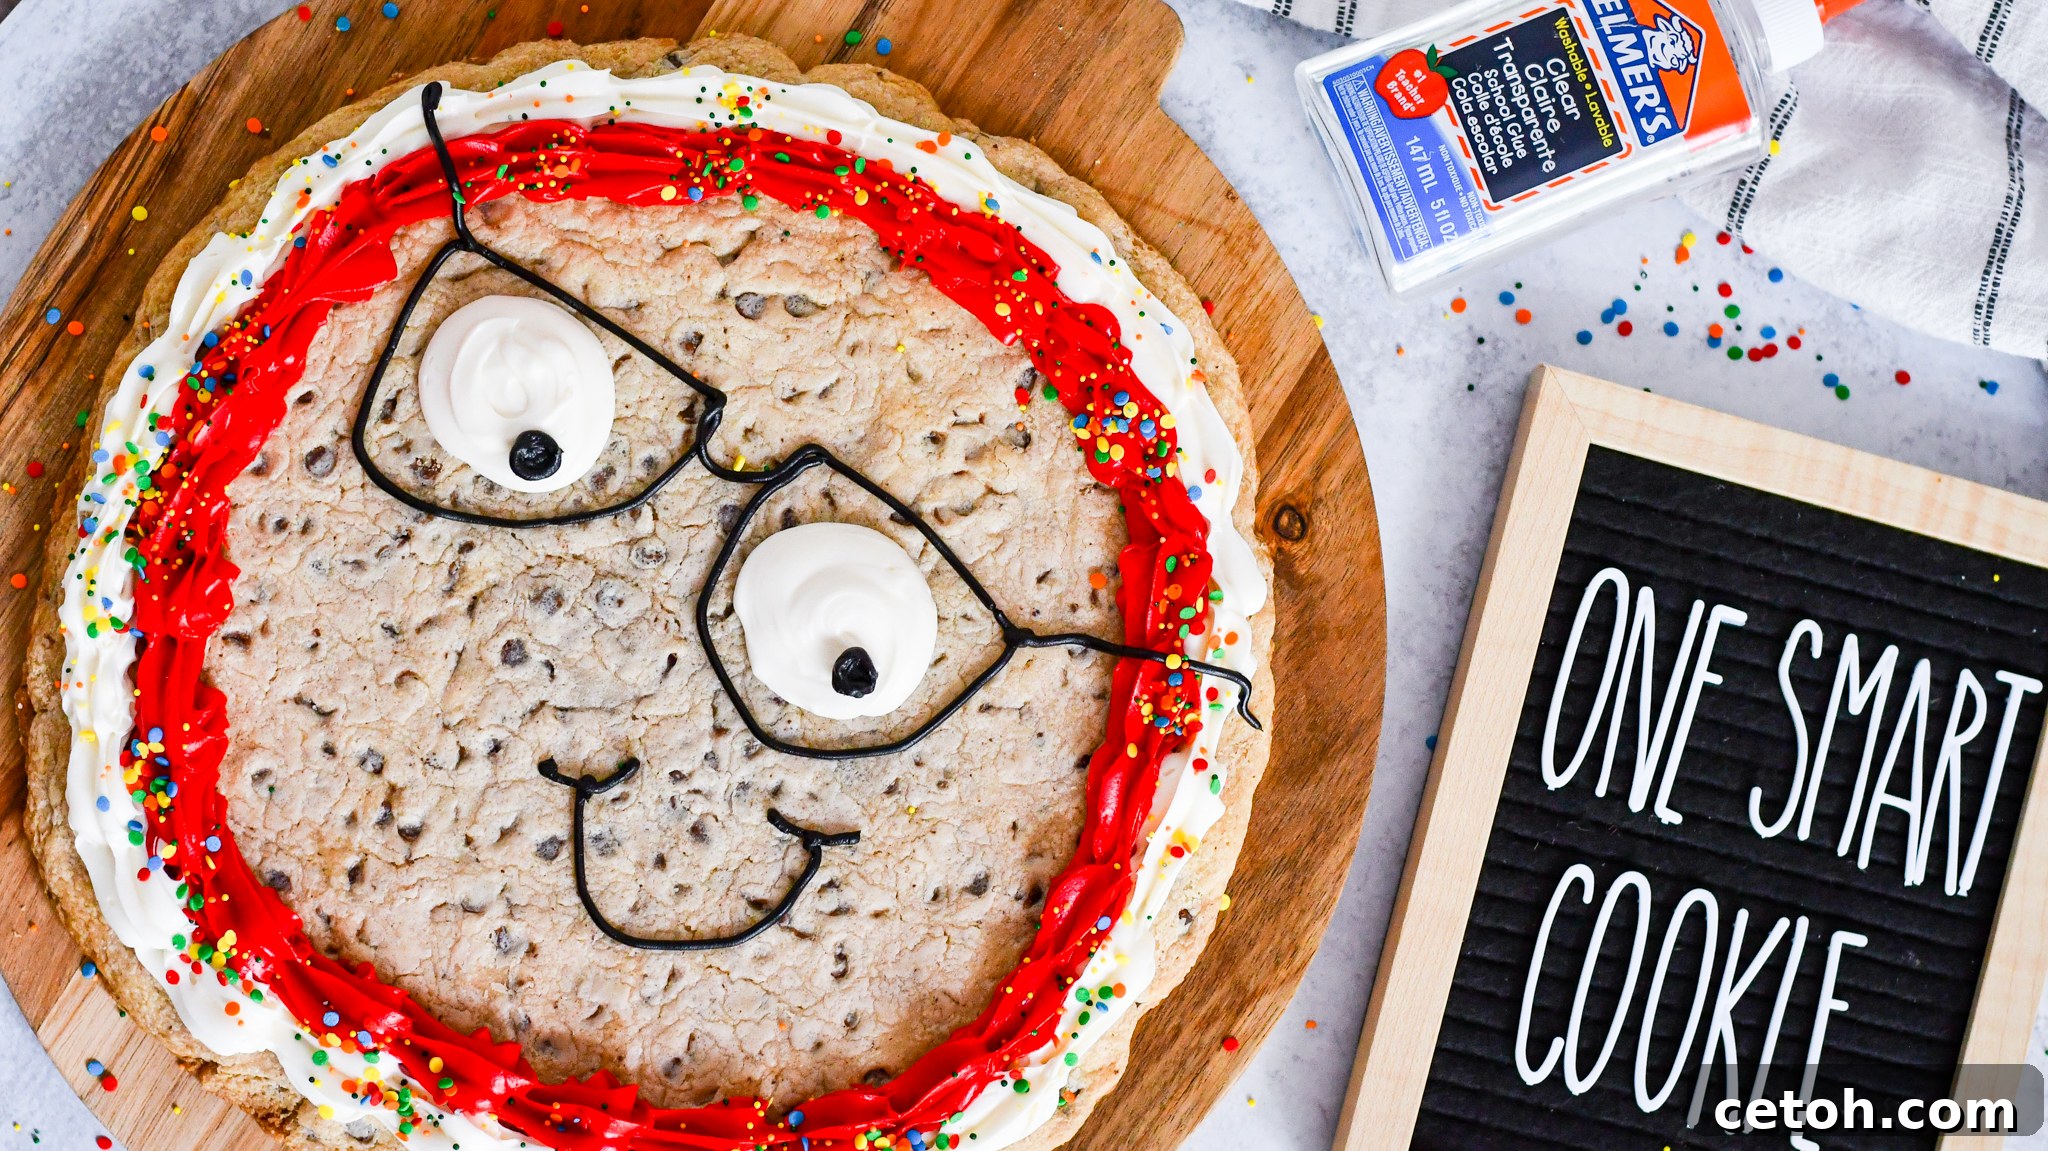
The Ultimate Back-to-School Smart Cookie Cake: A Fun & Easy Recipe for Little Scholars
As the bustling back-to-school season gears up, what better way to celebrate your child’s return to learning than with a delightful and personalized treat? This “Smart Cookie” cake recipe is designed to bring smiles to young faces, transforming a simple cookie cake into an adorable, brainy character complete with charming glasses and bright eyes. Forget complex baking; we’re keeping things wonderfully straightforward by using readily available store-bought cookie dough, making this a perfect activity even for busy parents.
This isn’t just any dessert; it’s a celebration of curiosity, knowledge, and the exciting journey ahead. Whether you’re looking for a special lunchbox surprise on the first day, a welcoming after-school snack, or a centerpiece for a back-to-school party, this Smart Cookie cake is sure to be a hit. It’s an easy-to-follow guide that allows you to unleash your creativity with just a few piping tips and a splash of colorful frosting. Get ready to bake a treat that’s as smart as your little ones!
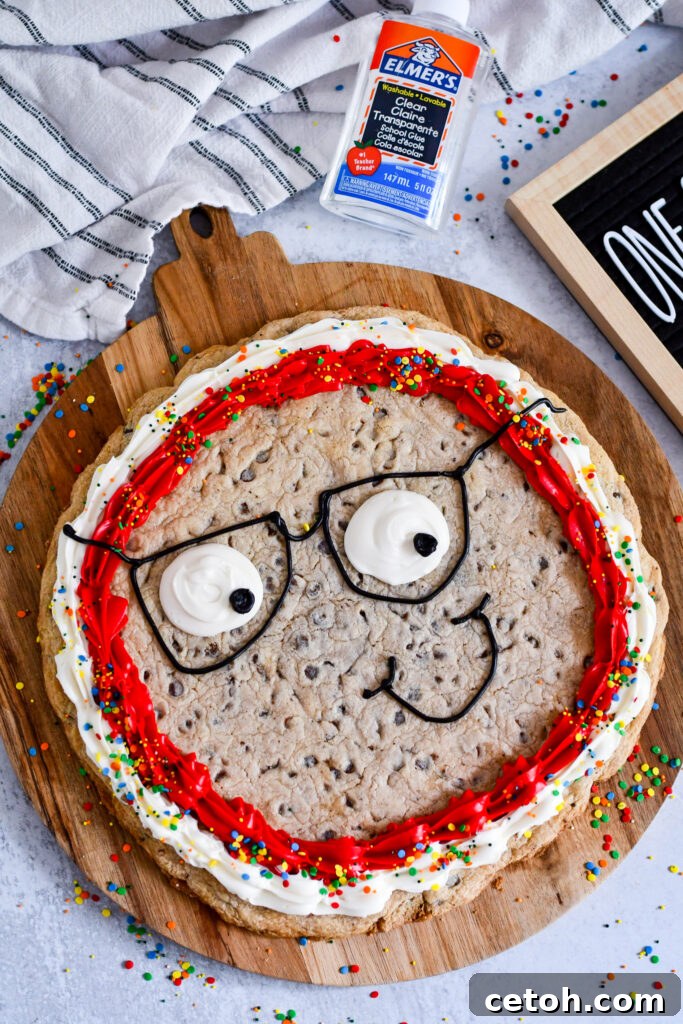
Celebrate the start of a new academic year with this adorable ‘Smart Cookie’ cake! It’s a fun, easy, and memorable treat for children.
Why You’ll Love This “Smart Cookie” Back-to-School Recipe
This “Smart Cookie” cake isn’t just another dessert; it’s a carefully crafted treat designed with convenience, fun, and flavor in mind, especially for the back-to-school rush. Here’s why this recipe will become your go-to for celebrating the academic season:
- Effortless Preparation: The biggest time-saver? Store-bought cookie dough! This eliminates the need for measuring, mixing, and chilling, letting you jump straight into the fun part: decorating. It’s perfect for busy weeknights or when you need a quick treat that still feels special.
- Kid-Friendly & Engaging: Children adore themed treats, and this “Smart Cookie” design is irresistibly cute and relatable. Getting your kids involved in the decorating process can also be a wonderful way to build excitement for school, foster their creativity, and create cherished memories. It’s a delightful visual treat that’s as fun to make as it is to eat.
- Perfect for Any School Occasion: Whether it’s a special after-school snack to welcome them home, a festive centerpiece for a back-to-school gathering with classmates, a thoughtful treat to share with teachers and staff, or even a unique lunchbox surprise on the first day, this cookie cake fits seamlessly into any school-related event. It’s a versatile dessert that’s guaranteed to be a conversation starter.
- Customizable Fun: While we provide specific decorating ideas, this recipe is incredibly versatile. You can experiment with different cookie dough flavors (like classic sugar cookie or peanut butter), choose various frosting colors to match school themes, add vibrant sprinkles, or even personalize the cookie with your child’s initial or an encouraging message. The possibilities for creative expression are endless.
- Deliciously Simple: Beyond its charming appearance, this cookie cake is a genuinely tasty dessert that appeals to all ages. The soft, chewy cookie base, baked to perfection, combined with creamy, vibrant frosting creates a satisfying and indulgent treat everyone will love. It’s comfort food with a smart twist!
Essential Supplies & Ingredients Needed to Bake Your Smart Cookie Cake
Creating your “Smart Cookie” cake requires just a few key items, most of which you might already have in your kitchen or can easily find at your local grocery store. We’ve prioritized simplicity and vibrant results to ensure your decorating experience is as enjoyable as the finished product, making this an accessible project for bakers of all skill levels.
- 12-inch Pizza Pan: This specific size is highly recommended for achieving a large, perfectly round cookie cake that serves as an excellent canvas for your creative decorations. Its flat surface ensures even baking and a consistent shape, which is crucial for piping a neat border and well-defined facial features. If you don’t have a dedicated pizza pan, a large round baking sheet with low sides or even a cast iron skillet of similar diameter can work, but ensure it’s well-greased and sturdy.
- Store-Bought Cookie Dough: This is the hero of our easy recipe! Opt for a classic chocolate chip or sugar cookie dough for the best results, as these flavors are widely loved and provide a neutral base for frosting. Brands like Pillsbury or Nestle Toll House work wonderfully due to their consistent quality and ease of use. The beauty of store-bought dough lies in its sheer convenience—no complex mixing, no lengthy chilling times, just press and bake. Make sure to get enough to cover a 12-inch pan evenly; typically, one standard family-size package (around 16-18 oz) is sufficient.
- Pillsbury Funfetti Frosting (or similar vibrant frosting): For truly dazzling colors and an undeniable fun factor, Pillsbury Funfetti frosting is our top choice. Its pre-colored options deliver a vibrancy that’s incredibly hard to replicate with homemade frosting and food coloring, saving you significant time and potential mess. Consider using white for the eyes, black or dark brown for the glasses and pupils, and any bright color for the decorative border. You’ll likely need at least two tubs to have enough for generous frosting and intricate decoration.
- Medium Star Piping Tip (e.g., Wilton 1M): This versatile piping tip is perfect for creating a beautiful and textured border around your cookie cake. The star shape adds a professional and decorative touch, framing your “Smart Cookie” face elegantly and providing a satisfying tactile experience as you pipe. It’s also great for adding a sprinkle-like effect or filling in larger areas if you wish to create more texture.
- Large Round Piping Tip (e.g., Wilton 1A or 2A): Essential for piping the large, expressive eyes of your “Smart Cookie.” This tip allows for smooth, clean circles, giving the eyes a bold and prominent appearance. The wider opening ensures a consistent flow of frosting, which is key for creating uniform eye shapes. Ensure your frosting is at room temperature and soft enough to flow easily through this tip for a perfect round shape.
- Small Round Piping Tip (e.g., Wilton 2 or 3): This fine-tipped tool is indispensable for all the intricate details that bring your cookie to life. You’ll use it to draw the delicate outline of the glasses, the cheerful smile, and the small, precise pupils of the eyes. Its narrow opening allows for excellent control, making it easier to create crisp, defined lines. A steady hand and this tip will make all the difference in crafting a truly smart-looking cookie.
- Piping Bags: Having a few disposable piping bags on hand will make your decorating process much smoother and more hygienic. They allow you to easily switch between different frosting colors and piping tips without having to wash and refill a single bag multiple times. For beginners, using dedicated piping bags provides better control and less mess than a simple Ziploc bag, though a sturdy resealable bag with a corner snipped off can be an acceptable alternative in a pinch.
- Optional: Mini Chocolate Chips or Black Gel Icing: For the pupils of the eyes, mini chocolate chips offer a quick and effective solution, adding a little texture and a slightly less “perfect” homemade feel. Alternatively, black gel icing or a small amount of black frosting in a piping bag with a tiny round tip will give a more precise, smooth, and vibrant pupil.
- Optional: Sprinkles & Food Coloring: If you’re using plain white frosting, various food colorings can allow you to customize your border and details to match any color scheme. Sprinkles are always a fun and festive addition for extra sparkle and visual interest!
How to Make Your Adorable “One Smart Cookie” Cake: Step-by-Step Guide
Creating this delightful “Smart Cookie” cake is an enjoyable process, and we’ll walk you through each step to ensure your back-to-school treat turns out perfectly. Pay attention to the details, and don’t be afraid to add your personal touch to make it truly unique!
1. Preheat the Oven and Prepare the Cookie Base
Before you begin any baking, ensure your oven is properly preheated. Set it to 350°F (175°C), or precisely follow the specific temperature instructions provided on your chosen brand of store-bought cookie dough packaging, as recommendations can sometimes vary slightly for optimal results. While the oven heats up, lightly grease your 12-inch pizza pan. A non-stick cooking spray works wonders for this, or you can use a small amount of softened butter or shortening, spreading it evenly across the entire surface to prevent any sticking and ensure your cookie cake slides out easily once baked. Now, take your store-bought cookie dough and press it firmly and evenly into the prepared pan. It’s crucial to spread the dough to a uniform thickness across the entire pan to ensure it bakes evenly and cooks through without burning the edges or leaving the center raw. A spatula, the back of a spoon, or even your clean hands can help achieve this smooth, consistent layer.
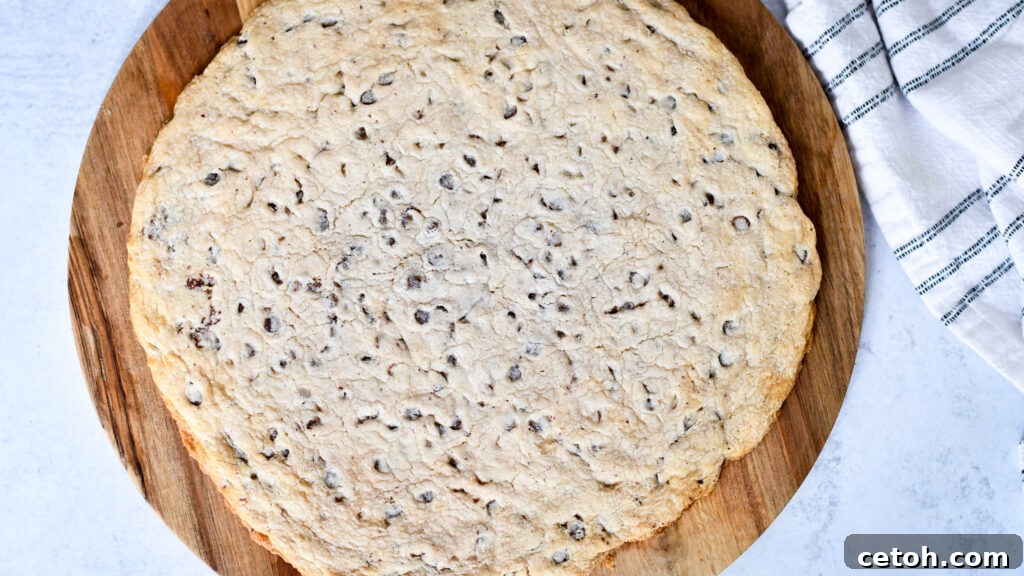
Lightly grease a 12-inch pizza pan and press the store-bought cookie dough evenly into the pan.
2. Bake the Cookie Cake to Golden Perfection
Once your dough is meticulously spread in the pan, carefully place it into the preheated oven. Bake for approximately 12-15 minutes. The exact baking time may vary slightly depending on your specific oven calibration and the particular cookie dough used, so it’s important to keep a close eye on it, especially towards the end. You’re looking for the edges to turn a beautiful, light golden brown, and the center to appear set and slightly puffed, indicating it’s cooked through. Avoid the temptation to over-bake, as this can lead to a dry, crumbly cookie rather than the desired soft and chewy texture that makes cookie cakes so delightful. Once baked, carefully remove the cookie cake from the oven and, most importantly, allow it to cool completely in the pan before attempting any decoration. Cooling is absolutely essential because a warm cookie will cause your frosting to melt, smudge, and lose its shape, ruining your carefully planned design. Patience here ensures picture-perfect results!
3. Prepare Your Frosting and Piping Bags
While your cookie cake is cooling down to room temperature, it’s the perfect time to prepare your frosting for decorating. If you’re using Pillsbury Funfetti or other pre-colored frostings, simply open them and give them a quick stir to ensure a smooth consistency. If you’re opting for plain white frosting and want to add custom colors, separate it into different bowls and mix in your desired food colorings. For instance, you’ll likely want white for the eyes, black or dark brown for the glasses and pupils, and a vibrant color for the border. Once colored, prepare your piping bags. Fit one piping bag with the medium star piping tip, another with the large round piping tip, and a third with the small round piping tip. Fill each bag with its respective frosting color, pushing the frosting down towards the tip and twisting the top of the bag to secure it. This detailed preparation ensures a smooth, efficient, and mess-free decorating process.
4. Pipe a Festive Border Around the Edge
With your cookie cake fully cooled and your frosting bags ready for action, you can begin the fun part: decorating! Start by adding a decorative border. Take the piping bag fitted with the medium star piping tip and filled with your chosen border color frosting (Pillsbury Funfetti is excellent for a vibrant edge!). Gently and steadily squeeze the piping bag, moving it along the outer edge of the cookie cake to create a continuous decorative border. You can create small, individual stars, scallops, or a simple wavy line—whatever style you prefer to elegantly frame your “Smart Cookie.” This border not only adds significant visual appeal but also helps define the canvas for the facial features, giving your cookie a polished look.
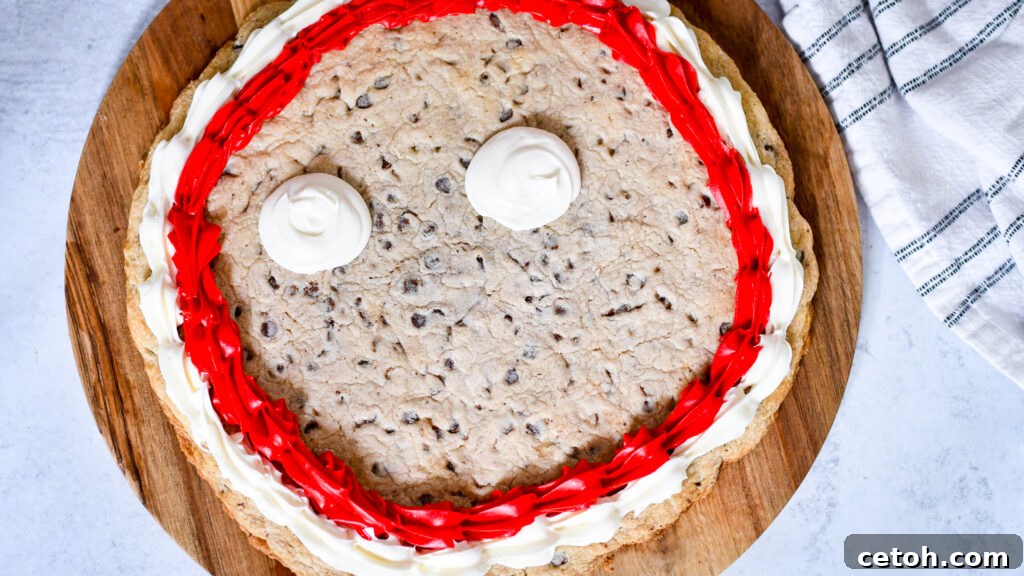
Pipe a decorative border around the edge of the cooled cookie cake.
5. Create the Expressive Eyes for Your Smart Cookie
Next, it’s time to give your cookie its intelligent and charming gaze! Take the piping bag fitted with the large round piping tip and filled with white frosting. Carefully pipe two large, distinct white circles near the top center of the cookie cake to form the eyes. Aim for them to be relatively symmetrical and evenly spaced, leaving a small gap in the middle for the bridge of the glasses. Once the white circles are smoothly in place, grab your small round piping tip filled with black frosting (or your chosen mini chocolate chips). Add a small dot in the center of each white circle to create the pupils. You can position the pupils to make your cookie look curious, thoughtful, or cheerfully looking straight ahead, adding character to your design.
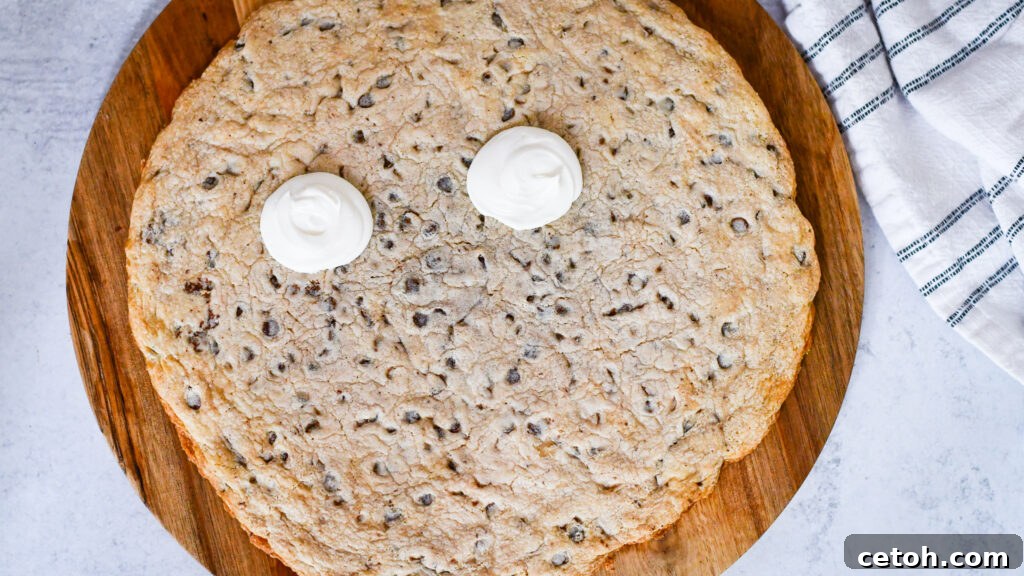
Use a large round piping tip to pipe two large white circles for the eyes near the top center of the cookie.
6. Craft the Signature Glasses and Cheerful Smile
Now for the defining feature of your “Smart Cookie”—the glasses! Using the small round piping tip filled with black or dark brown frosting, carefully pipe the outline of glasses around the eyes. Start by drawing a smooth circle around one white eye, then another around the second eye. Connect these two circles with a small horizontal line in the middle to form the bridge of the glasses, creating a cohesive look. For added realism and detail, you can also pipe small ‘arms’ extending from the outer sides of the glasses, curving slightly outwards. Once the glasses are neatly in place, use the same small round piping tip and frosting to draw a cheerful smile beneath the eyes. A simple, upward-curving line is perfect for conveying a happy, smart, and welcoming expression. Take your time with these fine details, as they truly bring the character of your “Smart Cookie” to life.
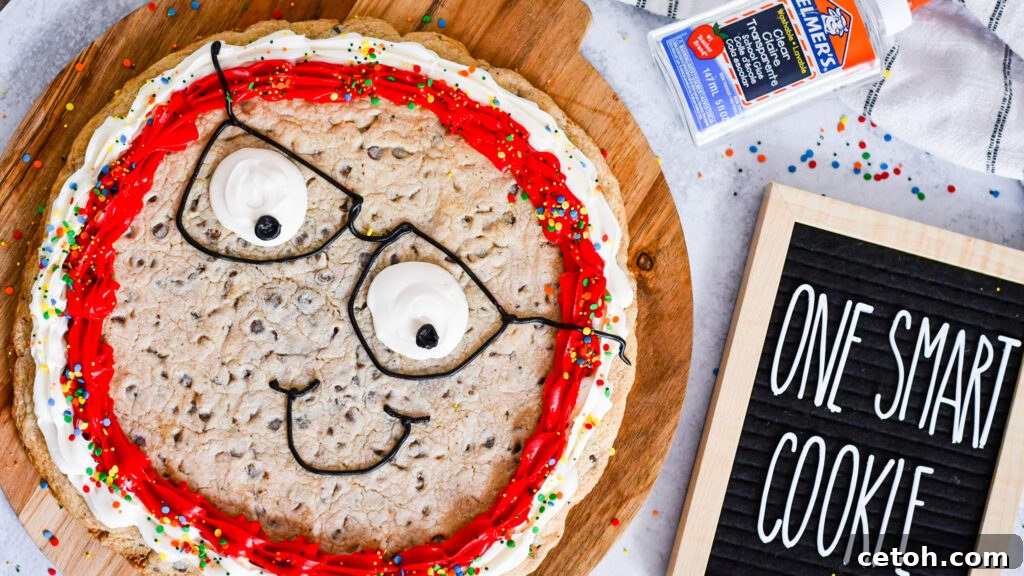
Pipe the outline of glasses around the eyes and add a smile beneath them.
7. Add Finishing Touches and Serve Your Masterpiece
With the main features beautifully complete, this is your chance to add any desired finishing touches to personalize your “Smart Cookie” cake even further! Perhaps a little dab of pink frosting for rosy cheeks using a tiny round tip, or a scattering of colorful sprinkles strategically placed over the border to enhance its festive appeal. You could also carefully write a personalized back-to-school message like “Good Luck!” or “You Got This!” using a very fine writing tip, directly onto the cookie or around its edge. Once you’re fully satisfied with your artistic creation, gently slide a large, flat spatula or a wide cake lifter underneath the cookie cake to transfer it from the pizza pan to a serving platter or cutting board. Slice your adorable “Smart Cookie” into neat wedges, and it’s ready to be shared and enjoyed by your delighted family and friends. Watch their faces light up as they discover this clever, delicious, and undeniably charming back-to-school surprise!
Storage Tips & Make-Ahead Advice for Your Cookie Cake
Making a delicious treat like the “Smart Cookie” cake is wonderful, but knowing how to store it properly ensures it stays fresh and tasty for as long as possible. Plus, a few make-ahead tips can save you valuable time when the school week gets hectic, making this recipe even more convenient for busy families!
- Storing Leftovers: If you happen to have any slices left (which is a big “if” for this popular treat!), it’s important to store them correctly to maintain freshness. Place any remaining cookie cake slices in an airtight container. The cookie cake will stay wonderfully fresh at room temperature for up to 2-3 days, retaining its soft, chewy texture. For slightly longer storage, you can refrigerate it for up to 5 days, though the frosting might firm up a bit in the colder environment. For the best flavor and texture, allow refrigerated slices to come back to room temperature before serving.
- Can I Freeze the Baked Cookie? Absolutely! If you want to get a head start on your back-to-school baking, you can bake the cookie base a few days or even weeks in advance. Once the cookie is completely cooled after baking, wrap the plain cookie base tightly in plastic wrap, then add an additional protective layer of aluminum foil, and store it in an airtight freezer-safe bag or container. It can be successfully frozen for up to 1-2 months without compromising quality. When you’re ready to decorate, simply remove the cookie from the freezer and allow it to thaw completely at room temperature (this usually takes a few hours) before adding any frosting or decorations.
- Preparing Frosting Ahead: You can also prepare your colored frostings a day or two in advance. Store them in separate airtight containers or keep them in their prepared piping bags (ensuring the tips are sealed or covered with plastic wrap to prevent drying) in the refrigerator. Before decorating, remove the frosting from the fridge and allow it to come to room temperature. You might need to knead the piping bags gently or stir the container frosting to ensure it is soft and pliable for easy, smooth piping.
Frequently Asked Questions About Your Smart Cookie Cake
Here are some common questions and helpful answers to ensure your “Smart Cookie” baking and decorating experience is a complete success and addresses any concerns you might have:
Can I use homemade cookie dough instead of store-bought?
Of course! Using your favorite tried-and-true homemade cookie dough recipe is a fantastic option if you prefer. Just be sure that your chosen recipe yields a dough that is firm enough to be pressed evenly into a pan without spreading excessively during baking. Depending on the recipe, you might need to adjust baking times slightly compared to store-bought dough, so always watch for those golden-brown edges and a set center rather than strictly adhering to the original bake time.
Can I freeze the cookie cake after it’s decorated?
While you can successfully freeze the plain baked cookie base, freezing a fully decorated cookie cake is a bit trickier. The frosting, especially if it’s dairy-based, can sometimes change texture or consistency after thawing, becoming watery or grainy, and delicate piped decorations might get smudged or compressed. If you absolutely must freeze it decorated, flash-freeze it uncovered first until the frosting is completely firm (about an hour), then wrap it carefully in plastic wrap and then aluminum foil. Thaw slowly in the refrigerator, then bring to room temperature before serving.
What can I use if I don’t have piping tips?
No dedicated piping tips? No problem for basic decorating, especially for this design! You can easily improvise using a sturdy resealable plastic bag (like a Ziploc bag). Fill the bag with frosting, push the frosting into one corner, and snip a tiny corner off that end with sharp scissors to create a makeshift piping bag. Use a very small snip for fine lines (like glasses and smiles) and a slightly larger snip for broader elements (like eyes). While it won’t create the precise star shapes of specific tips, it’s perfectly functional for bringing your “Smart Cookie” to life with charming, hand-drawn details.
Can I make this cookie cake gluten-free or dairy-free?
Yes, adapting this recipe for various dietary needs is quite straightforward! Simply substitute the store-bought cookie dough with a gluten-free or dairy-free version. Many popular brands now offer excellent and readily available alternatives for both. Additionally, it’s crucial to ensure that your chosen frosting is also certified gluten-free or dairy-free, so always check the ingredient labels carefully to avoid any hidden allergens.
How can I make the cookie cake more unique or personalized for my child?
Get wonderfully creative with personalization! You can easily make your Smart Cookie cake truly unique to your child. Use their favorite colors for the decorative border or add their initial prominently in frosting on the cookie’s forehead. Consider incorporating edible glitter for extra sparkle and magic, or use different candy pieces (like M&Ms or small round candies) for the pupils instead of chocolate chips for a pop of color. You could even draw a small apple, a stack of books, or a tiny backpack alongside the cookie’s head for a truly academic and personalized theme. Have fun with it!
My frosting is too stiff/too runny – what should I do?
Frosting consistency is absolutely key for easy and successful piping. If your frosting is too stiff to pipe smoothly, microwave it in very short 5-10 second bursts, stirring well after each interval, until it reaches a perfectly spreadable and pipeable consistency. Be careful not to overheat it! If, conversely, your frosting is too runny and won’t hold its shape, you can try adding a small amount of powdered sugar, one tablespoon at a time, mixing thoroughly after each addition until it thickens to the desired consistency. Alternatively, refrigerate it for 10-15 minutes to firm it up slightly.
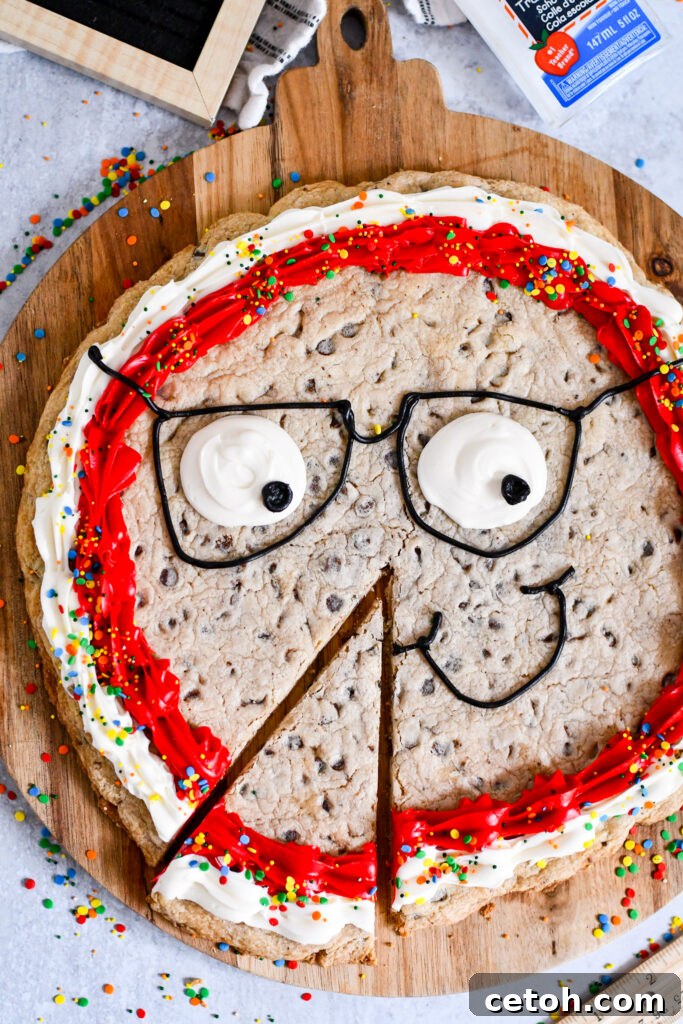
Looking for a cute and easy treat for the first day of school? Try this ‘Smart Cookie’ recipe made with store-bought dough!
We hope this expanded guide helps you create a truly memorable and delicious “Smart Cookie” cake for the back-to-school season. It’s a sweet, fun, and effortless way to celebrate new beginnings and fuel young minds for another year of learning and growth. Happy baking!