
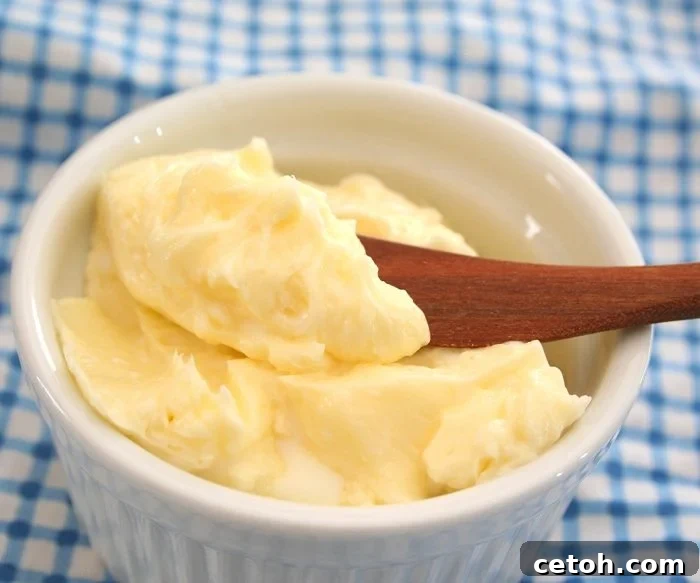
Discover the Delight of Homemade Butter: A Simple Guide to Crafting Creamy Goodness
 A little while ago, as I celebrated my remarkably healthy lipid profile, I promised you a recipe for a truly special treat: homemade butter. For as long as I can remember, butter has held a cherished spot in my heart and on my plate. It’s a love I inherited honestly, as my mother, perpetually slender and vibrant, possesses an almost boundless affection for this creamy, golden delight. We used to playfully tease her about the generous slabs of butter she’d spread on her crackers and bread. Back then, despite my own enjoyment, a part of me felt a slight twinge of apprehension. Like many, I had wholeheartedly embraced the prevailing nutritional advice, which largely demonized saturated fats. Oh, how times have changed! Today, I find myself not only eating my words but relishing every delicious morsel, especially when those words are richly coated in generous servings of homemade butter.
As someone who has embraced a low-carb lifestyle and adopted a completely fresh perspective on nutrition, I now feel liberated to enjoy butter with joyful abandon. However, I remain conscious about the quality of what I consume. Many conventional store-bought butters contain various chemicals and hormones, which can accumulate in animals’ fatty tissues. This concern drives my preference for organic options, and whenever possible, I seek out grass-fed butter – a product whose taste is nothing short of heavenly. Yet, there’s an even more satisfying path to enjoying this dairy staple: making it yourself.
The Journey to Freshness: My Inspiration to Make Butter at Home
The seed for making my own butter was planted after I won a cookbook titled The Whole Family Cookbook from another blog. This wonderful book champions whole foods for children and features many engaging ideas to get kids involved in the kitchen. Although the cookbook initially found its way into a growing pile of reading material by my bedside, the concept of making butter resonated deeply with me. It was an idea that refused to be forgotten. So, when I finally stumbled upon a local creamery selling un-homogenized whole cream – still pasteurized, but crucially, free of the fillers that prevent natural separation – I bought a half-gallon with the sole intention of embarking on my own butter-making adventure.
You might imagine that making butter requires an old-fashioned churn, the kind you see in historical villages with a wooden barrel and a plunger. While those are certainly authentic, there are much simpler, modern methods. A stand mixer or food processor can whip cream into butter with ease. However, I decided to embrace the playful spirit of the children’s cookbook and try their suggested method: simply pouring some cream into a jar, sealing it tightly, and shaking it vigorously for about 20 minutes. This hands-on approach proved to be an excellent workout for my arms! I attempted to involve my own children, but they were a bit too young to sustain the continuous shaking motion required for very long. Nonetheless, the simplicity and effectiveness of the jar method were undeniable.
Mastering the Craft: Tips for Perfect Homemade Butter
Since that initial attempt, I’ve made my own butter numerous times, and each batch has been nothing short of heavenly. The unparalleled taste and texture of freshly churned butter truly have no equal. Through my various experiments, I’ve gathered several essential tips that will help you achieve perfect results every time. These insights will guide you from liquid cream to a beautiful, golden lump of homemade goodness, ensuring your butter-making experience is both successful and incredibly rewarding.
- **Don’t Overfill Your Jar:** This is crucial. The cream needs ample space to whip, expand, and incorporate air effectively. If you fill the jar to the brim, the cream won’t have the necessary room to transform, making the process much slower and less efficient. Aim to fill the jar no more than halfway for optimal results.
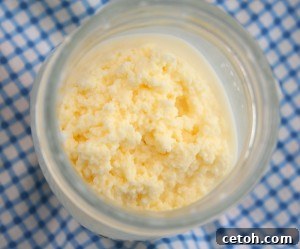
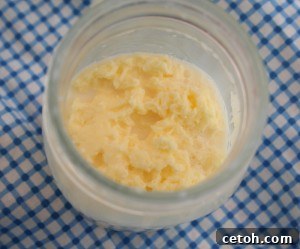
- **Recognizing the Whipped Cream Stage:** As you shake, you’ll reach a point where the liquid cream suddenly stops sloshing around. This is your cue that it has transformed into thick, luscious whipped cream. While delicious in its own right, don’t stop here if your goal is butter! Keep shaking to continue the process.
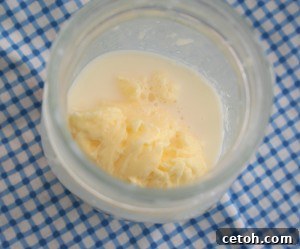
- **Identifying Butter Formation:** The next exciting phase is when the butter begins to separate. You’ll notice the liquid returning, sloshing around in the jar once more. This liquid is buttermilk. Keep shaking for a little while longer to ensure the butter fully consolidates and to extract as much buttermilk as possible. When you see one smooth, solid lump of butter at the bottom of the jar, your work is done.
- **Salting Your Butter:** If you, like me, prefer salted butter, a small pinch of salt is usually sufficient to enhance its flavor beautifully. A word of caution: if you add salt to your butter, do not attempt to drink the leftover buttermilk. It becomes incredibly salty and tastes quite unpleasant!
- **Flavoring Your Fresh Butter:** Homemade butter is wonderfully soft immediately after churning, making it the perfect canvas for adding fresh ingredients. Consider stirring in some finely chopped herbs like chives, parsley, dill, or even cilantro for a savory twist. For a sweet butter, a dash of honey and cinnamon can be delightful. It’s incredibly easy to incorporate any flavors you desire before the butter hardens in the refrigerator.
- **Cream Quantity and Time:** Remember that the more cream you pour into your jar, the longer it will take to transform into butter. Patience is key, but the reward of fresh, homemade butter is always worth the effort.
Beyond the Basics: Enhancing Your Homemade Butter Experience
Making your own butter isn’t just about the end product; it’s about the entire experience—the satisfaction of creating something delicious from scratch, the control over ingredients, and the unparalleled taste of freshness. This simple process opens up a world of culinary possibilities, allowing you to customize your butter to suit any dish or occasion.
Choosing Your Cream Wisely
The quality of your cream directly impacts the quality of your butter. Opt for heavy cream or whipping cream, ideally with a high fat content (35-40%). As mentioned, I prefer non-homogenized cream when available, as it separates more easily and results in a richer butter. Organic and grass-fed options often yield butter with a superior flavor profile, thanks to the cows’ natural diet. Avoid ultra-pasteurized cream, as it can sometimes be more challenging to churn into butter due to the higher heat processing.
Temperature Matters
The ideal temperature for your cream is cool, but not ice-cold. Room temperature cream will churn too quickly, sometimes resulting in a grainy texture. Cream that is too cold will take a very long time to churn. Aim for a temperature around 50-60°F (10-15°C). If your cream is straight from the fridge, let it sit out for 10-15 minutes before you start shaking.
Working the Butter: Rinsing for Purity and Shelf Life
Once your butter has formed and the buttermilk has separated, there’s an important step for ensuring its quality and longevity: rinsing. Residual buttermilk can cause your butter to spoil more quickly and develop off-flavors. To rinse, place the butter in a bowl of very cold water and use a spoon or spatula to press and knead it, squeezing out any remaining milky liquid. Replace the water several times until it runs clear. This step, while requiring a bit more effort, significantly improves the flavor and extends the shelf life of your homemade butter.
Shaping and Storing Your Fresh Butter
After rinsing, your butter is ready for shaping. You can press it into a mold, roll it into a log wrapped in parchment paper, or simply store it in an airtight container. Homemade butter, especially if thoroughly rinsed, can last for several weeks in the refrigerator. For longer storage, it freezes beautifully for several months. Just be sure to wrap it tightly to prevent freezer burn.
Homemade Butter: A Simple Jar Recipe
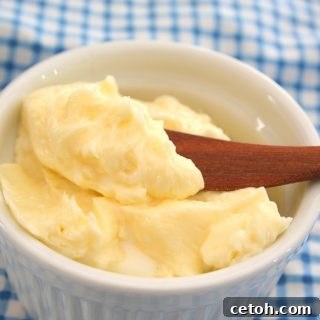
All you need is a large mason jar for creamy, delicious homemade butter!
Servings: 8 servings
Prep Time: 30 mins
Total Time: 30 mins
Pin Recipe
Share on Facebook
Rate this Recipe
Ingredients
- 1/2 to 1 cup whole cream, preferably non-homogenized (if not available, ensure it has no fillers like carrageenan)
- Pinch of salt, if desired
- 1 tbsp fresh chopped herbs to add at the end, if desired (e.g., chives, parsley, cilantro)
Instructions
- Pour the cream into a clean jar with a tight-fitting lid. For 1/2 cup of cream, a half-pint jar works well. For larger quantities of cream, use a larger jar, ensuring it’s no more than half full.
- Add salt, if you are using it, to the cream in the jar.
- Securely seal the jar with its lid. Begin shaking it vigorously. Continue shaking until the cream no longer sloshes around, indicating it has become whipped cream.
- Do not stop! Keep shaking the jar until you hear the liquid sloshing again. This means the buttermilk has separated from the solid butter.
- Shake a bit more, ensuring the butter coalesces into one smooth, solid lump at the bottom of the jar.
- Carefully pour off the separated buttermilk. You can save this buttermilk for baking or other recipes, keeping in mind that if you salted the butter, the buttermilk will be quite salty.
- If desired, add any fresh chopped herbs or other flavorings to the freshly churned butter and stir them in evenly. The butter is very soft at this stage, making it easy to incorporate additions.
- Store your homemade butter in an airtight container in the refrigerator. It will harden as it cools.
The pure, unadulterated flavor of homemade butter is a revelation. It’s far superior to most store-bought varieties, offering a richness and freshness that elevates any dish. From spreading it on warm toast to using it in your favorite recipes, the difference is truly palpable. Moreover, making butter at home gives you complete control over the ingredients, ensuring you avoid unwanted additives and can choose the highest quality cream available. This return to basic food preparation connects us more deeply with what we consume and offers a satisfying sense of self-sufficiency in the kitchen.
I’d love to know your thoughts on homemade butter. Have you tried making it yourself? Leave your rating and comments below!